Showing posts with label Fruit. Show all posts

12.11.2010

Christmas Cookies

Every year, as many families, we like to make Christmas cookies. My sister and I were quite young when we first started making them on our own and it's been our special tradition ever since. I remember how we used to rub flour onto our cheeks to make it look like we had been working so hard in the kitchen. Now my sister has a little girl who helps to make them and a little boy who helps to eat them!

I can't even tell you where this recipe came from. My mom had it written on a tattered piece of paper and I copied it down from her. She may have gotten it from my grandmother who may have gotten it from her grandmother (or from the back of the Crisco container...I guess we'll never know!)

We only make these once a year because, for some reason, cut out cookies seem like a huge deal to us. It takes us hours and hours to make them, which probably has more to do with us talking and eating raw cookie dough than actually making the cookies. Nonetheless, it's a happy tradition that we look forward to all year!

Christmas Cutout Cookies


  1. First, blend together 6 cups of sifted flour, 1 tbsp of salt, and 2 1/3 cups of Crisco (shortening) using a pastry blender or two butter knives (use the butter knives to slice through the ingredients and mix them together).
  2. Then, take 2 cups of the mixture you made above and add 3/4 cups of sugar, 1 tsp of baking powder, and 1/4 cup of flour. Next, blend in 1 egg and 1 tsp of vanilla.
  3. Roll out the dough (don't chill it, use immediately) and use cookies cutters to cut out different shapes. Re-roll the dough that's left after you cut out the shapes and try to make as many more shapes as you can (We always feel this tremendous sense of accomplishment when we re-roll it enough times to have only a little teeny bit of dough left over).
  4. If you are using sprinkles, put them on the cookies now (before they bake). Bake at 375 degrees for somewhere between 10 and 15 minutes. We never remember how long they take to bake and just try to keep an eye on them (which usually means that the first batch gets a little "brown"). After they cool, decorate with icing or whatever else is edible.
  5. Continue using the first mixture you made to make batches of dough (by adding the sugar, baking powder, flour, egg, and vanilla).
There are a few cookies recipes we make every year that are close to our hearts. Peanut Blossoms are a classic cookie recipe that we got from our Aunt Wendy. I always make Spritz cookies for me and my Mom because we love them with coffee! I can't remember where I got the recipe for Spritz cookies, but there are about a million versions online. You need to have a cookie press to make Spritz cookies and they can be purchased very inexpensively at places like Bed, Bath and Beyond or Amazon.


Peanut Blossoms
  • 3 1/2 cups flour
  • 2 tsp baking soda
  • 1 tsp salt
  • 1 cup sugar
  • 1 cup brown sugar
  • 1 cup shortening
  • 2 eggs
  • 4 tbsp milk
  • 2 tbsp vanilla
  • 1 cup peanut butter
  • 14 oz. bag of Hershey kisses
  • Extra sugar for rolling
  1. Preheat the oven to 375 degrees.
  2. Combine all the ingredients except the Hershey kisses and extra sugar in a large bowl.
  3. Mix on the lowest speed until dough forms.
  4. Shape the dough into little balls and then roll into extra sugar.
  5. Put on an ungreased cookie sheet (I like to bake mine on parchment paper). Bake until golden brown, about 10-12 minutes.
  6. While they are baking, unwrap the kisses. When you remove the cookies from the oven, immediately press one kiss into each cookie. Let them cool completely and be careful when putting them into a container because the kisses will remain soft for quite a while.
  7. This recipe makes about 8 dozen cookies, but I typically double it at Christmas so that I can give many away.

Classic Spritz Cookies


  • 1 1/2 cup butter
  • 1 cup sugar
  • 1 egg
  • 2 tbsp milk
  • 1 tsp vanilla
  • 1/2 tsp almond extract
  • 3 1/2 cup flour
  • 1 tsp baking powder
  1. Preheat the oven to 375 degrees.
  2. Cream together the butter and sugar (I put it in my mixer for several minutes until it's light and fluffy)
  3. Add the egg, milk, vanilla, and almond extract. Beat together well.
  4. Stir together the flour and baking powder and then gradually add to the creamed mixture.
  5. Mix until it's a smooth dough. Don't chill it.
  6. Put the dough into the press and press cookies directly onto the baking sheet. Decorate with sprinkles if desired and then bake for 10-12 minutes.
  7. Remove the cookies, cool completely on a baking rack. This recipe makes about 7-8 dozen cookies.
There are lots of other cookie recipes that I've tried and loved, but I'll leave you with one more. In many ways, this is my favorite one because they are so easy and very delicious. I make these all year around and everyone always enjoys them!

Crispy Thumbprint Cookies


  • 1 package of yellow cake mix
  • 1/2 c vegetable oil
  • 1 egg
  • 1/4 c water
  • 3 c crisp rice cereal crushed (Rice Krispies)
  • Raspberry or strawberry preserves or Andes mint candies cut in half
  1. Preheat oven to 375
  2. Combine cake mix, oil, egg and water. Beat at medium speed of electric mixer until well blended. Add cereal; mix until well blended.
  3. Drop by heaping teaspoonfuls about 2 inches apart onto ungreased baking sheet. Use thumb to make indentation in each cookie. Spoon about 1/2 teaspoon of preserves into center of cookie. (Or place 1/2 of mint candy in center of each cookie).
  4. Bake 9 to 11 minutes or until golden brown. Cool cookies 1 minute on baking sheet; remove from baking sheet to wire wrack to cool completely. Makes 3 dozen cookies.

10.27.2010

Canning Series - Fruit


We gathered once again at the Kitchen Workshop for our canning series. If you don't know how to can or forget the specifics, go to this post for a step-by-step guide.
This time, our focus was fruit. This differs from the fruit spread course because these recipes serve better as dessert toppers, not as jams or jellies. We made some seriously decadent stuff! I'll just dive right in.

Blackberries in Framboise
~Absolutely delicious~


Makes about 4 (8 oz) half pints

You will need:
  • 6 cups blackberries, divided
  • Water
  • 2 cups sugar
  • 1 cinnamon stick (about 4 inches), broken into pieces
  • 1 tbsp grated lemon zest 1/2 tsp fresh grated nutmeg1/2 cup framboise or other raspberry liqueur4 (8 oz) half pint glass preserving jars with lids and bands
Directions:

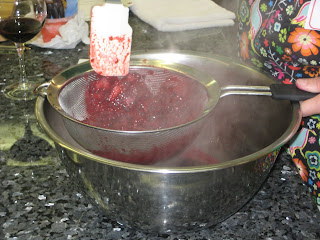
1. Place 2 cups of blackberries in a stainless steel saucepan. Using a potato masher, crush slightly. Add 3 tbsp water. Cover and boil gently over medium-low heat until fruit is soft, about 2 minutes. Strain though a dampened jelly bag or a strainer lined with several layers of dampened cheesecloth set over a glass measure to collect 1/2 cup blackberry juice.

2. Prepare boiling water canner. Heat jars and lids in simmering water until ready for use. Do not boil. Set bands aside.

3. Combine sugar, cinnamon stick pieces, lemon zest, nutmeg and 2 cups water in a large stainless steel saucepan. Bring to a boil over medium-high heat, stirring occasionally. Reduce heat and boil gently for 5 minutes. Strain and return syrup to saucepan. Add blackberry juice, remaining blackberries and framboise. Bring to a boil over medium-high heat, stirring constantly but gently so as not to crush blackberries.

4. Pack hot blackberries into hot jars, leaving 1/2 inch headspace, using a slotted spoon. Ladle hot syrup into jar to cover blackberries lea ving 1/2 inch headspace. Remove air bubbles and re-measure headspace. If needed, add more syrup to meet recommended headspace. Wipe rim. Center lid on jar. Apply band and adjust until fit is fingertip tight.

5. Process filled jars in a boiling water canner for 10 minutes, adjusting for altitude. Remove jars and cool. Check lids for seal after 24 hours. Lid should not flex up and down when center is pressed.


Raspberry Chocolate Sundae Topper

~This look just like raspberry sauce but is surprisingly chocolately~

Makes about 6 (8 oz) half pints

You will need:
  • 1/2 cup sifted unsweetened cocoa powder
  • 1 1.75-oz pkg Ball® Original Fruit Pectin
  • 4-1/2 cups crushed red raspberries
  • 6-3/4 cups granulated sugar
  • 4 Tbsp. lemon juice
  • 6 (8 oz) half pint glass preserving jars with lids and bands
Directions:

1. Prepare boiling water canner. Heat jars and lids in simmering water until ready for use. Do not boil. Set bands aside.

2. Combine cocoa powder and pectin in a medium glass bowl, stirring until evenly blended. Set aside.

(Didn't the raspberries look lovely before we crushed them?)

3. Combine crushed raspberries and lemon juice in a large stainless steel saucepan . Whisk in pectin mixture until dissolved. Bring to a boil over high heat, stirring frequently. Add sugar all at once and return to a full rolling boil, stirring const antly. Boil hard for 1 minute, stirring constantly. Remove from heat and skim off foam.


4. Ladle hot sundae topper into hot jars leaving 1/4 inch headspace. Remove air bubbles. Wipe rim. Center lid on jar. Apply band until fit is fingertip tight.

5. Process jars in a boiling water canner for 10 minutes, adjusting for altitude. Remove jars and cool. Check lids for seal after 24 hours. Lid should not flex up and down when center is pressed.


Peach Rum Sauce
~Another wonderful dessert item to have on hand~

Makes about 7 (8 oz) half pints

You will need:
  • 6 cups chopped pitted peeled peaches, treated to prevent browning and drained
  • 2 cups lightly packed brown sugar
  • 2 cups granulated sugar
  • 3/4 cup rum
  • 1 tsp grated lemon zest
  • 7 (8 oz) half pint glass preserving jars with lids and bands

Directions:
1. Prepare boiling water canner. Heat jars and lids in simmering water until ready for use. Do not boil. Set bands aside.

2. Combine peaches, brown sugar, granulated sugar, rum and lemon zest in a large stainless steel saucepan. Bring to a boil over high heat, stirring constantly, until sugar dissolves. Reduce heat and boil gently, stirring occasionally, until thickened, about 20 minutes.

3. Ladle hot sauce into hot jars leaving 1/4 inch headspace. Remove air bubbles and re-measure headspace. If needed, add more sauce to meet recommended headspace. Wipe rim. Center lid on jar. Apply band and adjust until fit is fingertip tight.

4. Process filled jars in a boiling water canner for 10 minutes, adjusting for altitude. Remove jars and cool. Check lids for seal after 24 hours. Lid should not flex up and down when center is pressed.


I'm not sure if we'll have any more canning classes this season, but if we do I'll be sure to let you know what we whipped up!


9.16.2010

Canning Series: Fruit Spreads

So we had our first canning class and although I had to arrive late (due to unforeseen circumstances) I had a great time! Heck, I got to take home jars of deliciousness without having to do hardly any work.

The first thing that we (I love that I'm saying "we" when I literally showed up just as we were taste testing and labeling the jars) tackled was Traditional Strawberry Jam.

Traditional Strawberry Jam with Variations
~Makes about 8 (8 oz.) half pints~


  • 5 cups crushed strawberries (about 5 lbs)
  • 1/4 cup lemon juice
  • 1 (1.75 oz.) package Ball Original Fruit Pectin (or any brand, Ball is sponsoring this series so we are using their products)
  • 7 cups granulated sugar
  • 8 (8 oz.) half pint glass preserving jars with lids and bands
  1. Prepare boiling water canner. Heat jars and lids in simmering water until ready for use. Do not boil. Set bands aside.
  2. Combine strawberries and lemon juice in a 6 or 8 quart saucepan. Gradually stir in pectin.
  3. Bring mixture to a full rolling boil that can not be stirred down, over high heat, stirring constantly.
  4. Add entire measure of sugar, stirring to dissolve. Return mixture to a full rolling boil. Boil hard 1 minutes, stirring constantly.
  5. Remove from heat. Skim foam if necessary.
  6. Ladle hot jam into hot jars leaving 1/4 inch headspace. Wipe rim. Center lid on jar. Apply band until fit is fingertip tight.
  7. Process in a boiling water canner for 10 minutes, adjusting for altitude. Remove jars and cool. Check lids for seal after 24 hours. Lid should not flex up and down when center is pressed.
Delicious Variations:

*Vanilla Strawberry Jam (this is the one we made): Add half a vanilla bean, split in half lengthwise, to the crushed strawberries. Cook as directed and remove vanilla bean before ladling jam into jars. The resulting jam will be enhanced with a subtle yet distinct vanilla overtone.

*Strawberry Balsamic Jam: Reduce the lemon juice to 1 tbsp and add 3 tbsp good-quality balsamic vinegar. Balsamic vinegar accents the strawberry flavor and gives the jam a robust taste.
*Lemony Strawberry Jam: Add the grated zest of 1 large lemon to the crushed strawberries.

*Peppered Strawberry Jam: Stir 1/2 tsp freshly ground black pepper into the cooked jam just before ladling it into the jars. Pepper accents and compliments the strawberries' sweet flavor. Be sure to use freshly ground pepper, which delivers a fresher-quality flavor.

Carrot Cake Jam
~Makes about 6 (8oz) half pints~


  • 1 1/2 cups finely grated peeled carrots
  • 1 1/2 cups chopped cored peeled pears
  • 1 3/4 cups chopped pineapple, including juice
  • 3 tbsp lemon juice
  • 1 tsp ground cinnamon
  • 1/2 tsp ground nutmeg
  • 1/2 tsp ground cloves
  • 1 (1.75 oz) package Ball Original Fruit Pectin
  • 6 1/2 cups sugar
  • 6 (8oz.) half pint glass preserving jars with lids and bands
  1. Prepare boiling water canner. Heat jars and lids in simmering water until ready for use. Do not boil. Set bands aside.
  2. Combine carrots, pears, pineapple with juice, lemon juice, cinnamon, nutmeg, and cloves in a 6 or 8 quart saucepan. Bring mixture to a boil over high heat, stirring frequently.
  3. Reduce heat, cover and boil gently for 20 minutes, stirring occasionally.
  4. Remove from heat and whisk in pectin until dissolved. Bring mixture to a full rolling boil that cannot be stirred down, over high heat, stirring frequently.
  5. Add sugar all at once and return to a full rolling boil, stirring constantly. Boil hard for 1 minutes, stirring constantly. Remove from heat and skim foam if necessary.
  6. Ladle hot jam into hot jars leaving 1/4 inch headspace. Wipe rim. Center lid on jar. Apply band and adjust until fit is fingertip tight.
  7. Process in a boiling water canner for 10 minutes, adjusting for altitude. Remove jars and cool. Check lids for seal after 24 hours. Lid should not flex up and down when center is pressed.
Orange Chili Marmalade
~Makes about 8 (8oz) half pints~
  • 2 1/4 lbs oranges (unpeeled), seeded and thinly sliced
  • Grated zest and juice of 1 lemon
  • 6 cups water
  • 3 dried habenero chili peppers (or 6 dried Colorado or New Mexico chili peppers)
  • 9 cups granulated sugar
  • 8 (8oz.) half pint glass preserving jars with lids and bands.
  1. Combine oranges, lemon zest and juice, and water in a large, deep stainless steel saucepan. Bring to a boil over high heat, stirring constantly. Reduce heat and boil gently, stirring occasionally, for 40 minutes.
  2. Add chili peppers, partially cover and boil gently, stirring occasionally, until fruit is very soft, about 30 minutes. Remove and discard chili peppers.
  3. Prepare boiling water canner, heat jars and lids in simmering water until ready for use. Do not boil and then set bands aside.
  4. Bring mixture to a boil over medium-high heat, stirring constantly. Maintaining boil, gradually stir in sugar. Boil hard, stirring occasionally, until mixture reaches gel stage, about 15 minutes.
  5. Remove from heat and test gel. If gel stage has been reached skim off foam.
  6. Ladle hot marmalade into hot jars leaving 1/4 inch headspace. Wipe rim. Center lid on jar. Apply band and adjust until fit is fingertip tight.
  7. Process filled jars in a boiling water canner for 10 minutes, adjusting for altitude. Remove jars and cool. Check lids for seal after 24 hours. Lid should not flex up and down when center is pressed.
* This marmalade is quite spicy, but very delicious. We thought it would be perfect poured over a block of cream cheese and served with crackers or bread.

Come back and visit next week to see what we whipped up in our canning series.

8.09.2010

Last Summer Cookout

Believe it or not, I'll be heading off to work on Tuesday. We have four days of inservice and the kids arrive on Monday! I am sad to see summer go. I had such a nice summer doing whatever I wished to do each day. I got to see friends and go shopping. I painted the inside of our house and read lots of books. I made some spending money doing this and that. We drove down to visit my sister and her family and then last week my sister brought the kids up for a visit. All in all, it was a low key summer and I loved every minute of it.

But now it's over. To celebrate my last Sunday where I don't feel the dread of starting the work week, we had my husband's family over for a cookout. It kind of amazes me that I get the "Sunday Dread" each week because I love my job so much. I truly love being a teacher. I wonder what the "Sunday Dread" would be like if I hated my job!

Anyway. I wanted to make very simple things that could be prepared ahead of time so that I could spend most of the time lounging with everyone. The meal turned out lovely.
I made my delicious Apricot Turkey Burgers. I have the recipe in this post, but I'll re-post it below anyway.

Apricot Turkey Burgers
~These are a fresh take on the typical turkey burger~

  • 3/4 cup drained canned chickpeas (garbanzo beans)
  • 1/2 cup dried apricots, chopped
  • 1/3 cup minced shallots
  • 1/2 tsp salt
  • 1/2 tsp ground ginger
  • 1/2 tsp ground cumin
  • 1/2 tsp ground cinnamon
  • 1/8 tsp ground red pepper
  • 1 1/2 lbs ground turkey
  • cooking spray
  • 6 multi-grain hamburger buns
  • Tzatziki sauce (I got mine from Trader Joe's...although, you can make it yourself)
  1. Prepare the grill or grill pan.
  2. Place chickpeas in a food processor, pulse 3 times or until chopped. Combine chickpeas, apricots, and next 7 ingredients.
  3. Divide mixture into 6 equal portions (I actually had enough to make 7), shaping each into a 1/2 inch thick patty.
  4. Place patties on a grill rack coated with cooking spray. Grill 6 minutes on each side or until a thermometer registers 165 degrees. Remove from grill and let stand for 5 minutes.
  5. Serve burgers on hamburger buns topped with Tzatziki sauce and tomatoes (if desired).
In the picture, I served the burgers with over fries. But yesterday I served them with this awesome new pasta salad I made for the first time. I saw it in the September issue of Food Network Magazine. Strangely, the recipe comes from the Biden family (ya know, the Vice President).

I don't know why I find that strange...I just picture someone asking me:

"Ali, this pasta salad is delicious. Who's recipe did you use?"

"Oh, thank you! It's actually an old family recipe from Joe Biden."

Maybe I'm just strange.

Soooo, why don't I just give you the recipe now.

The Bidens' Pasta Caprese


  • 1/3 cup extra virgin olive oil
  • 1/4 cup fresh lemon juice
  • 1 shallow, minced
  • 1 small garlic clove, minced
  • Kosher salt and freshly ground black pepper
  • 1 tsp sugar (it says optional, but I threw it in there)
  • 2 lbs mixed heirloom tomatoes, cored, seeded and cut into 1/2 inch pieces (getting real heirloom tomatoes is a must for this recipe)
  • 1 lb pasta (I almost always use whole wheat pasta, but I used regular campanelle for this)
  • 12 oz. fresh mozzarella cheese, cut into 1/2 inch pieces
  • 1/2 cup chopped fresh basil
  • 1/2 tsp grated lemon zest (I used at least twice that because I love me some lemon zest)
  1. Whisk the olive oil, lemon juice, shallow and garlic in a large bowl. Season with salt and pepper. Add sugar, if desired (depending on the sweetness of your tomatoes).
  2. Add the tomatoes to the bowl and gently toss. Marinate at room temperature , about 15 minutes.
  3. Meanwhile, bring a large pot of salted water to boil. Add the pasta and cook as the label directs. Drain in a colander and run under cold water to stop the cooking.
  4. Add the pasta and mozzarella to the tomato mixture and toss. Stir in the basil and lemon zest, and season with salt and pepper. Refrigerate, tossing occasionally, until serving.
Because pasta salad is even better when it sits and the flavors mingle, I made it right after Church and stuck it in the fridge. The burgers took minutes to put together and I just had to throw them on the grill when everyone arrived. I was going to make my Tzatziki sauce and then I realized that it was cheaper to buy it at the Olive Bar in Wegman's than to get the ingredients. Score!

My mother in law brought hummus and pita chips, my sister in law brought drinks, and my other sister in law brought delicious brownies for dessert. It was a truly relaxing and enjoyable way to spend my last few hours of summer vacation!

6.25.2010

Happy Food

I absolutely love good, fresh, and healthy food. It makes me happy...so it's happy food!

Today I had two encounters with happy food. The first was my delicious breakfast. I had a toasted English muffin spread with part-skim ricotta cheese. Then I drizzled some Stone Fruit Compote on top and cut up a big bunch of organic strawberries.


Yum.

I may or may not have had a bowl of vanilla ice cream this afternoon and drizzled some of the compote on top of that, too.

My second happy food of the day was Fresh Corn Salad. I plan to bring it to a picnic with friends tonight and serving it with tortilla chips. I got this recipe from my good friend and posted it last year. I'll re-post it below because it's so darn delicious.

Fresh Corn Salad
~I was pretty much obsessed with this after my first bite~

*Fresh Corn is important - do not substitute frozen or canned.*
Dressing:
  • 6 tbsp olive oil
  • 2 tbsp fresh lime juice
  • 1 tbsp red wine vinegar
  • 1 Jalapeno chili, stemmed, seeded, and minced (you can leave this out, if you don't like spice)
  • 1 garlic clove, minced
  • 1/2 tsp cumin
  • 1/2 tsp salt
  • 1/4 tsp pepper
Salad:
  • 8 ears fresh corn, husks & silk removed (I used 6)
  • 1 pint cherry tomatoes, halved, or whatever tomatoes you have on hand (I used a couple large tomatoes that I chopped)
  • 1 (15.5 oz) can black beans, rinsed
  • 6 scallions (green onions), sliced thinly
  • 2 tbsp minced fresh cilantro (I didn't use this because I don't like cilantro...don't hate me, I know everyone seems to like cilantro. But even the smell of it turns my stomach.)
  • Salt & Pepper to taste
  1. For the dressing: Shake all of the dressing ingredients together in a jar with a tight-fitting lid (or a plastic container or plastic baggie).
  2. Cook the corn in a big pot of boiling water until tender (5-7 minutes). Drain and rinse under cold water. Cut kernels from cob with a paring knife into a large bowl.
  3. Add tomatoes, beans, scallions, cilantro, and dressing and toss. Season with S&P to taste & serve.
*This salad can be made a day in advance.

I'm actually going to have a third encounter with happy food at the picnic tonight. It's kind of a secret happy food of mine. You see, I don't eat beef. I hate it. I want to like it, but I don't. However, whenever I even smell this happy food I practically start drooling with the anticipation of eating it. My secret happy food is....


Yes...all-beef juicy hot dogs with ketchup on top.

Ironically, I detest turkey hot dogs. I typically substitute turkey for beef in recipes all the time, but turkey hot dogs make me want to vomit.


Do you have any happy foods?

6.23.2010

Summer days

I am now beginning my summer vacation and could not be more content. I know that teachers get teased because they get so much time off...but I swear that if there wasn't a summer break, there wouldn't be any teachers.

I'm extremely passionate about teaching and truly love each and every student I have in my class...but by the time June hits, I'm SO ready for some space before I turn into "scary teacher". It's nice to have some time to myself, but by the second week of August, I start itching to teach again!

So now I am spending my days doing exactly what I wish and loving every minute of it. I've been going through some of the summer issues of my favorite food magazines. As usual, Everyday Food Magazine has caught my eye and I've been using some of their ideas to create little bits of wonderfulness. The following two recipes come from the July/August 2010 issue.

Stone Fruit Compote
~This is perfect for spreading on toast or topping yogurt~


  • 2 1/4 cups (3/4 lbs) stone fruit such as peaches, nectarines, or plums
  • 2 tbsp honey
  • pinch of course salt
  • 3 tbsp water
  • a flavor combination such as 1 star anise and 2 allspice berries OR 1 small cinnamon stick and 1 wide strip of lemon zest (I used a sprinkling of ground cinnamon and the strip of lemon zest)
  1. Combine all the ingredients in a small saucepan and cook over medium-high heat until the fruit is soft (8-12 minutes).
  2. Remove the lemon zest strip and/or cinnamon stick (if you used that flavor combination).
  3. Transfer to a pint size jar and let cool (I used a canning jar). Once it's cool, you can put the lid on it and store it in the fridge for up to two weeks. This chunky spread can be put on toast with ricotta cheese or over some plain yogurt. I imagine it would be great over ice cream, too!
Couscous Salad with Black Beans, Mushrooms, and Corn
~This meat-less meal is filling and delicious~

  • 2 tbsp extra virgin olive oil
  • 1 cup Israeli couscous (you can use regular couscous or orzo pasta, too)
  • course salt and ground pepper
  • 1/2 lb sliced button or cremini mushrooms
  • 1 small bunch scallions, white and green parts separated and thinly sliced
  • 1 1/4 cups fresh corn kernels (from 2 ears of corn)
  • 1 can (15.5 oz) black beans, rinsed and drained
  • 2 tbsp fresh lime juice
  • 1 jalapeno (optional, but delicious in it) thinly sliced (I chopped it)
  • 1 avocado, halved, pitted, peeled, and sliced
  1. In a medium saucepan, heat 1 tbsp oil over medium-high heat. Add couscous and cook, stirring constantly, until golden brown and fragrant (about 4 minutes).
  2. Add 1 1/2 cups water, season with salt, and bring got a boil. Reduce heat to low, cover, and simmer until liquid is absorbed and couscous is tender (about 15 minutes)
  3. Meanwhile, in a large skillet, heat 2 tsp oil over medium-high heat. Cook mushrooms, stirring occasionally, until golden brown (about 5 minutes). Season with salt and pepper and then transfer to a large bowl.
  4. Add 1 tsp oil to the skillet and cook the scallion whites and corn, stirring occasionally, until scallions are soft and corn is browned (about 5 minutes). Season with salt and pepper and then add to the mushrooms.
  5. Add couscous, black beans, lime juice, jalapeno (if using), and scallion greens to the mushroom mixture and toss to combine. Season with salt and pepper and serve with avocado slices on top. (I actually added some crumbled tortilla chips on top and it was a the perfect salty companion to the salad)
For me, summer days are all about relaxing, enjoying the fresh produce of the season, and doing the things that I love. Cooking is definitely at the top of that list!

1.27.2010

A Family Meal


I absolutely live for making big family meals. There is something so deliciously wonderful about eating good food with people you care about. Anyone who knows me, knows that I love to love with food.

I've never been much of a Giada de Laurentiis fan. She's beautiful, but as I watched her show I would be somewhat distracted by her huge head and short arms (think: T-Rex).

Yeah...she scares me a little, too.

I also get annoyed at the excessive amount of cleavage showing in every episode (which may account for the large male fan base she has acquired). Furthermore, I get confused by the way she talks. One minute, she is talking like you and me. The next minute, she is pronouncing Italian ingredients like she lives in a Tuscan villa on the Mediterranean coast. Just say Parmesan and marscarpone cheese like a normal person...you grew up in California. Anyway.

I got her Giada's Family Dinners cookbook for Christmas and began to try her recipes. Um, wow. Every single thing I've made from this cookbook has been completely mouthwatering. I'm sorry I called you a T-Rex, Giada, because your recipes are awesome.

I've made the following recipe three separate times since Christmas because it's a total crowd pleaser. It yields enough to make 6 hearty main course servings. If you're anything like me, I find sun-dried tomatoes to be a bit much sometimes. The way they are cooked in this recipe really mellows their flavor and they are delicious. I followed up this pasta dinner recently with a yummy dessert recipe I found in Southern Living Magazine.

Penne with Sausage, Artichokes, and Sun-Dried Tomatoes
~I use whole grain pasta to make this hearty one dish meal~


  • 3/4 cup drained oil-packed sun-dried tomatoes, sliced, 2 tbsp of oil reserved*
  • 1 lb Italian hot sausages, casings removed (I use hot Italian turkey sausage)
  • 2 (8 oz.) packages frozen artichoke hearts, thawed (I have yet to find frozen artichokes, so I use the canned kind in brine, not oil)
  • 2 large garlic cloves, chopped
  • 1 3/4 cups reduced sodium-chicken broth
  • 1/2 cup dry white wine
  • salt
  • 12 oz. penne (I use Barilla Whole Grain)
  • 1/2 cup freshly shredded Parmesan cheese, plus more for serving
  • 1/3 cup chopped fresh basil
  • 1/4 chopped fresh Italian parsley
  • 8 oz. fresh mozzarella, drained and cubed (she says this is optional, but I think it's essential)
  • freshly ground black pepper
  1. Heat the oil reserved from the tomatoes in a large, heavy frying pan over medium-high heat. Add the sausage and cook until brown, breaking up the meat into bite-size pieces with a fork (about 8 minutes)
  2. Transfer sausage to a bowl. Add the artichokes and garlic to the same skillet, and saute over medium heat until the garlic is tender (about 2 minutes).
  3. Add the broth, wine, and sun-dried tomatoes. Boil over medium-high heat, stirring occasionally, until the sauce reduces slightly (about 8 minutes).
  4. Meanwhile, bring a large pot of salted water to a boil. Add the penne and cook, stirring often to prevent the pasta from sticking together, until tender but still firm to the bite (about 10 minutes). Drain, but do not rinse, the pasta.
  5. Add the pasta, sausage, 1/2 cup of Parmesan, basil, and parsley to the artichoke mixture. Toss until the sauce is almost absorbed by the pasta.
  6. Stir in the mozzarella and season to taste with salt and pepper. Serve with additional Parmesan cheese alongside.
*Those of you who are local: Jarred sun-dried tomatoes can be really pricey...especially the jars in the produce aisle. I actually found the Wegman's brand sun-dried tomatoes in oil (found in the pasta aisle) are the cheapest around.

Banana Bread Cobbler
~I wish I had gotten a picture of this...it was really good~
  • 1 cup self-rising flour (or 1 cup all purpose with 1 1/2 tsp baking powder and 1/2 tsp salt)
  • 1 cup sugar
  • 1 cup milk
  • 1/2 cup butter, melted
  • 4 medium-size ripe bananas, sliced
  • 3/4 cup firmly packed light brown sugar
  • 1/2 cup self-rising flour (or 1/2 cup all purpose with 3/4 tsp baking power and 1/4 tsp salt)
  • 1/2 cup butter, softened
  • 1 cup uncooked regular oats
  • 1/2 chopped pecans
  1. Preheat oven to 375 degrees. Whisk together 1 cup flour, sugar, and milk until just blended. Whisk in melted butter and pour batter into a lightly greased 11 x 7 inch baking dish.
  2. Top with banana slices.
  3. Combine Streusel ingredients (brown sugar, 1/2 cup flour, and butter) until crumbly, using a fork. Stir oats and pecans into the Streusel mixture.
  4. Top the banana slices with the Streusel mixture and bake for 40-45 minutes or until golden and bubbly. Serve with vanilla ice cream or whipped cream (I loved it with vanilla ice cream).
Family get togethers should not force you to be in the kitchen all day. Make simple and delicious meals like this and then spend your time doing what matters...being with the people you love.

10.06.2009

Girls Only Getaway to the Mountains


For my Aunt Kathy's 50th birthday, we went on a Girls Only trip to the Poconos. It was my Mom, my sister, and my Aunts (Aunt Kathy and Aunt Lori). My Mom's other sister, Aunt Diana couldn't be with us and we missed her terribly. She always brings such joy and laughter to the people around her. She also is a phenomenal cook and baker and would have loved all the things my sister and I created. We will do the trip again, Aunt Diana, and you'll be with us next time!

We had a wonderful time. My Aunts live in Florida and North Carolina, so I don't get to see them that often. It was so much fun to talk until the wee hours of the morning and just hang out with one another. My sister and I decided that we would cook the entire weekend because we don't often get to cook together. She's been cooking long before I started and it was such a special time for us to be in the kitchen side-by-side.

We took pictures of most of the food we made, but they weren't on my camera and I need everybody to email them to me (hint, hint). The house that my Mom's good friend graciously let us use was absolutely unbelievable! I wish I had snapped a picture of the kitchen, because it was divine. But here's what the dining room looked like:

And here's what the view from the main balcony looked like (every bedroom also had it's own balcony):


And without further ado, here was our Menu (some are links and the many can be found in the recipes below)

Friday Evening
Shrimp and Zucchini Tostadas
Spinach and Strawberry Salad
Pear Cardamom Bread

Saturday Morning
Banana Sour Cream Pancakes
Herbed Scrambled Eggs

Saturday Evening
Zesty Ravioli Skillet
Herbed Garlic Bread
Parmesan Roasted Broccoli
Plum Galette


Sunday Morning
Crab and Roasted Red Pepper Strata
Pecan Praline Bacon
Cranberry Lemon Scones
(I used lemon instead of orange)

Snacks
Fresh Corn Salad
Puppy Chow
Banana Bread


Banana Sour Cream Pancakes
~These have a really unique flavor~


  • 1 1/2 cups flour
  • 3 tbsp sugar
  • 2 tsp baking powder
  • 1 1/2 tsp kosher salt
  • 1/2 cup sour cream
  • 3/4 cup plus 1 tbsp milk
  • 2 eggs
  • 1 tsp vanilla extract
  • 1 tsp grated lemon zest
  • unsalted butter
  • 2 ripe bananas, diced, plus extra for serving
  • Pure maple syrup
  1. Sift together the flour, sugar, baking powder, and salt.
  2. In a separate bowl, whisk together the sour cream, milk, eggs, vanilla, and lemon zest. Add the wet ingredients to the dry ones, mixing only until combined.
  3. Melt 1 tbsp of butter in a large skillet over medium low heat until it bubbles. Ladles the pancake batter into the pan to make 3 or 4 pancakes.
  4. Distribute a rounded tbsp of bananas on each pancake.
  5. Cook for 2 or 3 minutes until bubble appear on the top and the underside is nicely browned. Flip the pancakes and then cook for another minute until browned.
  6. Wipe out the pan with a paper towel, add more butter to the pan, and continue cooking pancakes until all the batter is used.
  7. Serve with sliced bananas, butter and maple syrup.
Recipe taken from Ina Garten's Barefoot Contessa Family Style

Herbed Scrambled Eggs
~These went nicely with the pancakes~


Crack 1 dozen eggs into a large bowl and whisk together with a 1/2 cup of milk and 1/2 cup of heavy cream. Cook over medium and allow to set a little bit before "scrambling". This gives the eggs a nice texture that is more like folds of eggs instead of lumps. Then add shredded provolone and/or Parmesan cheese while the eggs cook and then sprinkle with chopped fresh herbs such as chives and Italian parsley when they are done cooking.

Zesty Ravioli Skillet
~Fresh and flavorful!~

  • 1/3 cup heavy whipping cream
  • 4 cups loosely packed fresh baby spinach leaves
  • 6 oz. provolone cheese, grated
  • 1 tbsp olive oil
  • 1 small jalapeno pepper, seeded
  • 3 garlic cloves, minced
  • 2 14.5 oz cans of diced tomatoes with onions, undrained
  • 1/2 tsp salt
  • 1/2 tsp freshly ground pepper
  • 1 package small frozen cheese ravioli
  • Halved grape tomatoes (optional)
  1. Add oil to a large skillet over medium-high heat. Finely chop the jalapeno and add to the skillet. Cook for 1 minute or until crisp tender. Add garlic to the skillet and cook for 15-20 seconds until fragrant.
  2. Add tomatoes, salt, and pepper to the skillet and cook 1-2 minutes until simmering. Add ravioli, stir to coat. Cook, uncovered, 4-5 minutes or until tender.
  3. Stir cream into skillet. Cook, uncovered, 1-2 minutes or until simmering.
  4. Sprinkle spinach over ravioli and cook, covered, 1 minute or until spinach starts to wilt.
  5. Remove from heat and top with cheese. Cover the hot skillet and let stand 1-2 minutes so that the cheese can melt. Garnish with grape tomatoes, if desired.
Recipe taken from The Pampered Chef

Herbed Garlic Bread
~I ate what seemed like 500 pieces of this~

  • 1 loaf of nice crusty Italian bread
  • 1 stick( or maybe a little less depending on how big the loaf is)of butter
  • 3 or 4 cloves of minced garlic
  • dash of garlic salt (optional)
  • a couple tbsp chopped fresh herbs like Italian Parsley and Basil
  • Olive oil
  • Handful of shredded provolone or Parmesan cheese.
Soften some butter and mix some minced garlic in it, you could add some sprinkles of garlic salt as well to add flavor. Spread that on the bread. Then add the chopped herbs. Drizzle with olive oil on top and added shredded provolone and Parmesan cheese. Put it in the broiler and WATCH IT until it gets golden on edges and cheese melts.

Plum Galette
~This recipe was so easy and very impressive~
  • 2 1/2 cups plus 2 tablespoons all-purpose flour (spooned and leveled), plus more for rolling (skip 2 1/2 cups of flour if using ready made pie crust)
  • 1 cup (2 sticks) cold unsalted butter, cut into pieces (skip if using ready made pie crust)
  • 5 tablespoons plus 1 teaspoon sugar (only need 5 tbsp if using ready made pie crust)
  • 1 teaspoon salt (skip if using ready made pie crust)
  • 1/2 cup ice water (skip if using ready made pie crust)
  • 1/4 cup whole, skin-on almonds, toasted
  • 5 to 6 plums, halved, pitted, and sliced inch thick (keep slices together)
  • 1 to 2 tablespoons heavy cream
*I used a Pillsbury ready made pie crust from the refrigerated section and it worked wonderfully*
  1. If you choose to make your own pie crust, follow these directions. In a food processor, combine 2 1/2 cups flour, butter, 1 teaspoon sugar, and salt; pulse until mixture resembles coarse meal. Sprinkle with 1/4 cup ice water. Pulse until dough is crumbly but holds together when squeezed (if necessary, add up to 1/4 cup remaining ice water, 1 tablespoon at a time). Don't overmix. Remove dough from processor and shape into a disk; wrap in plastic and refrigerate 1 hour.
  2. Here is where I began. Wipe bowl of food processor clean and add almonds, 3 tablespoons sugar, and 2 tablespoons flour; pulse until ground to a coarse meal.
  3. Preheat oven to 350 degrees. On a floured surface, roll out dough to 1/4-inch thickness (I didn't have to do this...I just unrolled the ready made crust). Transfer to a parchment-lined baking sheet (I made it on a stoneware pizza stone); sprinkle almond mixture over dough.
  4. With a spatula, transfer plums to dough; press lightly to fan out, leaving a 2-inch border. Fold edge of dough over fruit. Refrigerate 20 minutes.
  5. Brush crust with cream; sprinkle galette with 2 tablespoons sugar. Bake until crust is golden and underside is cooked through, about 70 minutes.
We had such an amazing time as a family. There is nothing in the world that makes me happier then sitting down to a table of delicious food with the ones that I love.

Happy Birthday, Aunt Kathy!

10.03.2009

Remember me?


I have been absent from this blog of mine because my life has been filled with many many many other things lately. As much as I love blogging, my family and job need to come first.

I've been doing some cooking, but not as much as I would like. I've been mostly throwing convenient meals together before running off to do something or after getting home from an impossibly long day. Sometimes you just go through times like this and then they pass. Let's hope this hectic lifestyle settles down so that I can find time to do the things that relax me once again.

I have several posts in mind with various recipes I've made recently, so I will post them this week. I've been holding off on some of them because I don't have pictures, but I guess that doesn't really matter all that much. I just love posting recipes with pictures so that you can see the wonderfulness!

Here is a simple recipe to hold you over until I get those other posts together (I'm sure you've been waiting with bated breath). This past week, Sonny and I went over to his sister's house and enjoyed a delicious meal with some lovely people.

She asked me to bring a salad and I discussed with my cooking teacher, Art, what I should make. I've never been a huge salad maker, not because I don't like salads, but because I don't really feel I have a knack for putting things together in a salad. I need to get over it and try some new salads because the one I made on Tuesday was awesome. Art gave me wonderful guidance and here is what we came up with:

Spinach Salad with Cheddar, Sauteed Pears, and Pecans
~This is ridiculously simple~

  • 1 8 oz. bag of baby spinach
  • 2 or 3 red pears, cored and sliced thinly (unpeeled)
  • 6 tbsp unsalted butter (use the real stuff)
  • 8 oz. grated sharp cheddar cheese
  • handful of chopped pecans (or walnuts)
  • handful of dried cranberries
  • handful of golden raisins
  1. Here is what you can do ahead of time: Place the spinach in a large salad bowl and sprinkle with the cheese, pecans, cranberries, and raisins.
  2. Right before serving, heat the butter in a large skillet over medium-high heat. Add the pear slices to the hot butter and saute for a just a few minutes (about 5) so that the pears become softened, but not mushy.
  3. Remove the pears from the pan and add to the salad. Then pour the remaining butter in the pan over the salad (it acts as a dressing).
You may be thinking that butter-dressing is gross, but it's not. It's awesome. And you may be thinking that butter-dressing will make you fat, but it won't. It's only 6 tbsp for a whole big salad that serves at least 4 people.

This salad was a wonderful thing to make in the fall when the pears are particularly delicious and in season. It also went so nicely with the lovely meal that my sister-in-law made that included chicken cutlets drizzled with a creamy pan sauce and served with roasted potatoes and baked apples.

I absolutely love this time of year because the food is so memory provoking. I can remember eating and smelling apples, pumpkin muffins, soup, and cinnamon throughout the autumns of my childhood.

And let's be honest...the main reason I love fall is because my birthday is in October and when it's my birthday I get to eat cake and open presents.

Happy October!

8.10.2009

The Perfect Picnic

My husband and I decided that we were going to enjoy our last day of summer vacation to the fullest. On Sunday night, I prepped some various items for us to snack on in the great outdoors.

We have the coolest picnic cooler bag thing that Sonny's cousin gave us for our wedding...it looks like this:

I packed it up with the following items:

Curry Chicken Salad Sandwiches
Creamy Cucumber Salad
Homemade Granola Bars
Chocolate Chip Cookies

I made the Curry Chicken Salad on Sunday night and popped it in the fridge. I set up the cucumbers and yogurt to drain overnight for the Creamy Cucumber Salad. The Homemade Granola Bars were also made on Sunday night. I grabbed a bag of pre-formed chocolate chip cookie dough from the freezer and placed the frozen balls of dough directly in the oven on a cookie sheet (I always reserve some dough when I make cookies so that I have it on hand in the freezer for occasions like this).

By doing a little bit of work ahead of time, all I had to do was assemble the sandwiches and throw the cucumber salad together before leaving for our picnic.

Creamy Cucumber Salad
~With a little planning ahead, this is very simple to make~

  • 4 hothouse cucumbers, thinly sliced (3 to 4 pounds)
  • 2 small red onions, thinly sliced in half rounds
  • Kosher salt
  • 4 cups (32 ounces) plain whole-milk yogurt
  • 1 cup (8 ounces) sour cream
  • 2 tablespoons champagne vinegar or white wine vinegar
  • 1/2 cup minced fresh dill
  • 1 1/2 teaspoons freshly ground black pepper
  1. Mix the cucumbers, red onions, and 1 1/2 tablespoons of salt in a bowl. Pour them into a colander and suspend it over a bowl. Wrap the bowl and colander with plastic wrap, and place in the refrigerator to drain for at least 4 hours or overnight. Discard the liquid that collects in the bowl.
  2. Pour the yogurt into a sieve (mesh strainer) lined with a paper towel and suspend it over another bowl. Wrap the bowl and sieve in plastic wrap and refrigerate for at least 4 hours or overnight. Discard the liquid that collects in the second bowl.
  3. When the cucumbers are ready, roll them up in paper towels or a kitchen towel and press the towel lightly to remove most of the liquid.
  4. Place the cucumbers and yogurt in a large bowl with the sour cream, vinegar, dill, 2 teaspoons salt, and the pepper. Toss well and refrigerate for a few hours to allow the flavors to blend.
  5. Sprinkle with 1/2 teaspoon salt and 1/2 teaspoon pepper and serve chilled.
Recipe taken from Ina Garten's Barefoot Contessa Back to Basics

Homemade Granola Bars
~These smell delicious as they are baking!~

  • 2 cups old-fashioned oatmeal
  • 1 cup sliced almonds
  • 1 cup shredded coconut, loosely packed
  • 1/2 cup toasted wheat germ
  • 3 tablespoons unsalted butter
  • 2/3 cup honey
  • 1/4 cup light brown sugar, lightly packed
  • 1 1/2 teaspoons pure vanilla extract
  • 1/4 teaspoon kosher salt
  • 1/2 cup chopped pitted dates (I got prunes)
  • 1/2 cup chopped dried apricots (I always get nuts and dried fruit from the bulk section in the grocery store...it's so much cheaper and I can get exactly the quantity I need!)
  • 1/2 cup dried cranberries
  1. Preheat the oven to 350 degrees F. Butter an 8 by 12-inch baking dish and line it with parchment paper.
  2. Toss the oatmeal, almonds, and coconut together on a sheet pan and bake for 10 to 12 minutes, stirring occasionally, until lightly browned. Transfer the mixture to a large mixing bowl and stir in the wheat germ.
  3. Reduce the oven temperature to 300 degrees.
  4. Place the butter, honey, brown sugar, vanilla, and salt in a small saucepan and bring to a boil over medium heat. Cook and stir for a minute, then pour over the toasted oatmeal mixture.
  5. Add the dates, apricots, and cranberries and stir well.
  6. Pour the mixture into the prepared pan. Wet your fingers and lightly press the mixture evenly into the pan. Bake for 25 to 30 minutes, until light golden brown. Cool for at least 2 to 3 hours before cutting into squares. Serve at room temperature.
Recipe taken from Ina Garten's Barefoot Contessa Back to Basics

We found the perfect spot under a big tree right by the water...it was so peaceful.

Here is a picture of our lovely picnic before we ate it all up!


The weather was hot, but it was cool and breezy by the water and under the shade of a tree. It was a truly relaxing and lovely way to spend a summer afternoon.


8.06.2009

Can It

So I haven't been doing much by way of cooking lately. My sister has been visiting and her daughter was a bit sick earlier in the week. I was feeling a bit rotten myself. We ended up eating this and that during the day and Wegman's takeout at night. My Mom also bought a lemon cake from Wegman's. I love it with my whole heart. After a lengthy discussion with my sister about portion size and sticking to a moderate daily intake of food...I ate three pieces of cake.

I am finding that summer is less "cooking with a plan" for me and more "have fun and figure it out as you go". This is due to the fact that I'm a teacher and don't work during the summer (don't hate me). However, the school year is about to commence and I am getting geared up to start planning and cooking ahead. It's really the only way I can handle getting dinner on the table after a tough day at work. And in the beginning of the school year, there are usually a lot of tough days.

I did do something rather special this week. I canned (I don't really like that it's called "canning" because they aren't cans, they're jars...). My neighbor has been doing it for a couple of years and she graciously invited me over to show me how it's done. I did all these!

Actually, I could have done even more but I ran out of jars. It was a really interesting process and I am definitely going to do it again this season and in the summers to come. I know that some people might cringe at the thought of canning and preserving because it seems like this huge ordeal.

I'll be honest that it can be a bit labor intensive, but it's a very simple process. If you are making a lot of things, it can take a while because you have to sterilize the jars for a certain amount of time (for small jars we did about 10 minutes) and then you have to fill them and put them back in the boiling water for a certain amount of time (in our case, 10 minutes). It doesn't seem like that long, but if you have to work in batches it can take a while. If you are doing it with a friend, you can chit chat and work on other things in the meanwhile. I really enjoyed it.

Here are two of the recipes we did. Both recipes can be made without the intention of preserving, but need to be kept in the fridge and used within a few weeks. Both of these recipes come from the great cookbook by Ellie Topp and Margaret Howard called The Complete Book of Year-Round Small-Batch Preserving.

Peach Mint Salsa
~This chutney-like salsa is delicious on grilled chicken or fish~


  • 2 cups chopped peeled peaches (about 4 medium peaches)
  • 1/4 cup finely chopped red onion
  • 1/4 cup finely chopped green pepper
  • 1 tbsp finely chopped jalapeno pepper
  • 2 tbsp honey
  • 1/4 tsp pickling salt (you can use kosher, but pickling salt is sold right next to it)
  • the zest and juice of 1 lime
  • 2 tbsp finely chopped fresh mint
  1. You can peel the peaches by dropping them in boiling water for 30 seconds and then plunging them in ice water. The peels should come off easily. If you have trouble, it's not that big of a deal for some of the peaches to be chopped with the peel on.
  2. Combine the peaches, onion, peppers, honey, salt, lime zest and juice in a medium saucepan.
  3. Bring to a boil over high heat, reduce heat and boil gently (uncovered) for 5 minutes (stir occasionally).
  4. Stir in mint and cook for 1 minute.
  5. Fill sterilized hot jars with salsa, leaving a 1/2 inch of space between the top of the salsa and the rim of the jar (this is called "head space"). Process 10 minutes for half-pint jars ("process" means boil the jars).
  6. Serve with tortilla chips or use it to top chicken or fish. I'm sure it can be used in other ways, as well!
This recipe only yields two cups of salsa, so it can easily be made to be eaten. If you are canning it, I would double or even triple the recipe.

Raspberry and Blueberry Jam
~This can be made year round with fresh or frozen berries~


  • 3 cups fresh or frozen raspberries (unsweetened)
  • 2 cups fresh or frozen blueberries (unsweetened)
  • 1 large orange
  • 6 1/2 cups sugar (alot of sugar! but this recipe yields alot of jam)
  • 2 tbsp lemon juice
  • 1 pouch liquid fruit pectin (found near canning supplies in grocery stores)
  1. Mash raspberries and blueberries in a large saucepan. I mashed them the point where the raspberries were pretty mashed up but the blueberries were mostly whole.
  2. Zest the orange and add the zest to the saucepan. Remove the white rind of the orange and chop the orange by hand or in a food processor.
  3. Add orange pulp, sugar and lemon juice to the saucepan. Bring to a full boil over high heat and boil hard for 1 minute, stirring constantly. Remove from heat and stir in pectin.
  4. Ladle into hot sterilized jars and process 10 minutes.
I have the ingredients to make Apricot Honey Butter, too. I am going to pick up some more jars and give it a go at home. I'll try to remember to take pictures so that I can do a post on the process step-by-step.

Tomorrow I am attempting to make a Friday Feast: Birthday Edition for my sister's birthday. If it turns out as good as it sounds, I will be sure to share it with you.

*I apologize for the poor quality of my picture...I have trouble taking clear pictures that aren't washed out with my camera's flash. My camera takes great pictures outside...not so great inside.