Showing posts with label Dessert. Show all posts

1.23.2011

Sweet Treat

I have the bad habit of needing something sweet after dinner. I know that many people have this habit, so I won't be too hard on myself. Sometimes I'm able to do fruit or yogurt, but that's mostly in the summer when berries are in season. Winter fruits just don't cut it for me when it comes to a sweet treat at night.

The January/February issue of Food Network Magazine has some ideas for lighter desserts and I found one of them to be particularly delicious. As far as cookies go, this recipe is quite figure friendly. I've made them a couple of times and found them to be a wonderful light dessert. I'll eat two cookies with a small glass of milk (actually, a small glass of Lactaid because I have...shall we say...trust issues with dairy).

Word to the Wise: Just because it's labeled as "light" doesn't mean you can eat a dozen at a time. I find that people (sometimes I'm included in this group) tend to think that if something is less calories, they can eat double or triple the serving size without consequences. Not so, my friends...eating sensible portions is a habit we should stick to no matter what we're eating.

So after that uplifting message...here's the recipe!

Oatmeal Cookies
~Easy and Delicious~


  • 1 1/4 cups brown sugar
  • 1 egg and 2 egg whites
  • 1/4 cup vegetable oil
  • 1 1/2 cup rolled oats
  • 1 cup whole-wheat flour
  • 1/2 cup wheat germ
  • 1 tsp baking soda
  • 1 tsp salt
  • 1/2 cup chocolate chips
  • 1/4 cup raisins
  • 1/4 cup walnuts
  • (I actually combine chocolate chips and raisins to equal a cup and leave the walnuts out...you pretty much can put a cup of whatever combination of goodies you'd like to substitute)
  1. Preheat oven to 350 degrees.
  2. Whisk brown sugar, egg, and egg whites in a bowl.
  3. Whisk in the vegetable oil.
  4. Stir in the oats, whole-wheat flour, wheat germ, baking soda, and salt.
  5. Add chocolate chips, raisins, nuts (or a cup of whatever combination you want)
  6. Drop large spoonfuls onto lined baking sheets and gently flatten. Bake for 12 to 15 minutes.

12.11.2010

Christmas Cookies

Every year, as many families, we like to make Christmas cookies. My sister and I were quite young when we first started making them on our own and it's been our special tradition ever since. I remember how we used to rub flour onto our cheeks to make it look like we had been working so hard in the kitchen. Now my sister has a little girl who helps to make them and a little boy who helps to eat them!

I can't even tell you where this recipe came from. My mom had it written on a tattered piece of paper and I copied it down from her. She may have gotten it from my grandmother who may have gotten it from her grandmother (or from the back of the Crisco container...I guess we'll never know!)

We only make these once a year because, for some reason, cut out cookies seem like a huge deal to us. It takes us hours and hours to make them, which probably has more to do with us talking and eating raw cookie dough than actually making the cookies. Nonetheless, it's a happy tradition that we look forward to all year!

Christmas Cutout Cookies


  1. First, blend together 6 cups of sifted flour, 1 tbsp of salt, and 2 1/3 cups of Crisco (shortening) using a pastry blender or two butter knives (use the butter knives to slice through the ingredients and mix them together).
  2. Then, take 2 cups of the mixture you made above and add 3/4 cups of sugar, 1 tsp of baking powder, and 1/4 cup of flour. Next, blend in 1 egg and 1 tsp of vanilla.
  3. Roll out the dough (don't chill it, use immediately) and use cookies cutters to cut out different shapes. Re-roll the dough that's left after you cut out the shapes and try to make as many more shapes as you can (We always feel this tremendous sense of accomplishment when we re-roll it enough times to have only a little teeny bit of dough left over).
  4. If you are using sprinkles, put them on the cookies now (before they bake). Bake at 375 degrees for somewhere between 10 and 15 minutes. We never remember how long they take to bake and just try to keep an eye on them (which usually means that the first batch gets a little "brown"). After they cool, decorate with icing or whatever else is edible.
  5. Continue using the first mixture you made to make batches of dough (by adding the sugar, baking powder, flour, egg, and vanilla).
There are a few cookies recipes we make every year that are close to our hearts. Peanut Blossoms are a classic cookie recipe that we got from our Aunt Wendy. I always make Spritz cookies for me and my Mom because we love them with coffee! I can't remember where I got the recipe for Spritz cookies, but there are about a million versions online. You need to have a cookie press to make Spritz cookies and they can be purchased very inexpensively at places like Bed, Bath and Beyond or Amazon.


Peanut Blossoms
  • 3 1/2 cups flour
  • 2 tsp baking soda
  • 1 tsp salt
  • 1 cup sugar
  • 1 cup brown sugar
  • 1 cup shortening
  • 2 eggs
  • 4 tbsp milk
  • 2 tbsp vanilla
  • 1 cup peanut butter
  • 14 oz. bag of Hershey kisses
  • Extra sugar for rolling
  1. Preheat the oven to 375 degrees.
  2. Combine all the ingredients except the Hershey kisses and extra sugar in a large bowl.
  3. Mix on the lowest speed until dough forms.
  4. Shape the dough into little balls and then roll into extra sugar.
  5. Put on an ungreased cookie sheet (I like to bake mine on parchment paper). Bake until golden brown, about 10-12 minutes.
  6. While they are baking, unwrap the kisses. When you remove the cookies from the oven, immediately press one kiss into each cookie. Let them cool completely and be careful when putting them into a container because the kisses will remain soft for quite a while.
  7. This recipe makes about 8 dozen cookies, but I typically double it at Christmas so that I can give many away.

Classic Spritz Cookies


  • 1 1/2 cup butter
  • 1 cup sugar
  • 1 egg
  • 2 tbsp milk
  • 1 tsp vanilla
  • 1/2 tsp almond extract
  • 3 1/2 cup flour
  • 1 tsp baking powder
  1. Preheat the oven to 375 degrees.
  2. Cream together the butter and sugar (I put it in my mixer for several minutes until it's light and fluffy)
  3. Add the egg, milk, vanilla, and almond extract. Beat together well.
  4. Stir together the flour and baking powder and then gradually add to the creamed mixture.
  5. Mix until it's a smooth dough. Don't chill it.
  6. Put the dough into the press and press cookies directly onto the baking sheet. Decorate with sprinkles if desired and then bake for 10-12 minutes.
  7. Remove the cookies, cool completely on a baking rack. This recipe makes about 7-8 dozen cookies.
There are lots of other cookie recipes that I've tried and loved, but I'll leave you with one more. In many ways, this is my favorite one because they are so easy and very delicious. I make these all year around and everyone always enjoys them!

Crispy Thumbprint Cookies


  • 1 package of yellow cake mix
  • 1/2 c vegetable oil
  • 1 egg
  • 1/4 c water
  • 3 c crisp rice cereal crushed (Rice Krispies)
  • Raspberry or strawberry preserves or Andes mint candies cut in half
  1. Preheat oven to 375
  2. Combine cake mix, oil, egg and water. Beat at medium speed of electric mixer until well blended. Add cereal; mix until well blended.
  3. Drop by heaping teaspoonfuls about 2 inches apart onto ungreased baking sheet. Use thumb to make indentation in each cookie. Spoon about 1/2 teaspoon of preserves into center of cookie. (Or place 1/2 of mint candy in center of each cookie).
  4. Bake 9 to 11 minutes or until golden brown. Cool cookies 1 minute on baking sheet; remove from baking sheet to wire wrack to cool completely. Makes 3 dozen cookies.

10.27.2010

Canning Series - Fruit


We gathered once again at the Kitchen Workshop for our canning series. If you don't know how to can or forget the specifics, go to this post for a step-by-step guide.
This time, our focus was fruit. This differs from the fruit spread course because these recipes serve better as dessert toppers, not as jams or jellies. We made some seriously decadent stuff! I'll just dive right in.

Blackberries in Framboise
~Absolutely delicious~


Makes about 4 (8 oz) half pints

You will need:
  • 6 cups blackberries, divided
  • Water
  • 2 cups sugar
  • 1 cinnamon stick (about 4 inches), broken into pieces
  • 1 tbsp grated lemon zest 1/2 tsp fresh grated nutmeg1/2 cup framboise or other raspberry liqueur4 (8 oz) half pint glass preserving jars with lids and bands
Directions:

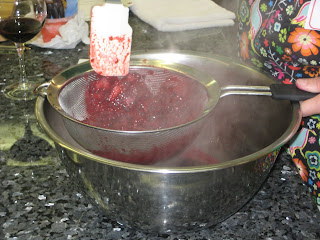
1. Place 2 cups of blackberries in a stainless steel saucepan. Using a potato masher, crush slightly. Add 3 tbsp water. Cover and boil gently over medium-low heat until fruit is soft, about 2 minutes. Strain though a dampened jelly bag or a strainer lined with several layers of dampened cheesecloth set over a glass measure to collect 1/2 cup blackberry juice.

2. Prepare boiling water canner. Heat jars and lids in simmering water until ready for use. Do not boil. Set bands aside.

3. Combine sugar, cinnamon stick pieces, lemon zest, nutmeg and 2 cups water in a large stainless steel saucepan. Bring to a boil over medium-high heat, stirring occasionally. Reduce heat and boil gently for 5 minutes. Strain and return syrup to saucepan. Add blackberry juice, remaining blackberries and framboise. Bring to a boil over medium-high heat, stirring constantly but gently so as not to crush blackberries.

4. Pack hot blackberries into hot jars, leaving 1/2 inch headspace, using a slotted spoon. Ladle hot syrup into jar to cover blackberries lea ving 1/2 inch headspace. Remove air bubbles and re-measure headspace. If needed, add more syrup to meet recommended headspace. Wipe rim. Center lid on jar. Apply band and adjust until fit is fingertip tight.

5. Process filled jars in a boiling water canner for 10 minutes, adjusting for altitude. Remove jars and cool. Check lids for seal after 24 hours. Lid should not flex up and down when center is pressed.


Raspberry Chocolate Sundae Topper

~This look just like raspberry sauce but is surprisingly chocolately~

Makes about 6 (8 oz) half pints

You will need:
  • 1/2 cup sifted unsweetened cocoa powder
  • 1 1.75-oz pkg Ball® Original Fruit Pectin
  • 4-1/2 cups crushed red raspberries
  • 6-3/4 cups granulated sugar
  • 4 Tbsp. lemon juice
  • 6 (8 oz) half pint glass preserving jars with lids and bands
Directions:

1. Prepare boiling water canner. Heat jars and lids in simmering water until ready for use. Do not boil. Set bands aside.

2. Combine cocoa powder and pectin in a medium glass bowl, stirring until evenly blended. Set aside.

(Didn't the raspberries look lovely before we crushed them?)

3. Combine crushed raspberries and lemon juice in a large stainless steel saucepan . Whisk in pectin mixture until dissolved. Bring to a boil over high heat, stirring frequently. Add sugar all at once and return to a full rolling boil, stirring const antly. Boil hard for 1 minute, stirring constantly. Remove from heat and skim off foam.


4. Ladle hot sundae topper into hot jars leaving 1/4 inch headspace. Remove air bubbles. Wipe rim. Center lid on jar. Apply band until fit is fingertip tight.

5. Process jars in a boiling water canner for 10 minutes, adjusting for altitude. Remove jars and cool. Check lids for seal after 24 hours. Lid should not flex up and down when center is pressed.


Peach Rum Sauce
~Another wonderful dessert item to have on hand~

Makes about 7 (8 oz) half pints

You will need:
  • 6 cups chopped pitted peeled peaches, treated to prevent browning and drained
  • 2 cups lightly packed brown sugar
  • 2 cups granulated sugar
  • 3/4 cup rum
  • 1 tsp grated lemon zest
  • 7 (8 oz) half pint glass preserving jars with lids and bands

Directions:
1. Prepare boiling water canner. Heat jars and lids in simmering water until ready for use. Do not boil. Set bands aside.

2. Combine peaches, brown sugar, granulated sugar, rum and lemon zest in a large stainless steel saucepan. Bring to a boil over high heat, stirring constantly, until sugar dissolves. Reduce heat and boil gently, stirring occasionally, until thickened, about 20 minutes.

3. Ladle hot sauce into hot jars leaving 1/4 inch headspace. Remove air bubbles and re-measure headspace. If needed, add more sauce to meet recommended headspace. Wipe rim. Center lid on jar. Apply band and adjust until fit is fingertip tight.

4. Process filled jars in a boiling water canner for 10 minutes, adjusting for altitude. Remove jars and cool. Check lids for seal after 24 hours. Lid should not flex up and down when center is pressed.


I'm not sure if we'll have any more canning classes this season, but if we do I'll be sure to let you know what we whipped up!


5.26.2010

Barley is Gnarly

I couldn't help myself. I love the way that "Barley" and "Gnarly" rhyme. I just had to title this post with "Barley is Gnarly". However, I wasn't completely sure what "gnarly" meant. So being the cool person I am, I looked it up online. I found two totally different meanings.
The first one is from dictionary.com

Gnarly - adjective, gnarlier, gnarliest.

Slang. distasteful; distressing; offensive; gross: a comic noted for his gnarly humor.

The second one is from urbandictionary.com

Gnarly - adjective

Off the hook. Totally extreme. When you've gone beyond radical.


They are obviously quite different, which could be a representation of how people feel about barley. Some people really like it and allow it to be a base for lots of other flavors. Others hate all things that can be described as "health food" and think it's nasty.

I honestly have had very little experience with barley. I may have eaten it once or twice, but I've never prepared it and never had a strong desire to prepare it. I figured it would taste...well, gnarly (in the dictionary.com sense of the word). But when I made used it in a recipe last night, I found it to be rather gnarly (in the urbandictionary.com sense of the word).

I saw a recipe in Everyday Food Magazine (I'm loving myself some Everyday Food Magazine June 2010) that used barley and thought I'd try it. Yum! The
barley took on all the great flavors in the dish and made it more filling and nutritious. I actually read online that barley is considered a "nutritional powerhouse" because of its fiber, vitamins and minerals, and lack of fat and cholesterol.

Here are a few tips/shortcuts that I used for this recipe:
  1. Instead of roasting chicken and shredding it, I used a rotisserie chicken from the grocery store. At Wegman's, the rot. chickens are only $4.99 and perfect for this type of thing.
  2. Instead of buying a big sack of barley (because, at this point, I was still convinced that it was gnarly), I used the bulk section of Wegman's organic aisle. Not all grocery stores have bulk sections, but they are a great money saver because you only get what you need!
  3. I used a silpat on the baking sheet when I roasted the veggies. I didn't want to scrap charred scallions off the bottom of the pan.
  4. Finally, I bought a bag of pre-washed baby spinach. I'm veering away from bagged greens for numerous reasons, but this was the most convenient option on a busy work night.
Barley Salad with Chicken and Corn
~This would be a great thing to bring to a cookout~

  • salt and pepper
  • 1 cup barley
  • 2 bunches scallions, cut into thirds crosswise and white ends halved
  • 2 1/2 cups fresh corn kernels, about 3 ears of corn, or frozen corn (I used fresh)
  • Olive oil
  • 1 pint grape tomatoes, halved
  • 1/4 fresh parsley leaves
  • Approx. 2 chicken breasts, shredded
  • At least 1 tbsp and 2 tsp fresh lime juice
  • 5 oz. baby spinach
  1. In a medium pot of boiling water, cook barley according to package instructions (I used the instructions at the store which said to cook each cup of barley in 2 1/2 to 3 cups of water). Drain and let cool.
  2. Meanwhile, preheat over to 450 degrees. Place scallions and corn on a rimmed baking sheet. Toss with 1 tbsp oil and season with salt and pepper.
  3. Roast until the vegetables are tender, about 25 minutes, stirring halfway through.
  4. In a large bowl, combine barley, roasted vegetables, tomato es, parsley, chicken, 1 tbsp oil, and 1 tbsp lime juice. Season with salt and pepper.
  5. In a medium bowl, toss spinach with 1 tbsp oil and 2 tsp lime juice. Season with salt and pepper. Serve the chicken-barley mixture over the spinach leaves.
Since I was feeling very much like a domestic diva, I decided to make the cookie recipe in the same issue of Everyday Food Magazine because I had the ingredients on hand. They just looked so light and refreshing in the magazine!

Lemon-Poppy Seed Cookies
~These were so easy and so delicious~

  • 1/2 cup all-purpose flour
  • 1/2 tsp salt
  • 1/4 tsp baking soda
  • 1/2 cup sugar
  • 2 large egg yolks
  • 2 tbsp poppy seeds
  • 1 tbsp vegetable oil
  • 1 tsp finely grated lemon zest
  • 1/2 tsp vanilla extract
  1. Preheat oven to 350 degrees, with racks in the upper and lower thirds.
  2. In a medium bowl, combine flour, salt, and baking soda.
  3. In a small bowl, mix together sugar, egg yolks, poppy seeds, oil, lemon zest, and vanilla. Stir eggs mixture into flour mixture until combined (dough will be slightly dry).
  4. Drop dough by teaspoonfuls, 2 inches apart, onto two parchment-lined baking sheets.
  5. Bake cookies until golden brown, 10-14 minutes, rotating the sheets halfway through. Transfer cookies to wire racks and let cool completely (or eat them warm right out of the oven because you can't wait). They can be stored for approx. 5 days in an airtight container.
  6. Optional Step: I decided to use the lemon juice from the zested lemon to make a little glaze for the top. This is totally not necessary, but adds a nice layer of flavor to the yummy morsel. I just mixed the lemon juice with powdered sugar until it reached the desired consistency and then drizzled it on the cookies as they cooled.

5.24.2010

Two Sides to Breakfast

Last week I had to bring a casserole to a special breakfast we were having at school. I have limited experience with making breakfast casseroles other than my Crab and Roasted Red Pepper Strata.
My thoughts wandered back to a dish that my friend, Jen, made for a little get together we had. I remember eating one serving and then casually passing by the food table about 100 more times to keep getting more.
I wish I had gotten a picture of this dish last week, because they look so yummy! By the time I thought of taking a picture, they were practically gone!

Ham and Cheese Sticky Buns
~These are quite the crowd pleaser~
  • 24 party size potato rolls
  • 1/2 lb. sliced swiss cheese
  • 1/2 lb. sliced ham
  • 2 sticks (1cup) butter
  • 1/3 c. brown sugar
  • 2 Tbls. Worcestershire sauce
  • 2 Tbls. mustard
  • 2Tbls.poppy seeds
  1. Slice rolls in half and place bottoms in 9 by 13 baking pan.
  2. Layer on cheese and ham and top with roll tops.
  3. Melt butter in a saucepan and add sugar, Worcestershire sauce, mustard and poppy seeds. Bring to a boiland let boil 2 minutes.
  4. Immediately pour over rolls and bake at 350 degrees for 20 minutes. Can be made ahead and heated when ready to serve.
These sticky buns may be delicious, but they are not great if you are calorie counting. I was browsing my June 2010 edition of Everyday Food Magazine and saw this healthy twist on the traditional "Egg-in-a-hole", which is usually made by frying a slice of bread with an egg in the center. I made them for dinner tonight and we were delighted with the result!

Bell Pepper "Egg-in-a-hole"
~This took less than 10 minutes to make!~


  • 2 tsp olive oil
  • 1 bell pepper (any color), cut into four 1/2 inch thick rings
  • 4 large eggs
  • Salt and Pepper
  • 2 tsp grated Parmesan (I actually shredded some sharp Cheddar instead)
  • 4 slices multigrain bread, toasted
  • 8 cups mixed salad greens (I scrapped this and make some home fries with a potato I had laying around)
  1. In a large cast-iron or nonstick skillet, heat 1 tsp oil over medium-high.
  2. Add bell pepper, then crack 1 egg into the middle of each pepper ring.
  3. Season with salt and pepper and cook until egg whites are mostly set but yolks are still runny, 2 to 3 minutes.
  4. Gently flip and cook 1 minute more for over easy. Sprinkle with Parmesan (or Cheddar) and place each egg on a slice of toast (I put the eggs between two slices of toast to make a breakfast sandwich).
  5. Toss salad greens with 1 tsp oil and season with salt and pepper, serve alongside eggs (like I said before, I didn't do this because I didn't have any greens...but I made some home fries instead).
Since I made this for dinner, we finished it off with some old fashioned oatmeal chocolate chip cookies that I made last night as a "Series Finale of LOST Special Treat". I found the recipe online at allrecipes.com

Chewy Chocolate Chip Oatmeal Cookies
~These are my husband's favorite cookies~


  • 1 cup butter, softened
  • 1 cup packed light brown sugar
  • 1/2 cup white sugar
  • 2 eggs
  • 2 tsp vanilla extract
  • 1 1/4 cup all purpose flour
  • 1/2 tsp baking soda
  • 1 tsp salt
  • 3 cups quick cooking oats
  • 1 cup chopped walnuts (I skipped these)
  • 1 cup chocolate chips
  1. Preheat the oven to 325 degrees F (165 degrees C).
  2. In a large bowl, cream together the butter, brown sugar, and white sugar until smooth. Beat in eggs one at a time, then stir in vanilla. Combine the flour, baking soda, and salt; stir into the creamed mixture until just blended. Mix in the quick oats, walnuts, and chocolate chips. Drop by heaping spoonfuls onto ungreased baking sheets.
  3. Bake for 12 minutes in the preheated oven. Allow cookies to cool on baking sheet for 5 minutes before transferring to a wire rack to cool completely.

4.01.2010

My New Best Friend

I have a new best friend that I keep in my freezer. When I have to come up with dessert in a snap, it's always there to lend a hand. When I want to create something impressive, it always comes through for me. It's name is Puff Pastry...and we are BFF.
You can find puff pastry in the freezer section with the dessert stuff. I use Pepperidge Farm. I buy the flat sheets (two sheets per package) instead of the shells, but I'm sure they are also great to have. Puff pastry is one of those things that appears to be a painstaking thing to make and people are typically impressed when it's put before them. It's flaky and buttery and the perfect base for all sorts of flavors, sweet or savory.

In my book, How to Cook Without a Book, Pam Anderson devoted her dessert chapter to puff pastry and the many last minute things you can make with it. I've been using puff pastry long before my love affair with How to Cook Without a Book began, but I liked her chocolate turnovers idea so much I thought I would share it with you through pictures.

First, you thaw one sheet of puff pastry and cut it into nine squares (approx. 3'' x 3''). I actually made six slightly bigger ones in the pictures below. You also get out some semi-sweet chocolate and break it into nine little pieces (about 1/4 oz. each).


If you want to make Jam turnovers, just get out your favorite flavor and substitute 1 tsp of jam for each 1/4 oz. piece of chocolate (I did both below). Place the jam or chocolate into the lower corner of each square.


Then you beat an egg into a little dish and brush the egg onto the edges of the each square.


Fold each square in half diagonally to form a little triangle turnover. Place each turnover onto a parchment-lined cookie sheet about 2 inches apart. Brush the tops with the egg. I put little dollops of jam on the jam turnovers so that I could tell them apart once they were baked. You obviously don't have to do that.

Bake the turnovers in a 425 degree oven until golden brown, about 15 minutes. If you are using both racks of the oven, switch the cookie sheets halfway through. If you are only using one cookie sheet, rotate it halfway through.

They come out looking delicious, but let them cool before burning your tongue so badly that you can't even taste them (obviously a lesson learned by personal experience). You can also sprinkle them with powdered sugar if you want...which I forgot to do.


If you have puff pastry, some chocolate in your cupboard or jam in your fridge, you've got a pretty impressive little dessert to serve last minute. I recently had a real BFF over for dinner (as opposed to my food-related BFFs) and she enjoyed them immensely. She also said, "Only you would have puff pastry all ready to go in your freezer". But puff pastry is not fancy-shmancy...it's literally idiot-proof and is the perfect thing to have on hand for no-fuss desserts or appetizers.

This is only 1 of the ten million things you can do with puff pastry...in fact, I used it to make something completely awesome that I'll share in a post soon.


1.27.2010

A Family Meal


I absolutely live for making big family meals. There is something so deliciously wonderful about eating good food with people you care about. Anyone who knows me, knows that I love to love with food.

I've never been much of a Giada de Laurentiis fan. She's beautiful, but as I watched her show I would be somewhat distracted by her huge head and short arms (think: T-Rex).

Yeah...she scares me a little, too.

I also get annoyed at the excessive amount of cleavage showing in every episode (which may account for the large male fan base she has acquired). Furthermore, I get confused by the way she talks. One minute, she is talking like you and me. The next minute, she is pronouncing Italian ingredients like she lives in a Tuscan villa on the Mediterranean coast. Just say Parmesan and marscarpone cheese like a normal person...you grew up in California. Anyway.

I got her Giada's Family Dinners cookbook for Christmas and began to try her recipes. Um, wow. Every single thing I've made from this cookbook has been completely mouthwatering. I'm sorry I called you a T-Rex, Giada, because your recipes are awesome.

I've made the following recipe three separate times since Christmas because it's a total crowd pleaser. It yields enough to make 6 hearty main course servings. If you're anything like me, I find sun-dried tomatoes to be a bit much sometimes. The way they are cooked in this recipe really mellows their flavor and they are delicious. I followed up this pasta dinner recently with a yummy dessert recipe I found in Southern Living Magazine.

Penne with Sausage, Artichokes, and Sun-Dried Tomatoes
~I use whole grain pasta to make this hearty one dish meal~


  • 3/4 cup drained oil-packed sun-dried tomatoes, sliced, 2 tbsp of oil reserved*
  • 1 lb Italian hot sausages, casings removed (I use hot Italian turkey sausage)
  • 2 (8 oz.) packages frozen artichoke hearts, thawed (I have yet to find frozen artichokes, so I use the canned kind in brine, not oil)
  • 2 large garlic cloves, chopped
  • 1 3/4 cups reduced sodium-chicken broth
  • 1/2 cup dry white wine
  • salt
  • 12 oz. penne (I use Barilla Whole Grain)
  • 1/2 cup freshly shredded Parmesan cheese, plus more for serving
  • 1/3 cup chopped fresh basil
  • 1/4 chopped fresh Italian parsley
  • 8 oz. fresh mozzarella, drained and cubed (she says this is optional, but I think it's essential)
  • freshly ground black pepper
  1. Heat the oil reserved from the tomatoes in a large, heavy frying pan over medium-high heat. Add the sausage and cook until brown, breaking up the meat into bite-size pieces with a fork (about 8 minutes)
  2. Transfer sausage to a bowl. Add the artichokes and garlic to the same skillet, and saute over medium heat until the garlic is tender (about 2 minutes).
  3. Add the broth, wine, and sun-dried tomatoes. Boil over medium-high heat, stirring occasionally, until the sauce reduces slightly (about 8 minutes).
  4. Meanwhile, bring a large pot of salted water to a boil. Add the penne and cook, stirring often to prevent the pasta from sticking together, until tender but still firm to the bite (about 10 minutes). Drain, but do not rinse, the pasta.
  5. Add the pasta, sausage, 1/2 cup of Parmesan, basil, and parsley to the artichoke mixture. Toss until the sauce is almost absorbed by the pasta.
  6. Stir in the mozzarella and season to taste with salt and pepper. Serve with additional Parmesan cheese alongside.
*Those of you who are local: Jarred sun-dried tomatoes can be really pricey...especially the jars in the produce aisle. I actually found the Wegman's brand sun-dried tomatoes in oil (found in the pasta aisle) are the cheapest around.

Banana Bread Cobbler
~I wish I had gotten a picture of this...it was really good~
  • 1 cup self-rising flour (or 1 cup all purpose with 1 1/2 tsp baking powder and 1/2 tsp salt)
  • 1 cup sugar
  • 1 cup milk
  • 1/2 cup butter, melted
  • 4 medium-size ripe bananas, sliced
  • 3/4 cup firmly packed light brown sugar
  • 1/2 cup self-rising flour (or 1/2 cup all purpose with 3/4 tsp baking power and 1/4 tsp salt)
  • 1/2 cup butter, softened
  • 1 cup uncooked regular oats
  • 1/2 chopped pecans
  1. Preheat oven to 375 degrees. Whisk together 1 cup flour, sugar, and milk until just blended. Whisk in melted butter and pour batter into a lightly greased 11 x 7 inch baking dish.
  2. Top with banana slices.
  3. Combine Streusel ingredients (brown sugar, 1/2 cup flour, and butter) until crumbly, using a fork. Stir oats and pecans into the Streusel mixture.
  4. Top the banana slices with the Streusel mixture and bake for 40-45 minutes or until golden and bubbly. Serve with vanilla ice cream or whipped cream (I loved it with vanilla ice cream).
Family get togethers should not force you to be in the kitchen all day. Make simple and delicious meals like this and then spend your time doing what matters...being with the people you love.

12.04.2009

Gifts from the Kitchen

I am very familiar with the plate of Christmas cookies or the banana bread that you are often given around the holidays. Not that I don't love cookies and breads...but I get so overloaded with them during the holidays that some of them are sure to go to waste.

I recently learned how to do some "gifts in a jar" from a friend of mine and from a whole pile of books I checked out of the library on the subject. These gifts enable a person to have most of the ingredients to make something, but they can make it whenever they want to instead of having to eat it right away.

Here's the one my friend taught me to make:

Chocolate Chip Cookies in a Jar

  • Large canning jar (1 quart, I think)
  • 1 cup flour
  • 1/2 tsp baking soda
  • 1/2 cup brown sugar
  • 1/2 cup white sugar
  • 1 cup quick oats
  • 1/2 cup chocolate chips
  • Scraps of fabric
  • ribbon or twine
  1. Mix together the flour and baking soda and carefully place into the bottom of the jar as the first layer.
  2. Place the brown sugar as the 2nd layer and the white sugar as the 3rd.
  3. Top the white sugar with the quick oats. Then, use the chocolate chips to fill to the top.
  4. Cut out a piece of fabric into a circle and tie onto the top of the jar with ribbon or twine.
  5. Attach the following directions (either handwritten or typed on nice paper)
Chocolate Chip Cookies

1 stick melted butter
1 egg
1 tsp vanilla

Preheat oven to 350 degrees.
Empty jar into bowl, stir in butter, 1 beaten egg, and vanilla. Mix well.
Drop on cookie sheets and bake for 8-10 minutes.
Makes 2 dozen cookies.

What I love about this gift is that it's inexpensive and actually useful. When someone is in a pinch they can grab the jar and whip up a treat! Like I said before, there are tons of books on these types of gifts and I plan to try some more. You can do it with soups, special hot chocolate and tea mixes, muffin mixes, breads, and scones.

Go ahead and research some additional recipes and I'll share the good ones that I come across. It really makes a thoughtful and practical gift!

12.03.2009

Thanks

Thanks for visiting even though I didn't post anything for the entire month of November. I could list all the things that have kept me crazy busy over the past many weeks...but I'm not going to. For me, writing this blog is fun. It's something I do that is relaxing and gives me a great deal of gratification. I use it as a resource I want to make my favorite recipes. I use it to share recipes with others. So thanks for stopping by...and thanks for not getting irritated at my inconsistent blogging habits.

Speaking of being thankful...I hosted Thanksgiving last week. It went SO well! Turkeys totally do not stress me out anymore. The first time I made a turkey, I did not give it enough time to thaw in the fridge. The day I was supposed to cook it, I stood in front of the kitchen sink crying while the stupid frozen turkey bobbed up and down in icy water it was supposed to be thawing in. Then when I finally got it thawed, I began to gag when all of the "parts" emerged from the inside of the turkey.

Now I thaw it well in advance. I grab those "parts" (a.k.a. giblets and neck) with bravery and throw them in a saucepan to boil away for the gravy. What a different a few years makes.

I've done a previous post on some Thanksgiving recipes that I enjoy. I thought I would add to that post here. It may be too late for Thanksgiving...but if you're making a turkey for the holidays, here's how I do it.

Ali's Favorite Way to Roast a Turkey*
  • 15 lb - 20 lb turkey
  • 1 lemon
  • 1 orange
  • 1 bunch fresh thyme
  • 1 bunch fresh sage
  • 1 bunch fresh rosemary
  • 1 head of garlic
  • 1 large onion
  • 1 stick of butter, softened
  • Olive oil
  • Salt and pepper
  1. Preheat the oven to 350 degrees. Remove the gizzards and neck and put into a small saucepan filled with water and an onion. Bring to a boil and then simmer for several hours.
  2. Rinse the turkey, inside and out, and then pat dry with paper towels. Generously salt and pepper the inside of the turkey.
  3. Cut the lemon and orange into quarters and stuff inside the turkey. Take a few sprigs of each fresh herb and put aside. Stuff the rest of the herbs into the turkey.
  4. Cut the head of garlic in half crosswise so that the cloves are cut in half. Cut the onion into large pieces and stuff the garlic and onion into the turkey.
  5. Remove the thyme, sage, and rosemary leaves from the stems and chop finely. Mix the herbs into the softened butter.
  6. Gently use your fingers to separate the skin from the breast meat of the turkey. Massage the butter directly onto the meat, under the skin. And yes, I truly "massage" the butter into the meat.
  7. Tie the legs together with kitchen string and place into a roasting pan. Pour some olive oil over the skin and then generously salt and pepper the outside of the turkey. If you have a few bits of fresh herbs left, toss them on too!
  8. Cover up the bird with foil and put in the oven. Depending on the size of the turkey (look it up online) set your timer for a few hours before it's supposed to be done (mine was 20 lb. so I cooked it for about 4 1/2 to 5 hours). A few hours before it's done, go ahead and baste it with some of the pan juices.
  9. About 45 minutes or an hour before it's due to be done, remove the foil so that the skin will brown up (think of the olive oil as tanning oil).
  10. Check the temperature in the thickest part of the thigh. It should be around 165 degrees or the juices should run clear when you pierce it with a knife. Take it out, and cover it with foil. Let it rest for a good 20-30 minutes. It stays hot under the foil and the juices go back into it so that it's nice and moist.
  11. Carve each breast off as one large piece and then slice into thick slices. I think it's so much tastier that way...I just don't like the traditional thin slices as much.
  12. While the turkey is resting, remove the pan drippings from the roasting pan. Strain out the gizzards, neck, and onion from the saucepan. Combine the remaining liquid and the pan drippings into a larger saucepan. Make a mixture of flour and water and whisk into the drippings. Strain several times if there are lumps. My grandmother did this part, so I won't pretend to be an expert on gravy making...but it seemed relatively simple and turned out delicious!
*I am kind of against stuffing the turkey. I know a lot of people do it very successfully...but I feel as though I'd have to cook the turkey long enough to allow the stuffing to get done and meanwhile, the turkey would get dry. Plus, I just love all those aromatics that I use to stuff the turkey.

My sister almost always makes the stuffing for Thanksgiving and tried a different recipes each year. This is the one she tried this year and it turned out great!

German Stuffing
~This stuffing is a great mix between sweet and savory flavors~
  • 2 cups chopped celery
  • 2 cups chopped onions
  • 4 tbsp butter
  • 6 cups chopped and peeled apples
  • 1 cup raisins
  • 1 cup prunes, chopped
  • 1 bag cranberries (fresh, not dried)
  • 16 cups cubed white bread or 2 bags of stuffing
  • 6 tbsp sugar
  • 2 tsp salt
  • 4 eggs
  • 1 cup apple cider
  • 1 cup turkey or chicken stock
  1. Preheat the oven to 350 degrees.
  2. Saute the celery and onion in skillet until tender. Transfer to a large bowl and add apples, raisins, prunes, cranberries, bread, sugar, and salt.
  3. In a smaller bowl, beat eggs, cider and stock.
  4. Pour over bread mixture and toss lightly. Stuff turkey (if you are doing that) or bake in a casserole dish. Bake for 40 minutes or until golden.
You didn't think I forgot about dessert, did you? I don't really like the texture of pumpkin pie, so I make pumpkin bars instead. They are awesome!

Pumpkin Bars with Cream Cheese Frosting
~These are so moist and flavorful~

  • 4 eggs
  • 1 2/3 cups granulated sugar
  • 1 cup vegetable oil
  • 15-ounce can pumpkin
  • 2 cups sifted all-purpose flour
  • 2 teaspoons baking powder
  • 2 teaspoons ground cinnamon
  • 1 teaspoon salt
  • 1 teaspoon baking soda
Icing:
  • 8-ounce package cream cheese, softened
  • 1/2 cup butter or margarine, softened
  • 2 cups sifted confectioners' sugar
  • 1 teaspoon vanilla extract
  1. Preheat the oven to 350 degrees F.

  2. Using an electric mixer at medium speed, combine the eggs, sugar, oil and pumpkin until light and fluffy. Stir together the flour, baking powder, cinnamon, salt and baking soda. Add the dry ingredients to the pumpkin mixture and mix at low speed until thoroughly combined and the batter is smooth. Spread the batter into a greased 13 by 10-inch baking pan. Bake for 30 minutes. Let cool completely before frosting. Cut into bars.

  3. To make the icing: Combine the cream cheese and butter in a medium bowl with an electric mixer until smooth. Add the sugar and mix at low speed until combined. Stir in the vanilla and mix again. Spread on cooled pumpkin bars.

Recipe taken from www.foodnetwork.com and is written by Paula Deen

And last, but certainly not least, is my Aunt Diana's apple pie recipe. She is the master pie maker of the family and I was fortunate enough to have her teach me how to make pie at a young age. Here's the simple recipe for a delicious pie...

Aunt DD's Apple Pie

  • 9-12 Granny Smith apples (depending on the size and depth of your pie plate)
  • Dash/pinch of salt
  • 1/2 cup brown sugar
  • Handful of flour
  • Sugar and cinnamon to taste
  • 2 cups sifted flour
  • 1 tsp salt
  • 1 cup Crisco (shortening)
  • 1/4 cup ice cold water
  1. Preheat oven to 375 degrees.
  2. Core and slice the apples to about the same size slices. Stir together apples, salt, sugar, handful of flour, sugar and cinnamon until the apples make their own juice.
  3. Combine 2 cups flour, salt, and Crisco in a large bowl. Cut with a pastry blender or two butter knives until the mixture becomes flaky.
  4. Add ice water a tablespoon at a time until it can be formed into a ball.
  5. Knead for a minute or two, and then split in two (patting into two discs). My Aunt doesn't do this...but I refrigerate the discs for about a half hour to let it rest.
  6. Roll out one of the disks until thin and even. Gently fold in half or roll around the pin to transfer it to the pie dish.
  7. Add the apples to the pie dish and put a few small chunks of butter in the apples.
  8. Roll the 2nd crust and place on top of the apples. Crimp to the bottom crust around the edge of the pie. Cut a few slits in the top to let the steam out and brush with a mixture of 1 beaten egg and a few tablespoons of milk or water. Sprinkle with a little sugar to make it sparkle when it's done.
  9. Bake for 45 minutes to an hour on a tray (in case it drips over the side of the pie dish). Cover the edges of the pie with foil or a crust cover, if they begin to burn before it's done. I usually check it by sticking a butter knife down through one of the slits to see if the apples are cooked.
I have been blessed with so many wonderful things in my life...I truly have a lot to be thankful for.


10.15.2009

Cheddar is Better

I love cheese. I especially love some good sharp cheddar cheese. I used to only like mild cheeses...I didn't know what I was missing. Sharp cheeses have so much flavor and can enhance recipes in ways you wouldn't expect.

A couple weeks ago, we made recipes out of Cabot Vermont Cheddar Cheese in cooking class. Art wanted to test some of the Cabot recipes before using them in a future class. Here's a couple that I just loved. The recipes and pictures are straight from the Cabot website.

Creamy Cheddar Spread
~Wonderful with pears and apples~

  • 8 ounces Cabot Extra Sharp Cheddar*, grated (about 2 cups)
  • 1/4 cup Cabot Sour Cream (could substitute Greek yogurt)
  • 2 tablespoons Cabot Salted Butter, cut into small pieces
  • 2 tablespoons white wine or apple juice
  • Large pinch ground mace or nutmeg
  • Pinch ground red pepper (cayenne)
  1. In food processor, combine all ingredients; process until smooth. (Alternatively, use electric mixer to blend ingredients; spread will have coarser texture.) Serve with whole-grain crackers, rounds of French bread or slices of fresh apple and pear.
*Try Cabot Garlic & Herb Cheddar a tasty variation.

Broccoli-Cheddar Soup
~One of my favorite comfor
t foods!~

  • 2 tablespoons Cabot Salted Butter
  • 2 cups peeled and diced boiling potatoes (about 2 medium)
  • 1/2 cup chopped onion
  • 2 tablespoons all-purpose flour
  • 1 (14 1/2-ounce) can chicken broth (about 2 cups)
  • 2 cups milk
  • 3 cups broccoli (chopped florets and thinly sliced stems)
  • 8 ounces Cabot Sharp or Extra Sharp Cheddar, grated (about 2 cups)
  • 1 teaspoon fresh lemon juice
  • Salt and ground black pepper to taste
  1. In large saucepan, melt butter over medium heat. Add potatoes and onion and cook, stirring, until onion is tender, about 5 minutes.
  2. Add flour and cook, stirring, for 2 minutes longer.
  3. Gradually stir in chicken broth and milk. Bring to simmer and cook until potatoes are nearly tender, about 5 minutes. Add broccoli and cook until broccoli is tender, about 5 minutes longer.
  4. Remove from heat and stir in cheese. Add lemon juice and season with salt and pepper.
Winter Squash Gratin
~This has a really nice and unusual flavor~

  • 1 1/2 cups Cabot Sharp Cheddar*, grated (about 6 ounces)
  • 1 1/2 cups fresh bread crumbs (about 3 slices firm white bread)
  • 2 tablespoons Cabot Salted Butter
  • 2 cups chopped onions
  • 1 teaspoon sugar
  • 1/2 teaspoon salt
  • 1/2 teaspoon dried thyme leaves, crumbled
  • 1/4 teaspoon ground black pepper
  • 2 pounds dry-fleshed winter squash, such as Buttercup, Hubbard or Kabocha, peeled and seeded
  • 3/4-1 cup chicken broth
  1. Preheat oven to 375°F. Combine cheese and bread crumbs in bowl and set aside.
  2. In large skillet over medium heat, melt butter. Add onions and sugar. Stir often until onions are golden, about 10 minutes. Stir in salt, thyme and pepper, then transfer mixture to 1 1/2-quart baking dish.
  3. Cut squash into smaller chunks and cut these chunks into 1/8-inch-thick slices. Add to onions and stir together well.
  4. Pour 3/4 cup of chicken broth evenly over squash. Cover dish tightly with lid or foil and bake for about 70 minutes, or until squash is tender and broth is nearly all absorbed. If squash appears dry, add remaining 1/4 cup broth.
  5. Sprinkle squash with reserved bread crumb mixture. Bake until topping is golden, about 20 minutes longer.
*Or use Cabot Garlic & Herb Cheddar.

Cranberry Apple Cheese Strudel
~This was my absolute favorite recipe of the day~

  • 6 cups sliced tart apples
  • 1 can whole berry cranberry sauce
  • 3/4 cup ground almonds or filberts (hazelnuts)
  • 3/4 cup sugar
  • 2 teaspoons ground cinnamon
  • 1 teaspoon grated lemon zest
  • 1 cup trans-fat-free margarine, melted
  • 1 cup fine dry breadcrumbs
  • 1/2 (16-ounce) package frozen fillo dough, thawed
  • 8 ounces Cabot 75% Reduced Fat Cheddar, very thinly sliced
  1. Preheat oven to 400°F. Lightly grease baking sheet and set aside.
  2. In large bowl, combine apples, cranberry sauce, almonds or filberts, sugar, cinnamon and lemon zest; set aside.
  3. In medium skillet over medium heat, combine 1/4 cup of melted margarine and breadcrumbs; cook, stirring, until breadcrumbs are lightly browned; transfer to plate to cool.
  4. To make first strudel, place sheet of fillo on kitchen towel and brush with some of remaining melted margarine. Top with 4 more sheets of fillo, brushing each with more margarine.
  5. Sprinkle 6 tablespoons of breadcrumbs evenly over layered fillo. Top with one-fourth of cheese slices.
  6. Top cheese with 5 more layers of margarine-brushed fillo.
  7. Two inches in from short edge of fillo, spoon half of apple mixture in 3-inch-wide strip. Top with another one-fourth of cheese slices.
  8. Using towel to help, roll fillo tightly up around filling (jelly-roll style), brushing exposed bare surface of dough with additional margarine as you roll.
  9. Use towel again to transfer strudel to prepared baking sheet. Brush top of strudel with more margarine and sprinkle with 2 more tablespoons breadcrumbs.
  10. Repeat entire procedure to make second strudel. Transfer seam-side-down to prepared baking sheet and bake for 20 to 25 minutes, or until nicely browned. Serve warm.
I'm excited to try these recipes out at home and I think I'll search the website for even more recipes...because I'm pretty much obsessed with cheese.

10.06.2009

Girls Only Getaway to the Mountains


For my Aunt Kathy's 50th birthday, we went on a Girls Only trip to the Poconos. It was my Mom, my sister, and my Aunts (Aunt Kathy and Aunt Lori). My Mom's other sister, Aunt Diana couldn't be with us and we missed her terribly. She always brings such joy and laughter to the people around her. She also is a phenomenal cook and baker and would have loved all the things my sister and I created. We will do the trip again, Aunt Diana, and you'll be with us next time!

We had a wonderful time. My Aunts live in Florida and North Carolina, so I don't get to see them that often. It was so much fun to talk until the wee hours of the morning and just hang out with one another. My sister and I decided that we would cook the entire weekend because we don't often get to cook together. She's been cooking long before I started and it was such a special time for us to be in the kitchen side-by-side.

We took pictures of most of the food we made, but they weren't on my camera and I need everybody to email them to me (hint, hint). The house that my Mom's good friend graciously let us use was absolutely unbelievable! I wish I had snapped a picture of the kitchen, because it was divine. But here's what the dining room looked like:

And here's what the view from the main balcony looked like (every bedroom also had it's own balcony):


And without further ado, here was our Menu (some are links and the many can be found in the recipes below)

Friday Evening
Shrimp and Zucchini Tostadas
Spinach and Strawberry Salad
Pear Cardamom Bread

Saturday Morning
Banana Sour Cream Pancakes
Herbed Scrambled Eggs

Saturday Evening
Zesty Ravioli Skillet
Herbed Garlic Bread
Parmesan Roasted Broccoli
Plum Galette


Sunday Morning
Crab and Roasted Red Pepper Strata
Pecan Praline Bacon
Cranberry Lemon Scones
(I used lemon instead of orange)

Snacks
Fresh Corn Salad
Puppy Chow
Banana Bread


Banana Sour Cream Pancakes
~These have a really unique flavor~


  • 1 1/2 cups flour
  • 3 tbsp sugar
  • 2 tsp baking powder
  • 1 1/2 tsp kosher salt
  • 1/2 cup sour cream
  • 3/4 cup plus 1 tbsp milk
  • 2 eggs
  • 1 tsp vanilla extract
  • 1 tsp grated lemon zest
  • unsalted butter
  • 2 ripe bananas, diced, plus extra for serving
  • Pure maple syrup
  1. Sift together the flour, sugar, baking powder, and salt.
  2. In a separate bowl, whisk together the sour cream, milk, eggs, vanilla, and lemon zest. Add the wet ingredients to the dry ones, mixing only until combined.
  3. Melt 1 tbsp of butter in a large skillet over medium low heat until it bubbles. Ladles the pancake batter into the pan to make 3 or 4 pancakes.
  4. Distribute a rounded tbsp of bananas on each pancake.
  5. Cook for 2 or 3 minutes until bubble appear on the top and the underside is nicely browned. Flip the pancakes and then cook for another minute until browned.
  6. Wipe out the pan with a paper towel, add more butter to the pan, and continue cooking pancakes until all the batter is used.
  7. Serve with sliced bananas, butter and maple syrup.
Recipe taken from Ina Garten's Barefoot Contessa Family Style

Herbed Scrambled Eggs
~These went nicely with the pancakes~


Crack 1 dozen eggs into a large bowl and whisk together with a 1/2 cup of milk and 1/2 cup of heavy cream. Cook over medium and allow to set a little bit before "scrambling". This gives the eggs a nice texture that is more like folds of eggs instead of lumps. Then add shredded provolone and/or Parmesan cheese while the eggs cook and then sprinkle with chopped fresh herbs such as chives and Italian parsley when they are done cooking.

Zesty Ravioli Skillet
~Fresh and flavorful!~

  • 1/3 cup heavy whipping cream
  • 4 cups loosely packed fresh baby spinach leaves
  • 6 oz. provolone cheese, grated
  • 1 tbsp olive oil
  • 1 small jalapeno pepper, seeded
  • 3 garlic cloves, minced
  • 2 14.5 oz cans of diced tomatoes with onions, undrained
  • 1/2 tsp salt
  • 1/2 tsp freshly ground pepper
  • 1 package small frozen cheese ravioli
  • Halved grape tomatoes (optional)
  1. Add oil to a large skillet over medium-high heat. Finely chop the jalapeno and add to the skillet. Cook for 1 minute or until crisp tender. Add garlic to the skillet and cook for 15-20 seconds until fragrant.
  2. Add tomatoes, salt, and pepper to the skillet and cook 1-2 minutes until simmering. Add ravioli, stir to coat. Cook, uncovered, 4-5 minutes or until tender.
  3. Stir cream into skillet. Cook, uncovered, 1-2 minutes or until simmering.
  4. Sprinkle spinach over ravioli and cook, covered, 1 minute or until spinach starts to wilt.
  5. Remove from heat and top with cheese. Cover the hot skillet and let stand 1-2 minutes so that the cheese can melt. Garnish with grape tomatoes, if desired.
Recipe taken from The Pampered Chef

Herbed Garlic Bread
~I ate what seemed like 500 pieces of this~

  • 1 loaf of nice crusty Italian bread
  • 1 stick( or maybe a little less depending on how big the loaf is)of butter
  • 3 or 4 cloves of minced garlic
  • dash of garlic salt (optional)
  • a couple tbsp chopped fresh herbs like Italian Parsley and Basil
  • Olive oil
  • Handful of shredded provolone or Parmesan cheese.
Soften some butter and mix some minced garlic in it, you could add some sprinkles of garlic salt as well to add flavor. Spread that on the bread. Then add the chopped herbs. Drizzle with olive oil on top and added shredded provolone and Parmesan cheese. Put it in the broiler and WATCH IT until it gets golden on edges and cheese melts.

Plum Galette
~This recipe was so easy and very impressive~
  • 2 1/2 cups plus 2 tablespoons all-purpose flour (spooned and leveled), plus more for rolling (skip 2 1/2 cups of flour if using ready made pie crust)
  • 1 cup (2 sticks) cold unsalted butter, cut into pieces (skip if using ready made pie crust)
  • 5 tablespoons plus 1 teaspoon sugar (only need 5 tbsp if using ready made pie crust)
  • 1 teaspoon salt (skip if using ready made pie crust)
  • 1/2 cup ice water (skip if using ready made pie crust)
  • 1/4 cup whole, skin-on almonds, toasted
  • 5 to 6 plums, halved, pitted, and sliced inch thick (keep slices together)
  • 1 to 2 tablespoons heavy cream
*I used a Pillsbury ready made pie crust from the refrigerated section and it worked wonderfully*
  1. If you choose to make your own pie crust, follow these directions. In a food processor, combine 2 1/2 cups flour, butter, 1 teaspoon sugar, and salt; pulse until mixture resembles coarse meal. Sprinkle with 1/4 cup ice water. Pulse until dough is crumbly but holds together when squeezed (if necessary, add up to 1/4 cup remaining ice water, 1 tablespoon at a time). Don't overmix. Remove dough from processor and shape into a disk; wrap in plastic and refrigerate 1 hour.
  2. Here is where I began. Wipe bowl of food processor clean and add almonds, 3 tablespoons sugar, and 2 tablespoons flour; pulse until ground to a coarse meal.
  3. Preheat oven to 350 degrees. On a floured surface, roll out dough to 1/4-inch thickness (I didn't have to do this...I just unrolled the ready made crust). Transfer to a parchment-lined baking sheet (I made it on a stoneware pizza stone); sprinkle almond mixture over dough.
  4. With a spatula, transfer plums to dough; press lightly to fan out, leaving a 2-inch border. Fold edge of dough over fruit. Refrigerate 20 minutes.
  5. Brush crust with cream; sprinkle galette with 2 tablespoons sugar. Bake until crust is golden and underside is cooked through, about 70 minutes.
We had such an amazing time as a family. There is nothing in the world that makes me happier then sitting down to a table of delicious food with the ones that I love.

Happy Birthday, Aunt Kathy!