12.11.2010

Christmas Cookies

Every year, as many families, we like to make Christmas cookies. My sister and I were quite young when we first started making them on our own and it's been our special tradition ever since. I remember how we used to rub flour onto our cheeks to make it look like we had been working so hard in the kitchen. Now my sister has a little girl who helps to make them and a little boy who helps to eat them!

I can't even tell you where this recipe came from. My mom had it written on a tattered piece of paper and I copied it down from her. She may have gotten it from my grandmother who may have gotten it from her grandmother (or from the back of the Crisco container...I guess we'll never know!)

We only make these once a year because, for some reason, cut out cookies seem like a huge deal to us. It takes us hours and hours to make them, which probably has more to do with us talking and eating raw cookie dough than actually making the cookies. Nonetheless, it's a happy tradition that we look forward to all year!

Christmas Cutout Cookies


  1. First, blend together 6 cups of sifted flour, 1 tbsp of salt, and 2 1/3 cups of Crisco (shortening) using a pastry blender or two butter knives (use the butter knives to slice through the ingredients and mix them together).
  2. Then, take 2 cups of the mixture you made above and add 3/4 cups of sugar, 1 tsp of baking powder, and 1/4 cup of flour. Next, blend in 1 egg and 1 tsp of vanilla.
  3. Roll out the dough (don't chill it, use immediately) and use cookies cutters to cut out different shapes. Re-roll the dough that's left after you cut out the shapes and try to make as many more shapes as you can (We always feel this tremendous sense of accomplishment when we re-roll it enough times to have only a little teeny bit of dough left over).
  4. If you are using sprinkles, put them on the cookies now (before they bake). Bake at 375 degrees for somewhere between 10 and 15 minutes. We never remember how long they take to bake and just try to keep an eye on them (which usually means that the first batch gets a little "brown"). After they cool, decorate with icing or whatever else is edible.
  5. Continue using the first mixture you made to make batches of dough (by adding the sugar, baking powder, flour, egg, and vanilla).
There are a few cookies recipes we make every year that are close to our hearts. Peanut Blossoms are a classic cookie recipe that we got from our Aunt Wendy. I always make Spritz cookies for me and my Mom because we love them with coffee! I can't remember where I got the recipe for Spritz cookies, but there are about a million versions online. You need to have a cookie press to make Spritz cookies and they can be purchased very inexpensively at places like Bed, Bath and Beyond or Amazon.


Peanut Blossoms
  • 3 1/2 cups flour
  • 2 tsp baking soda
  • 1 tsp salt
  • 1 cup sugar
  • 1 cup brown sugar
  • 1 cup shortening
  • 2 eggs
  • 4 tbsp milk
  • 2 tbsp vanilla
  • 1 cup peanut butter
  • 14 oz. bag of Hershey kisses
  • Extra sugar for rolling
  1. Preheat the oven to 375 degrees.
  2. Combine all the ingredients except the Hershey kisses and extra sugar in a large bowl.
  3. Mix on the lowest speed until dough forms.
  4. Shape the dough into little balls and then roll into extra sugar.
  5. Put on an ungreased cookie sheet (I like to bake mine on parchment paper). Bake until golden brown, about 10-12 minutes.
  6. While they are baking, unwrap the kisses. When you remove the cookies from the oven, immediately press one kiss into each cookie. Let them cool completely and be careful when putting them into a container because the kisses will remain soft for quite a while.
  7. This recipe makes about 8 dozen cookies, but I typically double it at Christmas so that I can give many away.

Classic Spritz Cookies


  • 1 1/2 cup butter
  • 1 cup sugar
  • 1 egg
  • 2 tbsp milk
  • 1 tsp vanilla
  • 1/2 tsp almond extract
  • 3 1/2 cup flour
  • 1 tsp baking powder
  1. Preheat the oven to 375 degrees.
  2. Cream together the butter and sugar (I put it in my mixer for several minutes until it's light and fluffy)
  3. Add the egg, milk, vanilla, and almond extract. Beat together well.
  4. Stir together the flour and baking powder and then gradually add to the creamed mixture.
  5. Mix until it's a smooth dough. Don't chill it.
  6. Put the dough into the press and press cookies directly onto the baking sheet. Decorate with sprinkles if desired and then bake for 10-12 minutes.
  7. Remove the cookies, cool completely on a baking rack. This recipe makes about 7-8 dozen cookies.
There are lots of other cookie recipes that I've tried and loved, but I'll leave you with one more. In many ways, this is my favorite one because they are so easy and very delicious. I make these all year around and everyone always enjoys them!

Crispy Thumbprint Cookies


  • 1 package of yellow cake mix
  • 1/2 c vegetable oil
  • 1 egg
  • 1/4 c water
  • 3 c crisp rice cereal crushed (Rice Krispies)
  • Raspberry or strawberry preserves or Andes mint candies cut in half
  1. Preheat oven to 375
  2. Combine cake mix, oil, egg and water. Beat at medium speed of electric mixer until well blended. Add cereal; mix until well blended.
  3. Drop by heaping teaspoonfuls about 2 inches apart onto ungreased baking sheet. Use thumb to make indentation in each cookie. Spoon about 1/2 teaspoon of preserves into center of cookie. (Or place 1/2 of mint candy in center of each cookie).
  4. Bake 9 to 11 minutes or until golden brown. Cool cookies 1 minute on baking sheet; remove from baking sheet to wire wrack to cool completely. Makes 3 dozen cookies.

11.07.2010

Food to Keep You Warm

Now that the weather is changing (at least it is in Pennsylvania), I enjoy making food that is warm and comforting. The first things that come to mind for me are soups and stews.

Soups and stews are convenient and wonderful for a number of reasons. First of all, they are one pot dinners. I don't have to make anything to go with them (usually) and there is minimal cleanup. Second of all, I can easily double a recipe and freeze the leftovers for another week. Soups with a cream base don't freeze well, but almost all other soups do. Third of all, they are often very well balanced and healthy meals. There's usually at least one veggie involved and, many times, the other ingredients aren't very high in fat. Finally, they make a great lunch the next day as they reheat beautifully.

I have plenty of soup and stew recipes that I've made over the past few years. Here are some new ones I've tried in the last couple of weeks.

Shrimp and Chorizo Stew
~This is absolutely filling and delicious~


  • 1/4 cup extra-virgin olive oil
  • 1 large Spanish onion
  • 4 cloves garlic, smashed
  • 4 oz. Spanish chorizo, casings removed, sliced
  • 2 tsp smoked paprika (hot or sweet)
  • Kosher salt
  • 1 cup canned whole plum tomatoes, roughly chopped, plus 1/2 cup juice from the can
  • 2 bay leaves
  • 1/4 tsp dried thyme
  • 1/4 tsp dried oregano
  • 1 lb russet potatoes, peeled and cut into 1 inch chunks
  • 1 bunch kale, stems removed and leaves roughly chopped
  • 1 lb medium shrimp, peeled and deveined
  1. Heat the olive oil in a small Dutch oven over medium heat. Add the onion and garlic and cook until golden brown, about 15 minutes.
  2. Add the chorizo, paprika, and 1 tsp salt and cook until the oil turns deep red, about 2 minutes.
  3. Add the chopped tomatoes (reserve the juice), the bay leaves, thyme and oregano and cook 1 more minute.
  4. Add the potatoes, 2 cups water, the tomato juice, and 2 tsp salt. Bring to a boil, then reduce heat, cover and simmer until the potatoes are almost tender, about 15 minutes.
  5. Add the kale and cook until the potatoes and kale are tender, about 10 minutes more. Stir in the shrimp and simmer just until they curl and turn pink, about 3 minutes. Discard the bay leaves and ladle the stew into bowls.
Recipe from the October 2010 edition of Food Network Magazine

This next recipe seemed like one I wouldn't like at first glance. I don't mind coconut, but I don't love it. Once I read through the recipe, I realized that it was made with coconut milk which is a bit more subtle than coconut flakes. I also have an on again/off again kind of relationship with carrots. Sometimes they work for me and sometimes I find them disgusting. I decided to throw caution to the wind and just try this recipe. I liked it a lot, but I don't think I would have liked it as much without bread to balance out the strong flavors. I heated up some Naan bread that I bought frozen at Trader Joe's. Yum!!

Coconut Shrimp Soup
~This Thai recipe is packed with flavor~


  • 1 tbsp vegetable oil
  • 1 tbsp grated peeled fresh ginger
  • 2 garlic cloves, minced
  • 1/4 to 1/2 tsp red pepper flakes
  • 1 lb carrots (6 to 9 medium), peeled, halved lengthwise, and thinly sliced
  • 1 can (13.5 oz) coconut milk
  • 1 tbsp cornstarch
  • 4 oz angel hair pasta
  • 1 1/2 lbs large shrimp, peeled, deveined, and tails removed
  • 1/4 cup fresh lime juice
  • Coarse salt (Kosher)
  • 4 scallions, thinly sliced
  1. Heat the oil in a large (3 quart) saucepan over medium-low heat (I used a Dutch oven). Add the ginger, garlic, and the pepper flakes; cook, stirring, until fragrant (about 1 minute).
  2. Add the carrots, coconut milk, and 3 cups water. In a small bowl, mix the cornstarch and 2 tbsp water until smooth; add to the pot. Bring to a boil.
  3. Break the pasta in half; add to the pot. Return to a boil, reduce the heat to medium, and simmer until the pasta is al dente and the carrots are just tender (about 3 or 4 minutes).
  4. Add the shrimp; stir until opaque, about 1 minute. Remove the pot from the heat and stir in the lime juice; season with salt. Ladle into serving bowls, and garnish with the scallions. Serve immediately.
Recipe from Great Food Fast by Everday Food (A Martha Stewart Living publication)

We all know how much I love Pam Anderson (no, not that Pamela Anderson). My parents gave me one of her cookbooks for my birthday. It's called The Perfect Recipe for Losing Weight & Eating Great. I'm really enjoying it because she gives great tips for eating healthy without sacrificing flavor. I needed a quick recipe that used most pantry ingredients last week and I knew Pam would have one for me. This soup was fast, easy, and delicious served with tortilla chips for dipping.

Creamy Chili-Corn Soup with Chicken and Black Beans
~Using a rotisserie chicken makes this even faster~


  • 2 tsp vegetable or olive oil
  • 4 large garlic cloves, minced
  • 2 tbsp chili powder
  • 1 tsp ground cumin
  • 2 cans (14.5 oz) creamed corn
  • 1 can (14.5 oz) petite diced tomatoes
  • 1 can (14.5 oz) chicken broth
  • 1 can (14.5 oz) black beans, drained
  • 1 can (4 oz) diced green chiles
  • 1 cup shredded cooked chicken
  • 1/4 cup chopped fresh cilantro leaves (I hate cilantro, so I used Italian parsley)
  • Salt and pepper
  1. In a Dutch oven or soup kettle, heat oil and garlic over medium-high heat until garlic starts to sizzle. Add chili powder and cumin and saute until fragrant, about 30 seconds.
  2. Add corn, tomatoes, broth, beans, chiles, and chicken. Bring to ta boil, reduce heat to low, and simmer, partially covered, to blend flavors, about 5 minutes.
  3. Stir in cilantro, add salt and pepper to taste, and serve.
Yes, it's really that simple. It's also only 377 calories per 2-cup serving.

I will certainly continue to try new recipes for soups and stews throughout these cold months. When I come across some good ones, I'll do my best to share them!

10.27.2010

Canning Series - Fruit


We gathered once again at the Kitchen Workshop for our canning series. If you don't know how to can or forget the specifics, go to this post for a step-by-step guide.
This time, our focus was fruit. This differs from the fruit spread course because these recipes serve better as dessert toppers, not as jams or jellies. We made some seriously decadent stuff! I'll just dive right in.

Blackberries in Framboise
~Absolutely delicious~


Makes about 4 (8 oz) half pints

You will need:
  • 6 cups blackberries, divided
  • Water
  • 2 cups sugar
  • 1 cinnamon stick (about 4 inches), broken into pieces
  • 1 tbsp grated lemon zest 1/2 tsp fresh grated nutmeg1/2 cup framboise or other raspberry liqueur4 (8 oz) half pint glass preserving jars with lids and bands
Directions:

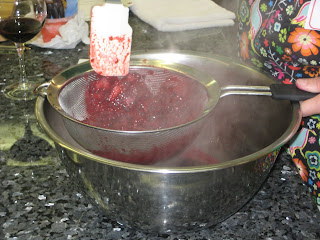
1. Place 2 cups of blackberries in a stainless steel saucepan. Using a potato masher, crush slightly. Add 3 tbsp water. Cover and boil gently over medium-low heat until fruit is soft, about 2 minutes. Strain though a dampened jelly bag or a strainer lined with several layers of dampened cheesecloth set over a glass measure to collect 1/2 cup blackberry juice.

2. Prepare boiling water canner. Heat jars and lids in simmering water until ready for use. Do not boil. Set bands aside.

3. Combine sugar, cinnamon stick pieces, lemon zest, nutmeg and 2 cups water in a large stainless steel saucepan. Bring to a boil over medium-high heat, stirring occasionally. Reduce heat and boil gently for 5 minutes. Strain and return syrup to saucepan. Add blackberry juice, remaining blackberries and framboise. Bring to a boil over medium-high heat, stirring constantly but gently so as not to crush blackberries.

4. Pack hot blackberries into hot jars, leaving 1/2 inch headspace, using a slotted spoon. Ladle hot syrup into jar to cover blackberries lea ving 1/2 inch headspace. Remove air bubbles and re-measure headspace. If needed, add more syrup to meet recommended headspace. Wipe rim. Center lid on jar. Apply band and adjust until fit is fingertip tight.

5. Process filled jars in a boiling water canner for 10 minutes, adjusting for altitude. Remove jars and cool. Check lids for seal after 24 hours. Lid should not flex up and down when center is pressed.


Raspberry Chocolate Sundae Topper

~This look just like raspberry sauce but is surprisingly chocolately~

Makes about 6 (8 oz) half pints

You will need:
  • 1/2 cup sifted unsweetened cocoa powder
  • 1 1.75-oz pkg Ball® Original Fruit Pectin
  • 4-1/2 cups crushed red raspberries
  • 6-3/4 cups granulated sugar
  • 4 Tbsp. lemon juice
  • 6 (8 oz) half pint glass preserving jars with lids and bands
Directions:

1. Prepare boiling water canner. Heat jars and lids in simmering water until ready for use. Do not boil. Set bands aside.

2. Combine cocoa powder and pectin in a medium glass bowl, stirring until evenly blended. Set aside.

(Didn't the raspberries look lovely before we crushed them?)

3. Combine crushed raspberries and lemon juice in a large stainless steel saucepan . Whisk in pectin mixture until dissolved. Bring to a boil over high heat, stirring frequently. Add sugar all at once and return to a full rolling boil, stirring const antly. Boil hard for 1 minute, stirring constantly. Remove from heat and skim off foam.


4. Ladle hot sundae topper into hot jars leaving 1/4 inch headspace. Remove air bubbles. Wipe rim. Center lid on jar. Apply band until fit is fingertip tight.

5. Process jars in a boiling water canner for 10 minutes, adjusting for altitude. Remove jars and cool. Check lids for seal after 24 hours. Lid should not flex up and down when center is pressed.


Peach Rum Sauce
~Another wonderful dessert item to have on hand~

Makes about 7 (8 oz) half pints

You will need:
  • 6 cups chopped pitted peeled peaches, treated to prevent browning and drained
  • 2 cups lightly packed brown sugar
  • 2 cups granulated sugar
  • 3/4 cup rum
  • 1 tsp grated lemon zest
  • 7 (8 oz) half pint glass preserving jars with lids and bands

Directions:
1. Prepare boiling water canner. Heat jars and lids in simmering water until ready for use. Do not boil. Set bands aside.

2. Combine peaches, brown sugar, granulated sugar, rum and lemon zest in a large stainless steel saucepan. Bring to a boil over high heat, stirring constantly, until sugar dissolves. Reduce heat and boil gently, stirring occasionally, until thickened, about 20 minutes.

3. Ladle hot sauce into hot jars leaving 1/4 inch headspace. Remove air bubbles and re-measure headspace. If needed, add more sauce to meet recommended headspace. Wipe rim. Center lid on jar. Apply band and adjust until fit is fingertip tight.

4. Process filled jars in a boiling water canner for 10 minutes, adjusting for altitude. Remove jars and cool. Check lids for seal after 24 hours. Lid should not flex up and down when center is pressed.


I'm not sure if we'll have any more canning classes this season, but if we do I'll be sure to let you know what we whipped up!


10.17.2010

Canning Series - Tomatoes


We had another lovely canning class a few weeks ago and the focus was tomatoes. I know tons of people who grow their own tomatoes and I hope to grow some myself someday. (Since I haven't quite mastered keeping house plants alive, I have a feeling that I'm not ready for an outdoor garden).
Here's our happy group after canning for three hours. Don't we look proud of ourselves?

When working with fresh tomatoes, you will likely need to core and peel them to use them in recipes. This is quite simple. Just boil a large pot of water and drop them in. Let them boil for a few minutes and then drain them. Let them sit for a couple minutes so that you don't burn your fingers off. Then the peel should slide or peel off easily. To core them, just take out that hard part in the middle and scrape out the seed (if you want). Here's our big ol' bowl of tomatoes after we took them out of the boiling water. The peels were practically falling off.


We did three recipes and they all came from the Ball Canning Company's website. First on the list of recipes was...
Bruschetta In a Jar
~Flavorful and great to have on hand~


Makes about 7 (8 oz) half pints

You will need:
  • 5 cloves garlic, minced
  • 1 cup dry white wine
  • 1 cup white wine vinegar
  • 1/2 cup water
  • 2 Tbsp sugar
  • 2 Tbsp dried basil
  • 2 Tbsp dried oregano
  • 2 Tbsp balsamic vinegar
  • 9 cups chopped cored peeled plum tomatoes (about 4 lb or 12 medium)
  • 7 (8 oz) half pint glass preserving jars with lids and bands

Directions:
1. Prepare boiling water canner. Heat jars and lids in simmering water until ready for use. Do not boil. Set bands aside.

2. Combine garlic, wine, wine vinegar, water, sugar, basil, oregano and balsamic vinegar. Bring to a full rolling boil over high heat, stirring occasionally. Reduce heat, cover and simmer 5 minutes or until garlic is heated through. Remove from heat.


3. Pack tomatoes into hot jars leaving 1/2 inch headspace. Ladle hot vinegar mixture over tomatoes leaving 1/2 inch headspace. Remove air bubbles. Wipe rim. Center hot lid on jar. Apply band and adjust until fit is fingertip tight. The picture below shows our cool little "get the air bubbles out" tool that came with our Ball canning kit.


4. Process filled jars in a boiling water canner for 20 minutes, adjusting for altitude. Remove jars and cool. Check lids for seal after 24 hours. Lid should not flex up and down when center is pressed.

Next up on the list was the classic...

Italian Style Tomato Sauce
~Perfect when you need a quick meal~


Makes about 3 (16 oz) pints

You will need:
  • 8 cups fresh plum tomato purée
  • 2/3 cup finely chopped onion
  • 2/3 cup finely chopped celery
  • 1/2 cup finely chopped carrot
  • 2 cloves garlic, finely chopped
  • 4 tbsp bottled lemon juice
  • 2 tsp salt
  • 1/2 tsp freshly ground black pepper
  • 1/2 tsp hot pepper flakes
  • 3 (16 oz) pint glass preserving jars with lids and bands

Directions:
1. Prepare boiling water canner. Heat jars and lids in simmering water until ready for use. Do not boil. Set bands aside.

2. Combine 1 cup of tomato purée, onion, celery, carrot and garlic in a large stainless steel saucepan, Bring to a boil over medium-high heat, stirring frequently. Reduce heat, cover and boil gently until vegetables are tender, about 5 minutes. While maintaining a steady boil, add remaining tomato purée, 1 cup at a time, stirring frequently. Stir in lemon juice, salt, black pepper and hot pepper flakes. Increase heat to high and bring to a full rolling boil; boil hard, stirring frequently, until mixture is reduced by one third, about 15 minutes.

3. Ladle hot sauce into hot jars leaving 1/2 inch headspace. Remove air bubbles and re-measure headspace. If needed, add more sauce to meet recommended headspace. Wipe rim. Center lid on jar. Apply band and adjust until fit is fingertip tight.4.) Process filled jars in a boiling water canner for 35 minutes, adjusting for altitude. Remove jars and cool. Check lids for seal after 24 hours. Lid should not flex up and down when center is pressed.
We ended on a spicy note with...

Zesty Salsa
~Homemade salsa is such a treat!~


Makes about 6 (16 oz) pints or 12 (8 oz) half pints
You will need:
  • 10 cups chopped cored peeled tomatoes (about 25 medium)
  • 5 cups chopped seeded green bell peppers (about 4 large)
  • 5 cups chopped onions (about 6 to 8 medium)
  • 2-1/2 cups chopped seeded chili peppers, such as hot banana, Hungarian wax, serrano or jalapeño (about 13 medium)
  • 1-1/4 cups cider vinegar
  • 3 cloves garlic, finely chopped
  • 2 Tbsp finely chopped cilantro
  • 1 Tbsp salt
  • 1 tsp hot pepper sauce, optional
  • 6 (16 oz) pint or 12 (8 oz) half pint glass preserving jars with lids and bands

Directions:
1. Prepare boiling water canner. Heat jars and lids in simmering water until ready for use. Do not boil. Set bands aside.

2. Combine tomatoes, green peppers, onions, chili peppers, vinegar, garlic, cilantro, salt and hot pepper sauce, if using, in a large stainless steel saucepan. Bring to a boil over medium-high heat, stirring constantly. Reduce heat and boil gently, stirring frequently, until slightly thickened, about 10 minutes.


3. Ladle hot salsa into hot jars, leaving 1/2 inch headspace. Remove air bubbles and adjust headspace, if necessary, by adding hot salsa. Wipe rim. Center lid on jar. Apply band until fit is fingertip tight.


4. Process both pint and half pint jars in a boiling water canner for 15 minutes, adjusting for altitude. Remove jars and cool. Check lids for seal after 24 hours. Lid should not flex up and down when center is pressed.

Stay tuned for more recipes from our canning series, plus some new fall and winter recipes I've been trying!

9.22.2010

Lunch Lady


Our canning class got canceled on Sunday. Art had something urgent he needed to do that couldn't wait so he'll reschedule it for a date in the future.

So no canning recipes.

But I have a yummy lunch recipe that I've made and loved! I pack a lunch every single day and I'm not about to eat a sandwich everyday. I just can't handle having the same thing everyday for lunch. I also have an aversion to most lunch meat and PB and J five days in a row is a little overboard.
Sometimes I bring leftovers, but that's not always an option. This recipe yields enough to make two servings, so I was able to bring it two different days. It's refreshing and delicious. It's good hot or cold and it's easy to make.

Couscous Salad with Grapes and Feta

  • 1/2 cup couscous
  • 1/2 cup hot water
  • 1/2 cup chopped toasted walnuts
  • 1/2 cup crumbled feta (2 oz)
  • 1/2 cup halved red seedless grapes
  • 1/4 cup chopped parsley
  • 3 tbsp olive oil
  • 2 tbsp fresh lemon juice
  • 1/2 tsp salt
  • 1/4 tsp black pepper
  • Pita bread for serving (if desired)
  1. Combine couscous and hot water (I boiled my water). Cover and let sit 10 minutes.
  2. Fluff couscous with a fork and fold in walnuts, feta, grapes, parsley, olive oil, lemon juice, salt, and pepper. Serve with pita bread if desired. Refrigerate for up to a day (I kept it a few days and it was fine).

9.16.2010

Canning Series: Fruit Spreads

So we had our first canning class and although I had to arrive late (due to unforeseen circumstances) I had a great time! Heck, I got to take home jars of deliciousness without having to do hardly any work.

The first thing that we (I love that I'm saying "we" when I literally showed up just as we were taste testing and labeling the jars) tackled was Traditional Strawberry Jam.

Traditional Strawberry Jam with Variations
~Makes about 8 (8 oz.) half pints~


  • 5 cups crushed strawberries (about 5 lbs)
  • 1/4 cup lemon juice
  • 1 (1.75 oz.) package Ball Original Fruit Pectin (or any brand, Ball is sponsoring this series so we are using their products)
  • 7 cups granulated sugar
  • 8 (8 oz.) half pint glass preserving jars with lids and bands
  1. Prepare boiling water canner. Heat jars and lids in simmering water until ready for use. Do not boil. Set bands aside.
  2. Combine strawberries and lemon juice in a 6 or 8 quart saucepan. Gradually stir in pectin.
  3. Bring mixture to a full rolling boil that can not be stirred down, over high heat, stirring constantly.
  4. Add entire measure of sugar, stirring to dissolve. Return mixture to a full rolling boil. Boil hard 1 minutes, stirring constantly.
  5. Remove from heat. Skim foam if necessary.
  6. Ladle hot jam into hot jars leaving 1/4 inch headspace. Wipe rim. Center lid on jar. Apply band until fit is fingertip tight.
  7. Process in a boiling water canner for 10 minutes, adjusting for altitude. Remove jars and cool. Check lids for seal after 24 hours. Lid should not flex up and down when center is pressed.
Delicious Variations:

*Vanilla Strawberry Jam (this is the one we made): Add half a vanilla bean, split in half lengthwise, to the crushed strawberries. Cook as directed and remove vanilla bean before ladling jam into jars. The resulting jam will be enhanced with a subtle yet distinct vanilla overtone.

*Strawberry Balsamic Jam: Reduce the lemon juice to 1 tbsp and add 3 tbsp good-quality balsamic vinegar. Balsamic vinegar accents the strawberry flavor and gives the jam a robust taste.
*Lemony Strawberry Jam: Add the grated zest of 1 large lemon to the crushed strawberries.

*Peppered Strawberry Jam: Stir 1/2 tsp freshly ground black pepper into the cooked jam just before ladling it into the jars. Pepper accents and compliments the strawberries' sweet flavor. Be sure to use freshly ground pepper, which delivers a fresher-quality flavor.

Carrot Cake Jam
~Makes about 6 (8oz) half pints~


  • 1 1/2 cups finely grated peeled carrots
  • 1 1/2 cups chopped cored peeled pears
  • 1 3/4 cups chopped pineapple, including juice
  • 3 tbsp lemon juice
  • 1 tsp ground cinnamon
  • 1/2 tsp ground nutmeg
  • 1/2 tsp ground cloves
  • 1 (1.75 oz) package Ball Original Fruit Pectin
  • 6 1/2 cups sugar
  • 6 (8oz.) half pint glass preserving jars with lids and bands
  1. Prepare boiling water canner. Heat jars and lids in simmering water until ready for use. Do not boil. Set bands aside.
  2. Combine carrots, pears, pineapple with juice, lemon juice, cinnamon, nutmeg, and cloves in a 6 or 8 quart saucepan. Bring mixture to a boil over high heat, stirring frequently.
  3. Reduce heat, cover and boil gently for 20 minutes, stirring occasionally.
  4. Remove from heat and whisk in pectin until dissolved. Bring mixture to a full rolling boil that cannot be stirred down, over high heat, stirring frequently.
  5. Add sugar all at once and return to a full rolling boil, stirring constantly. Boil hard for 1 minutes, stirring constantly. Remove from heat and skim foam if necessary.
  6. Ladle hot jam into hot jars leaving 1/4 inch headspace. Wipe rim. Center lid on jar. Apply band and adjust until fit is fingertip tight.
  7. Process in a boiling water canner for 10 minutes, adjusting for altitude. Remove jars and cool. Check lids for seal after 24 hours. Lid should not flex up and down when center is pressed.
Orange Chili Marmalade
~Makes about 8 (8oz) half pints~
  • 2 1/4 lbs oranges (unpeeled), seeded and thinly sliced
  • Grated zest and juice of 1 lemon
  • 6 cups water
  • 3 dried habenero chili peppers (or 6 dried Colorado or New Mexico chili peppers)
  • 9 cups granulated sugar
  • 8 (8oz.) half pint glass preserving jars with lids and bands.
  1. Combine oranges, lemon zest and juice, and water in a large, deep stainless steel saucepan. Bring to a boil over high heat, stirring constantly. Reduce heat and boil gently, stirring occasionally, for 40 minutes.
  2. Add chili peppers, partially cover and boil gently, stirring occasionally, until fruit is very soft, about 30 minutes. Remove and discard chili peppers.
  3. Prepare boiling water canner, heat jars and lids in simmering water until ready for use. Do not boil and then set bands aside.
  4. Bring mixture to a boil over medium-high heat, stirring constantly. Maintaining boil, gradually stir in sugar. Boil hard, stirring occasionally, until mixture reaches gel stage, about 15 minutes.
  5. Remove from heat and test gel. If gel stage has been reached skim off foam.
  6. Ladle hot marmalade into hot jars leaving 1/4 inch headspace. Wipe rim. Center lid on jar. Apply band and adjust until fit is fingertip tight.
  7. Process filled jars in a boiling water canner for 10 minutes, adjusting for altitude. Remove jars and cool. Check lids for seal after 24 hours. Lid should not flex up and down when center is pressed.
* This marmalade is quite spicy, but very delicious. We thought it would be perfect poured over a block of cream cheese and served with crackers or bread.

Come back and visit next week to see what we whipped up in our canning series.

9.15.2010

Canning: How It's Done

My canning classes have finally begun! I'm so excited to learn more about this time-honored way of preserving nature's bounty. Here we are at our first class...


Because the Ball company sponsored the canning series that I'm taking at The Kitchen Workshop, I decided to use their exact instructions for canning.

Here's how canning is done...

1. Prepare your gear
  • You will need a 21-quart waterbath canner with a canning rack (Ball sells them, but I got my kit at Walmart). Here's the big canner pot we used in class...
  • You will also need Ball glass preserving jars with lids and bands (again, Ball sells these on their website, but I got some at Wegman's and Walmart)
  • You need common kitchen utensils and produce/ingredients specific to your recipe.
  • Wash the jars, lids, and band in hot, soapy water. Rinse well.
  • Keep jars warm until ready to use, in order to minimize risk of breakage when filling with hot food. You can heat them in a pot of simmering water, or in a heated dishwasher.
  • Fill canner pot half full with enough water to cover jars with at least 1 inch of water. Heat to a simmer. Place lid on canner and keep rack to the side until ready to use. Here's what the rack looks like when it's submerged under water.


2. Select your recipe
  • Select your recipe and read the directions thoroughly. This is not the time to experiment. Even a slight change can throw off the balance of a recipe, turning bliss to blah.
  • Prepare recipe of your choice
  • Fill each jar with prepared food. Follow canning recipe for correct fill-level. Each jar needs space between the food and the rim (headspace) to allow for food expansion.

  • Remove air bubbles by sliding a small non-metallic spatula inside the jar, gently pressing food against the opposite side of the jar. Air bubbles inside the jar can impact canning effectiveness.
  • Wipe any food from the rims of the jars. Center new lid on the jar, then twist on the band until "fingertip tight". Ensure bands are NOT over-tight -- air inside the jars must be able to escape during canning.
3. Preserve your food
  • Place filled jars into canning rack, then lower into simmering water, ensuring jars are covered by 1 inch of water. Cover with lid and heat to a steady boil (this is called "processing"). Boil jars for the time specified in the recipe, adjusting for altitude (see below).

  • Turn off the heat and let jars stand in water for 5 minutes. Remove jars from water and cool upright on wire rack or towel on countertop for 12 hours.
  • After removing jars from the canning rack, do not re-tighten or over tighten bands that may have come loose during canning, so as not to interfere with the sealing process.
4. Congratulations! You just canned! Press on center of cooled lid. If jar is sealed, the lid will NOT flex up or down. (If your jars did not seal, see item 6 in the tip section below) Store sealed jars in pantry for up to 1 year (I'm pretty sure you can keep them longer than this). Jars may be stored without bands, or you may clean underside of bands to ensure no moisture is trapped during storage. Enjoy your homemade food or give it as a gift!

Here are some basic tips for canning...

1. Use recipes that have been formulated for canning (there are tons of recipes on the Ball website and there are tons of books and websites out there with canning recipes). The reason for this is because there needs to be certain ratios of acid and other components in order to can properly. I'm sure you could use non-canning recipes if they have the right ingredients, but I always use canning recipes just to be safe.


2. "Headspace" is the fancy canning word for space you leave at the top of the jar when you fill it. Always measure from the top of the jar rim down to the top of the food.

3. Some tools that are really helpful when canning are a funnel, jar and lid lifter, and bubble remover. The funnel helps to fill the jar without a mess. The jar lifter helps lift the jars out of the hot water safely. The lid lifter is made using a magnet and helps remove the lids from the simmering water. The bubble remover is long and thing and used to release air bubbles and measure headspace with ease. Ball sells a kit of these things, but other kits can be found at various stores that sell kitchen supplies.

4. When recipes say "Adjust for altitude" is means that altitude can affect canning recipes, just like it does when you bake. Recipes are typically written for altitudes up to 1,000 feet above sea level. If your altitude is 1,001-3,000 feet, increase processing time by 5 minutes. If your altitude is 3,001-6,000 feet, increase processing time by 10 minutes. If your altitude is 6,001-8,000, increase processing time by 15 minutes. If your altitude is 8,001-10,000, increase your processing time by 20 minutes.

5. Foods like meat, poultry, vegetables, chili and fish are low-acid foods. They must be processed using the Pressure Canning method and cannot be safely preserved using the Waterbath Canning method I've outlined above. For more info on Pressure Canning, go here.

6. If the lid flexes after you've processed, the jar did not seal properly. You may refrigerate for immediate use. Or for directions on how to safely re-process the jar, go here.

7. Jars and bands can be reused. The lids cannot be reused for processing.

8. Additional FAQs and answers can be found on the Ball website.

Now that you know the ins and outs of canning, stay tuned for delicious recipes that we will be making in class. I will share them all!

9.05.2010

Can It

Now that the first three weeks of school are over (yeah...we go back early), I plan to have my life a little more balanced. For those of you who are in the teaching profession, you know exactly what I'm talking about. In the beginning of the year, you stay after school and work for hours and then come home and collapse into bed (at least I do). It takes me a few weeks to get my routines in order and then I start to resemble a normal person again.

So cooking isn't the priority for the first few weeks of school. The first week of school we ate take out every night. The second week of school I cooked twice. The third week I cooked three times. So let's hope that it will just keep getting better and better! :)

I have some recipes I've made recently that I plan to share...but I'm here to tell you about another topic I will be blogging about for the next several weeks.

Canning!

My cooking teacher, Art, has invited me to participate in the "Ball Canning Series" they are doing at the Kitchen Workshop. I am going to try to attend all six classes in the series if my schedule permits. Then I will blog about each class and share recipes and pictures.

If you are thinking pickled vegetables and jam...you are in for a surprise. We'll be covering the canning basics along with many fun and interesting recipes/variations. Take a peek at what we'll be making:

Sunday, September 12, 2010

11:00am-2:00pm
Ball Canning Series/ Fruit Spread Course

Traditional Strawberry Jam with Chef Variations

Carrot Cake Jam

Orange Chili Marmalade

2:00pm-5:00pm
Ball Canning Series/ Fruit Course

Blackberries in Framboise

Peach Rum Sauce

Chocolate Raspberry Sundae Topper

Sunday, September 19, 2010

11:00am-2:00pm
Ball Canning Series/ Salsa Course

Zesty Salsa

Tomatillo Salsa

Pineapple Chili Salsa

2:00pm-5:00pm
Ball Canning Series/ Pickles Course

Dill Sandwich Slices

Tomato and Apple Chutney

Zesty Zucchini

Sunday, September 26, 2010

11:00am-2:00pm
Ball Canning Series/ Sauces and Condiments Course

Singapore Chili Sauce

Zesty Peach Barbecue Sauce

Lemon-Sage Wine Mustard

Cranberry Ketchup


2:00pm-5:00pm
Ball Canning Series/ Tomatoes Course

Basic Tomatoes

Italian-Style Tomato Sauce

Bruschetta in a Jar

So make sure you check back at Cooking With a Plan to see what we'll be whipping up at the Kitchen Workshop!

8.10.2010

Snack Attack

Snacks can be a bit of a nemesis for me. When I want a snack it's usually at the time of day where my blood sugar drops and I'm ravenous for something good (which pretty much happens at 4:00 pm every single day of my life.

The problem is...when I want something "good", I don't mean "good-for-me-good". I wish I was one of those girls that just craves a salad or carrot sticks. When given the option between steamed veggies and french fries at a restaurant, I ALWAYS want the fries. In fact, I'm quite certain that I could eat fries several times a day, each and every day. Then I could have ice cream for dessert. I love ice cream with my whole heart.

Sometimes I give in to these cravings and, you know what? Even though they are terrible for you, I don't feel guilty about eating them once and a while. My quality of life would be severely compromised without French fries and ice cream. A life without ice cream, is just not a life I'm interested in.
Anyway. I digress.

Since I can't eat junk food every time I'm craving a snack, I've had to come up with some alternatives. I'm always on the hunt for healthy things to munch on after school. I was delighted when I got my September issue of Food Network Magazine and they had a whole feature on after school snacks. They have these nifty little books in each issues that you can tear out and they give you 50 ideas for a certain type of food. This little book had 50 fun snacks to explore.

I was particularly intrigued by #21 on the list: Crunchy Chickpeas. I made them on Sunday and my hubby and I loved them. But I will give this disclaimer; they are much better when they are fresh out of the oven than they are cold. I think I'll heat up the extras in the toaster oven when I go back for more. But other than that, I thought they were really unique and tasty. They almost reminded me of an exotic popcorn type of thing. Plus, they are incredibly good for you!

Crunchy Chickpeas
~Not the best picture, but they smell heavenly!~

  • 15 oz. can chickpeas, drained
  • 2 tbsp olive oil
  • 1 tsp cumin
  • 1 tsp smoked paprika
  • Kosher salt
  1. Heat the oil, cumin, and paprika in a large ovenproof skillet for 2 to 4 minutes.
  2. Season with salt and then pop in a 425 degree oven for 20 minutes.

8.09.2010

Last Summer Cookout

Believe it or not, I'll be heading off to work on Tuesday. We have four days of inservice and the kids arrive on Monday! I am sad to see summer go. I had such a nice summer doing whatever I wished to do each day. I got to see friends and go shopping. I painted the inside of our house and read lots of books. I made some spending money doing this and that. We drove down to visit my sister and her family and then last week my sister brought the kids up for a visit. All in all, it was a low key summer and I loved every minute of it.

But now it's over. To celebrate my last Sunday where I don't feel the dread of starting the work week, we had my husband's family over for a cookout. It kind of amazes me that I get the "Sunday Dread" each week because I love my job so much. I truly love being a teacher. I wonder what the "Sunday Dread" would be like if I hated my job!

Anyway. I wanted to make very simple things that could be prepared ahead of time so that I could spend most of the time lounging with everyone. The meal turned out lovely.
I made my delicious Apricot Turkey Burgers. I have the recipe in this post, but I'll re-post it below anyway.

Apricot Turkey Burgers
~These are a fresh take on the typical turkey burger~

  • 3/4 cup drained canned chickpeas (garbanzo beans)
  • 1/2 cup dried apricots, chopped
  • 1/3 cup minced shallots
  • 1/2 tsp salt
  • 1/2 tsp ground ginger
  • 1/2 tsp ground cumin
  • 1/2 tsp ground cinnamon
  • 1/8 tsp ground red pepper
  • 1 1/2 lbs ground turkey
  • cooking spray
  • 6 multi-grain hamburger buns
  • Tzatziki sauce (I got mine from Trader Joe's...although, you can make it yourself)
  1. Prepare the grill or grill pan.
  2. Place chickpeas in a food processor, pulse 3 times or until chopped. Combine chickpeas, apricots, and next 7 ingredients.
  3. Divide mixture into 6 equal portions (I actually had enough to make 7), shaping each into a 1/2 inch thick patty.
  4. Place patties on a grill rack coated with cooking spray. Grill 6 minutes on each side or until a thermometer registers 165 degrees. Remove from grill and let stand for 5 minutes.
  5. Serve burgers on hamburger buns topped with Tzatziki sauce and tomatoes (if desired).
In the picture, I served the burgers with over fries. But yesterday I served them with this awesome new pasta salad I made for the first time. I saw it in the September issue of Food Network Magazine. Strangely, the recipe comes from the Biden family (ya know, the Vice President).

I don't know why I find that strange...I just picture someone asking me:

"Ali, this pasta salad is delicious. Who's recipe did you use?"

"Oh, thank you! It's actually an old family recipe from Joe Biden."

Maybe I'm just strange.

Soooo, why don't I just give you the recipe now.

The Bidens' Pasta Caprese


  • 1/3 cup extra virgin olive oil
  • 1/4 cup fresh lemon juice
  • 1 shallow, minced
  • 1 small garlic clove, minced
  • Kosher salt and freshly ground black pepper
  • 1 tsp sugar (it says optional, but I threw it in there)
  • 2 lbs mixed heirloom tomatoes, cored, seeded and cut into 1/2 inch pieces (getting real heirloom tomatoes is a must for this recipe)
  • 1 lb pasta (I almost always use whole wheat pasta, but I used regular campanelle for this)
  • 12 oz. fresh mozzarella cheese, cut into 1/2 inch pieces
  • 1/2 cup chopped fresh basil
  • 1/2 tsp grated lemon zest (I used at least twice that because I love me some lemon zest)
  1. Whisk the olive oil, lemon juice, shallow and garlic in a large bowl. Season with salt and pepper. Add sugar, if desired (depending on the sweetness of your tomatoes).
  2. Add the tomatoes to the bowl and gently toss. Marinate at room temperature , about 15 minutes.
  3. Meanwhile, bring a large pot of salted water to boil. Add the pasta and cook as the label directs. Drain in a colander and run under cold water to stop the cooking.
  4. Add the pasta and mozzarella to the tomato mixture and toss. Stir in the basil and lemon zest, and season with salt and pepper. Refrigerate, tossing occasionally, until serving.
Because pasta salad is even better when it sits and the flavors mingle, I made it right after Church and stuck it in the fridge. The burgers took minutes to put together and I just had to throw them on the grill when everyone arrived. I was going to make my Tzatziki sauce and then I realized that it was cheaper to buy it at the Olive Bar in Wegman's than to get the ingredients. Score!

My mother in law brought hummus and pita chips, my sister in law brought drinks, and my other sister in law brought delicious brownies for dessert. It was a truly relaxing and enjoyable way to spend my last few hours of summer vacation!

7.12.2010

Fresh, Flavorful, and Filling

Last night I made the most delicious pasta salad. I got the recipe from the July/August 2010 edition of Food Network Magazine. It was pictured on the cover and I just had to eat it. It was beyond yum. I used whole wheat pasta, which makes it an even heartier meal. The fresh lemon juice and basil were just perfect in it. I'm going to try another recipe from the same magazine for dinner tonight...if it turns out well, I'll post it :)

Roasted-Pepper Pasta Salad
~Fresh, flavorful, and filling~


  • Kosher salt
  • 12 oz mezzi rigatoni or other short tube shaped pasta (I actually used the spiral kind)
  • 2 bell peppers (red and/or yellow) halved, stemmed, and seeded
  • 6 cloves garlic, unpeeled
  • 1/4 cup almonds (I used whole almonds from the bulk section of the grocery store)
  • 1/3 cup extra-virgin olive oil
  • 1 lemon
  • 8 oz bocconcini (small fresh mozzarella balls)*
  • 1 bunch fresh basil, leaves torn
  • Freshly ground black pepper
  1. Preheat the broiler and bring a large pot of salted water to a boil.
  2. Add the pasta to the water and cook as the label directs. Drain and rinse under cold water to stop the cooking. Shake off the excess water.
  3. Meanwhile, place the bell peppers cut-side down on a foil-lined broiler pan, add the garlic and broil until charred (7 - 8 minutes).
  4. Transfer the peppers to a bowl, cover, and set aside for about 5 minutes.
  5. Heat a dry skillet over medium-high heat. Add the almonds and toast, shaking the pan, for 4-5 minutes. Let cool, then coarsely chop.
  6. Squeeze the garlic from its skin onto the cutting board (this is fun). Add 1/2 tsp salt and mince/mash the garlic into a paste with a large knife (so was this).
  7. Peel the roasted peppers and slice into strips; transfer to a large bowl. Add garlic paste and drizzle with olive oil. Finely grate about 1 tsp lemon zest into the bowl and squeeze in all of the lemon juice.
  8. Add the bocconcini, basil, almonds, pasta, 1 tsp salt, and pepper to taste. Then toss together and serve.
* I actually had a large ball of fresh mozzarella and cut it into chunks. Incidentally, I had frozen this ball of cheese after buying it on sale. I had forgotten about it and kept it in there for several months. When I asked the lady at the fancy cheese counter at Wegman's if it was ok to still use it, she proceeded to act shocked and dismayed that I even froze it! She insisted that I couldn't freeze soft cheese like that. Um, ok...well I did, and it worked fine. The mozzarella tasted fresh and delicious. Crazy cheese lady.

I enjoy finding recipes that don't have meat in them, but are still filling. This was a complete meal and even though my husband was skeptical ("But where's the chicken?" The man loves chicken.) he quickly changed his mind once he began to eat it. Becoming less dependent on having a meat for a protein at every meal is not only good for the environment, but also for your budget. If you have any meatless meals that you adore, please feel free to send the recipes my way!