Showing posts with label Canning. Show all posts

10.27.2010

Canning Series - Fruit


We gathered once again at the Kitchen Workshop for our canning series. If you don't know how to can or forget the specifics, go to this post for a step-by-step guide.
This time, our focus was fruit. This differs from the fruit spread course because these recipes serve better as dessert toppers, not as jams or jellies. We made some seriously decadent stuff! I'll just dive right in.

Blackberries in Framboise
~Absolutely delicious~


Makes about 4 (8 oz) half pints

You will need:
  • 6 cups blackberries, divided
  • Water
  • 2 cups sugar
  • 1 cinnamon stick (about 4 inches), broken into pieces
  • 1 tbsp grated lemon zest 1/2 tsp fresh grated nutmeg1/2 cup framboise or other raspberry liqueur4 (8 oz) half pint glass preserving jars with lids and bands
Directions:

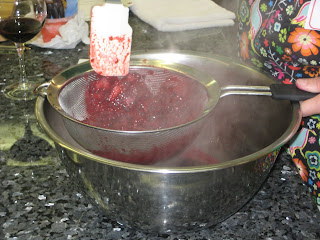
1. Place 2 cups of blackberries in a stainless steel saucepan. Using a potato masher, crush slightly. Add 3 tbsp water. Cover and boil gently over medium-low heat until fruit is soft, about 2 minutes. Strain though a dampened jelly bag or a strainer lined with several layers of dampened cheesecloth set over a glass measure to collect 1/2 cup blackberry juice.

2. Prepare boiling water canner. Heat jars and lids in simmering water until ready for use. Do not boil. Set bands aside.

3. Combine sugar, cinnamon stick pieces, lemon zest, nutmeg and 2 cups water in a large stainless steel saucepan. Bring to a boil over medium-high heat, stirring occasionally. Reduce heat and boil gently for 5 minutes. Strain and return syrup to saucepan. Add blackberry juice, remaining blackberries and framboise. Bring to a boil over medium-high heat, stirring constantly but gently so as not to crush blackberries.

4. Pack hot blackberries into hot jars, leaving 1/2 inch headspace, using a slotted spoon. Ladle hot syrup into jar to cover blackberries lea ving 1/2 inch headspace. Remove air bubbles and re-measure headspace. If needed, add more syrup to meet recommended headspace. Wipe rim. Center lid on jar. Apply band and adjust until fit is fingertip tight.

5. Process filled jars in a boiling water canner for 10 minutes, adjusting for altitude. Remove jars and cool. Check lids for seal after 24 hours. Lid should not flex up and down when center is pressed.


Raspberry Chocolate Sundae Topper

~This look just like raspberry sauce but is surprisingly chocolately~

Makes about 6 (8 oz) half pints

You will need:
  • 1/2 cup sifted unsweetened cocoa powder
  • 1 1.75-oz pkg Ball® Original Fruit Pectin
  • 4-1/2 cups crushed red raspberries
  • 6-3/4 cups granulated sugar
  • 4 Tbsp. lemon juice
  • 6 (8 oz) half pint glass preserving jars with lids and bands
Directions:

1. Prepare boiling water canner. Heat jars and lids in simmering water until ready for use. Do not boil. Set bands aside.

2. Combine cocoa powder and pectin in a medium glass bowl, stirring until evenly blended. Set aside.

(Didn't the raspberries look lovely before we crushed them?)

3. Combine crushed raspberries and lemon juice in a large stainless steel saucepan . Whisk in pectin mixture until dissolved. Bring to a boil over high heat, stirring frequently. Add sugar all at once and return to a full rolling boil, stirring const antly. Boil hard for 1 minute, stirring constantly. Remove from heat and skim off foam.


4. Ladle hot sundae topper into hot jars leaving 1/4 inch headspace. Remove air bubbles. Wipe rim. Center lid on jar. Apply band until fit is fingertip tight.

5. Process jars in a boiling water canner for 10 minutes, adjusting for altitude. Remove jars and cool. Check lids for seal after 24 hours. Lid should not flex up and down when center is pressed.


Peach Rum Sauce
~Another wonderful dessert item to have on hand~

Makes about 7 (8 oz) half pints

You will need:
  • 6 cups chopped pitted peeled peaches, treated to prevent browning and drained
  • 2 cups lightly packed brown sugar
  • 2 cups granulated sugar
  • 3/4 cup rum
  • 1 tsp grated lemon zest
  • 7 (8 oz) half pint glass preserving jars with lids and bands

Directions:
1. Prepare boiling water canner. Heat jars and lids in simmering water until ready for use. Do not boil. Set bands aside.

2. Combine peaches, brown sugar, granulated sugar, rum and lemon zest in a large stainless steel saucepan. Bring to a boil over high heat, stirring constantly, until sugar dissolves. Reduce heat and boil gently, stirring occasionally, until thickened, about 20 minutes.

3. Ladle hot sauce into hot jars leaving 1/4 inch headspace. Remove air bubbles and re-measure headspace. If needed, add more sauce to meet recommended headspace. Wipe rim. Center lid on jar. Apply band and adjust until fit is fingertip tight.

4. Process filled jars in a boiling water canner for 10 minutes, adjusting for altitude. Remove jars and cool. Check lids for seal after 24 hours. Lid should not flex up and down when center is pressed.


I'm not sure if we'll have any more canning classes this season, but if we do I'll be sure to let you know what we whipped up!


10.17.2010

Canning Series - Tomatoes


We had another lovely canning class a few weeks ago and the focus was tomatoes. I know tons of people who grow their own tomatoes and I hope to grow some myself someday. (Since I haven't quite mastered keeping house plants alive, I have a feeling that I'm not ready for an outdoor garden).
Here's our happy group after canning for three hours. Don't we look proud of ourselves?

When working with fresh tomatoes, you will likely need to core and peel them to use them in recipes. This is quite simple. Just boil a large pot of water and drop them in. Let them boil for a few minutes and then drain them. Let them sit for a couple minutes so that you don't burn your fingers off. Then the peel should slide or peel off easily. To core them, just take out that hard part in the middle and scrape out the seed (if you want). Here's our big ol' bowl of tomatoes after we took them out of the boiling water. The peels were practically falling off.


We did three recipes and they all came from the Ball Canning Company's website. First on the list of recipes was...
Bruschetta In a Jar
~Flavorful and great to have on hand~


Makes about 7 (8 oz) half pints

You will need:
  • 5 cloves garlic, minced
  • 1 cup dry white wine
  • 1 cup white wine vinegar
  • 1/2 cup water
  • 2 Tbsp sugar
  • 2 Tbsp dried basil
  • 2 Tbsp dried oregano
  • 2 Tbsp balsamic vinegar
  • 9 cups chopped cored peeled plum tomatoes (about 4 lb or 12 medium)
  • 7 (8 oz) half pint glass preserving jars with lids and bands

Directions:
1. Prepare boiling water canner. Heat jars and lids in simmering water until ready for use. Do not boil. Set bands aside.

2. Combine garlic, wine, wine vinegar, water, sugar, basil, oregano and balsamic vinegar. Bring to a full rolling boil over high heat, stirring occasionally. Reduce heat, cover and simmer 5 minutes or until garlic is heated through. Remove from heat.


3. Pack tomatoes into hot jars leaving 1/2 inch headspace. Ladle hot vinegar mixture over tomatoes leaving 1/2 inch headspace. Remove air bubbles. Wipe rim. Center hot lid on jar. Apply band and adjust until fit is fingertip tight. The picture below shows our cool little "get the air bubbles out" tool that came with our Ball canning kit.


4. Process filled jars in a boiling water canner for 20 minutes, adjusting for altitude. Remove jars and cool. Check lids for seal after 24 hours. Lid should not flex up and down when center is pressed.

Next up on the list was the classic...

Italian Style Tomato Sauce
~Perfect when you need a quick meal~


Makes about 3 (16 oz) pints

You will need:
  • 8 cups fresh plum tomato purée
  • 2/3 cup finely chopped onion
  • 2/3 cup finely chopped celery
  • 1/2 cup finely chopped carrot
  • 2 cloves garlic, finely chopped
  • 4 tbsp bottled lemon juice
  • 2 tsp salt
  • 1/2 tsp freshly ground black pepper
  • 1/2 tsp hot pepper flakes
  • 3 (16 oz) pint glass preserving jars with lids and bands

Directions:
1. Prepare boiling water canner. Heat jars and lids in simmering water until ready for use. Do not boil. Set bands aside.

2. Combine 1 cup of tomato purée, onion, celery, carrot and garlic in a large stainless steel saucepan, Bring to a boil over medium-high heat, stirring frequently. Reduce heat, cover and boil gently until vegetables are tender, about 5 minutes. While maintaining a steady boil, add remaining tomato purée, 1 cup at a time, stirring frequently. Stir in lemon juice, salt, black pepper and hot pepper flakes. Increase heat to high and bring to a full rolling boil; boil hard, stirring frequently, until mixture is reduced by one third, about 15 minutes.

3. Ladle hot sauce into hot jars leaving 1/2 inch headspace. Remove air bubbles and re-measure headspace. If needed, add more sauce to meet recommended headspace. Wipe rim. Center lid on jar. Apply band and adjust until fit is fingertip tight.4.) Process filled jars in a boiling water canner for 35 minutes, adjusting for altitude. Remove jars and cool. Check lids for seal after 24 hours. Lid should not flex up and down when center is pressed.
We ended on a spicy note with...

Zesty Salsa
~Homemade salsa is such a treat!~


Makes about 6 (16 oz) pints or 12 (8 oz) half pints
You will need:
  • 10 cups chopped cored peeled tomatoes (about 25 medium)
  • 5 cups chopped seeded green bell peppers (about 4 large)
  • 5 cups chopped onions (about 6 to 8 medium)
  • 2-1/2 cups chopped seeded chili peppers, such as hot banana, Hungarian wax, serrano or jalapeño (about 13 medium)
  • 1-1/4 cups cider vinegar
  • 3 cloves garlic, finely chopped
  • 2 Tbsp finely chopped cilantro
  • 1 Tbsp salt
  • 1 tsp hot pepper sauce, optional
  • 6 (16 oz) pint or 12 (8 oz) half pint glass preserving jars with lids and bands

Directions:
1. Prepare boiling water canner. Heat jars and lids in simmering water until ready for use. Do not boil. Set bands aside.

2. Combine tomatoes, green peppers, onions, chili peppers, vinegar, garlic, cilantro, salt and hot pepper sauce, if using, in a large stainless steel saucepan. Bring to a boil over medium-high heat, stirring constantly. Reduce heat and boil gently, stirring frequently, until slightly thickened, about 10 minutes.


3. Ladle hot salsa into hot jars, leaving 1/2 inch headspace. Remove air bubbles and adjust headspace, if necessary, by adding hot salsa. Wipe rim. Center lid on jar. Apply band until fit is fingertip tight.


4. Process both pint and half pint jars in a boiling water canner for 15 minutes, adjusting for altitude. Remove jars and cool. Check lids for seal after 24 hours. Lid should not flex up and down when center is pressed.

Stay tuned for more recipes from our canning series, plus some new fall and winter recipes I've been trying!

9.16.2010

Canning Series: Fruit Spreads

So we had our first canning class and although I had to arrive late (due to unforeseen circumstances) I had a great time! Heck, I got to take home jars of deliciousness without having to do hardly any work.

The first thing that we (I love that I'm saying "we" when I literally showed up just as we were taste testing and labeling the jars) tackled was Traditional Strawberry Jam.

Traditional Strawberry Jam with Variations
~Makes about 8 (8 oz.) half pints~


  • 5 cups crushed strawberries (about 5 lbs)
  • 1/4 cup lemon juice
  • 1 (1.75 oz.) package Ball Original Fruit Pectin (or any brand, Ball is sponsoring this series so we are using their products)
  • 7 cups granulated sugar
  • 8 (8 oz.) half pint glass preserving jars with lids and bands
  1. Prepare boiling water canner. Heat jars and lids in simmering water until ready for use. Do not boil. Set bands aside.
  2. Combine strawberries and lemon juice in a 6 or 8 quart saucepan. Gradually stir in pectin.
  3. Bring mixture to a full rolling boil that can not be stirred down, over high heat, stirring constantly.
  4. Add entire measure of sugar, stirring to dissolve. Return mixture to a full rolling boil. Boil hard 1 minutes, stirring constantly.
  5. Remove from heat. Skim foam if necessary.
  6. Ladle hot jam into hot jars leaving 1/4 inch headspace. Wipe rim. Center lid on jar. Apply band until fit is fingertip tight.
  7. Process in a boiling water canner for 10 minutes, adjusting for altitude. Remove jars and cool. Check lids for seal after 24 hours. Lid should not flex up and down when center is pressed.
Delicious Variations:

*Vanilla Strawberry Jam (this is the one we made): Add half a vanilla bean, split in half lengthwise, to the crushed strawberries. Cook as directed and remove vanilla bean before ladling jam into jars. The resulting jam will be enhanced with a subtle yet distinct vanilla overtone.

*Strawberry Balsamic Jam: Reduce the lemon juice to 1 tbsp and add 3 tbsp good-quality balsamic vinegar. Balsamic vinegar accents the strawberry flavor and gives the jam a robust taste.
*Lemony Strawberry Jam: Add the grated zest of 1 large lemon to the crushed strawberries.

*Peppered Strawberry Jam: Stir 1/2 tsp freshly ground black pepper into the cooked jam just before ladling it into the jars. Pepper accents and compliments the strawberries' sweet flavor. Be sure to use freshly ground pepper, which delivers a fresher-quality flavor.

Carrot Cake Jam
~Makes about 6 (8oz) half pints~


  • 1 1/2 cups finely grated peeled carrots
  • 1 1/2 cups chopped cored peeled pears
  • 1 3/4 cups chopped pineapple, including juice
  • 3 tbsp lemon juice
  • 1 tsp ground cinnamon
  • 1/2 tsp ground nutmeg
  • 1/2 tsp ground cloves
  • 1 (1.75 oz) package Ball Original Fruit Pectin
  • 6 1/2 cups sugar
  • 6 (8oz.) half pint glass preserving jars with lids and bands
  1. Prepare boiling water canner. Heat jars and lids in simmering water until ready for use. Do not boil. Set bands aside.
  2. Combine carrots, pears, pineapple with juice, lemon juice, cinnamon, nutmeg, and cloves in a 6 or 8 quart saucepan. Bring mixture to a boil over high heat, stirring frequently.
  3. Reduce heat, cover and boil gently for 20 minutes, stirring occasionally.
  4. Remove from heat and whisk in pectin until dissolved. Bring mixture to a full rolling boil that cannot be stirred down, over high heat, stirring frequently.
  5. Add sugar all at once and return to a full rolling boil, stirring constantly. Boil hard for 1 minutes, stirring constantly. Remove from heat and skim foam if necessary.
  6. Ladle hot jam into hot jars leaving 1/4 inch headspace. Wipe rim. Center lid on jar. Apply band and adjust until fit is fingertip tight.
  7. Process in a boiling water canner for 10 minutes, adjusting for altitude. Remove jars and cool. Check lids for seal after 24 hours. Lid should not flex up and down when center is pressed.
Orange Chili Marmalade
~Makes about 8 (8oz) half pints~
  • 2 1/4 lbs oranges (unpeeled), seeded and thinly sliced
  • Grated zest and juice of 1 lemon
  • 6 cups water
  • 3 dried habenero chili peppers (or 6 dried Colorado or New Mexico chili peppers)
  • 9 cups granulated sugar
  • 8 (8oz.) half pint glass preserving jars with lids and bands.
  1. Combine oranges, lemon zest and juice, and water in a large, deep stainless steel saucepan. Bring to a boil over high heat, stirring constantly. Reduce heat and boil gently, stirring occasionally, for 40 minutes.
  2. Add chili peppers, partially cover and boil gently, stirring occasionally, until fruit is very soft, about 30 minutes. Remove and discard chili peppers.
  3. Prepare boiling water canner, heat jars and lids in simmering water until ready for use. Do not boil and then set bands aside.
  4. Bring mixture to a boil over medium-high heat, stirring constantly. Maintaining boil, gradually stir in sugar. Boil hard, stirring occasionally, until mixture reaches gel stage, about 15 minutes.
  5. Remove from heat and test gel. If gel stage has been reached skim off foam.
  6. Ladle hot marmalade into hot jars leaving 1/4 inch headspace. Wipe rim. Center lid on jar. Apply band and adjust until fit is fingertip tight.
  7. Process filled jars in a boiling water canner for 10 minutes, adjusting for altitude. Remove jars and cool. Check lids for seal after 24 hours. Lid should not flex up and down when center is pressed.
* This marmalade is quite spicy, but very delicious. We thought it would be perfect poured over a block of cream cheese and served with crackers or bread.

Come back and visit next week to see what we whipped up in our canning series.

9.15.2010

Canning: How It's Done

My canning classes have finally begun! I'm so excited to learn more about this time-honored way of preserving nature's bounty. Here we are at our first class...


Because the Ball company sponsored the canning series that I'm taking at The Kitchen Workshop, I decided to use their exact instructions for canning.

Here's how canning is done...

1. Prepare your gear
  • You will need a 21-quart waterbath canner with a canning rack (Ball sells them, but I got my kit at Walmart). Here's the big canner pot we used in class...
  • You will also need Ball glass preserving jars with lids and bands (again, Ball sells these on their website, but I got some at Wegman's and Walmart)
  • You need common kitchen utensils and produce/ingredients specific to your recipe.
  • Wash the jars, lids, and band in hot, soapy water. Rinse well.
  • Keep jars warm until ready to use, in order to minimize risk of breakage when filling with hot food. You can heat them in a pot of simmering water, or in a heated dishwasher.
  • Fill canner pot half full with enough water to cover jars with at least 1 inch of water. Heat to a simmer. Place lid on canner and keep rack to the side until ready to use. Here's what the rack looks like when it's submerged under water.


2. Select your recipe
  • Select your recipe and read the directions thoroughly. This is not the time to experiment. Even a slight change can throw off the balance of a recipe, turning bliss to blah.
  • Prepare recipe of your choice
  • Fill each jar with prepared food. Follow canning recipe for correct fill-level. Each jar needs space between the food and the rim (headspace) to allow for food expansion.

  • Remove air bubbles by sliding a small non-metallic spatula inside the jar, gently pressing food against the opposite side of the jar. Air bubbles inside the jar can impact canning effectiveness.
  • Wipe any food from the rims of the jars. Center new lid on the jar, then twist on the band until "fingertip tight". Ensure bands are NOT over-tight -- air inside the jars must be able to escape during canning.
3. Preserve your food
  • Place filled jars into canning rack, then lower into simmering water, ensuring jars are covered by 1 inch of water. Cover with lid and heat to a steady boil (this is called "processing"). Boil jars for the time specified in the recipe, adjusting for altitude (see below).

  • Turn off the heat and let jars stand in water for 5 minutes. Remove jars from water and cool upright on wire rack or towel on countertop for 12 hours.
  • After removing jars from the canning rack, do not re-tighten or over tighten bands that may have come loose during canning, so as not to interfere with the sealing process.
4. Congratulations! You just canned! Press on center of cooled lid. If jar is sealed, the lid will NOT flex up or down. (If your jars did not seal, see item 6 in the tip section below) Store sealed jars in pantry for up to 1 year (I'm pretty sure you can keep them longer than this). Jars may be stored without bands, or you may clean underside of bands to ensure no moisture is trapped during storage. Enjoy your homemade food or give it as a gift!

Here are some basic tips for canning...

1. Use recipes that have been formulated for canning (there are tons of recipes on the Ball website and there are tons of books and websites out there with canning recipes). The reason for this is because there needs to be certain ratios of acid and other components in order to can properly. I'm sure you could use non-canning recipes if they have the right ingredients, but I always use canning recipes just to be safe.


2. "Headspace" is the fancy canning word for space you leave at the top of the jar when you fill it. Always measure from the top of the jar rim down to the top of the food.

3. Some tools that are really helpful when canning are a funnel, jar and lid lifter, and bubble remover. The funnel helps to fill the jar without a mess. The jar lifter helps lift the jars out of the hot water safely. The lid lifter is made using a magnet and helps remove the lids from the simmering water. The bubble remover is long and thing and used to release air bubbles and measure headspace with ease. Ball sells a kit of these things, but other kits can be found at various stores that sell kitchen supplies.

4. When recipes say "Adjust for altitude" is means that altitude can affect canning recipes, just like it does when you bake. Recipes are typically written for altitudes up to 1,000 feet above sea level. If your altitude is 1,001-3,000 feet, increase processing time by 5 minutes. If your altitude is 3,001-6,000 feet, increase processing time by 10 minutes. If your altitude is 6,001-8,000, increase processing time by 15 minutes. If your altitude is 8,001-10,000, increase your processing time by 20 minutes.

5. Foods like meat, poultry, vegetables, chili and fish are low-acid foods. They must be processed using the Pressure Canning method and cannot be safely preserved using the Waterbath Canning method I've outlined above. For more info on Pressure Canning, go here.

6. If the lid flexes after you've processed, the jar did not seal properly. You may refrigerate for immediate use. Or for directions on how to safely re-process the jar, go here.

7. Jars and bands can be reused. The lids cannot be reused for processing.

8. Additional FAQs and answers can be found on the Ball website.

Now that you know the ins and outs of canning, stay tuned for delicious recipes that we will be making in class. I will share them all!

9.05.2010

Can It

Now that the first three weeks of school are over (yeah...we go back early), I plan to have my life a little more balanced. For those of you who are in the teaching profession, you know exactly what I'm talking about. In the beginning of the year, you stay after school and work for hours and then come home and collapse into bed (at least I do). It takes me a few weeks to get my routines in order and then I start to resemble a normal person again.

So cooking isn't the priority for the first few weeks of school. The first week of school we ate take out every night. The second week of school I cooked twice. The third week I cooked three times. So let's hope that it will just keep getting better and better! :)

I have some recipes I've made recently that I plan to share...but I'm here to tell you about another topic I will be blogging about for the next several weeks.

Canning!

My cooking teacher, Art, has invited me to participate in the "Ball Canning Series" they are doing at the Kitchen Workshop. I am going to try to attend all six classes in the series if my schedule permits. Then I will blog about each class and share recipes and pictures.

If you are thinking pickled vegetables and jam...you are in for a surprise. We'll be covering the canning basics along with many fun and interesting recipes/variations. Take a peek at what we'll be making:

Sunday, September 12, 2010

11:00am-2:00pm
Ball Canning Series/ Fruit Spread Course

Traditional Strawberry Jam with Chef Variations

Carrot Cake Jam

Orange Chili Marmalade

2:00pm-5:00pm
Ball Canning Series/ Fruit Course

Blackberries in Framboise

Peach Rum Sauce

Chocolate Raspberry Sundae Topper

Sunday, September 19, 2010

11:00am-2:00pm
Ball Canning Series/ Salsa Course

Zesty Salsa

Tomatillo Salsa

Pineapple Chili Salsa

2:00pm-5:00pm
Ball Canning Series/ Pickles Course

Dill Sandwich Slices

Tomato and Apple Chutney

Zesty Zucchini

Sunday, September 26, 2010

11:00am-2:00pm
Ball Canning Series/ Sauces and Condiments Course

Singapore Chili Sauce

Zesty Peach Barbecue Sauce

Lemon-Sage Wine Mustard

Cranberry Ketchup


2:00pm-5:00pm
Ball Canning Series/ Tomatoes Course

Basic Tomatoes

Italian-Style Tomato Sauce

Bruschetta in a Jar

So make sure you check back at Cooking With a Plan to see what we'll be whipping up at the Kitchen Workshop!