3.31.2009

Nothing Short of Delicious

I was scanning a favorite blog of mine, Confessions of a Stay-at-Home-Mom, earlier today and got inspired for dinner. She does these "Simple Suppers Mondays" posts where she shares very easy recipes that you can make with simple ingredients.

When I saw her recipe for Chicken Diablo I knew I just had to try it. I made it exactly as she suggested, even serving Lipton's "Fiesta Sides" Spanish Rice with it. Then I added an extra side dish, Stuffed Tomatoes, that couldn't have been easier (recipe below).

Dinner.was.delicious.

It was just one of those times where minimal effort produced maximum awesomeness.

You can obviously click on the link above, but I'm going to copy down the recipe for Chicken Diablo here anyway. The Stuffed Tomato recipe will be right below.

Chicken Diablo*
  • 4 chicken breasts (I made 5 so we'd have left overs)
  • 4 Tbsp butter
  • 1/2 cup honey
  • 1/4 cup mustard (I used a mixture of yellow mustard and honey mustard)
  • 1 tsp salt
  • 1 tsp curry
  1. Preheat oven to 375 degrees.
  2. Melt butter on the stove over low heat. Once melted, stir in honey, mustard, salt and curry.
  3. Place chicken in suitable oven casserole dish (spray with cooking spray). Pour butter mixture over chicken. Bake for 45 minutes.
*Lipton/Knorr's "Fiesta Sides" Spanish rice was awesome on the side.

Stuffed Tomatoes*
  • 4 large ripe, but firm, Roma (or plum) tomatoes. Halve them lengthwise
  • 1/4 tsp salt
  • 1/4 tsp pepper
  • 4 small garlic cloves, peeled and thinly sliced
  • 2 tbsp olive oil (I def. used more than this)
  • 1/3 cup plain bread crumbs
  • 1 tbsp finely chopped parsley (I always keep Italian parsley in the fridge)
  • 1 tbsp finely chopped basil (I have a basil plant I keep in the windowsill)
  • 1 tsp finely chopped fresh thyme leaves or 1/4 tsp dried thyme
  1. Preheat oven to 400 degrees.
  2. Arrange tomatoes, cut sides up, in a 3 qt. baking dish. Sprinkle with the salt, pepper and garlic. Then drizzle with half of the olive oil.
  3. Bake the tomatoes, uncovered, until they are softened and sizzling (45-60 minutes). Remove from the oven and preheat the broiler.
  4. In a small bowl, stir together the bread crumbs, parsley, basil, and thyme. Sprinkle the bread crumb mixture over the tomatoes. Drizzle the remaining olive oil over the bread crumb mixture. Broil until lightly browned (2 or 3 minutes). Serve immediately.
*In order to time this right with the chicken, I put the tomatoes in at 375 degrees alongside the chicken. The chicken cooks for 45 minutes. I took the chicken out, covered it with foil, and raised the temperature to 400 degrees. I cooked the tomatoes for an additional 5 or 6 minutes and then topped them with the bread crumb mixture and olive oil. I broiled them for a few minutes while the rice was finishing up (it only takes 7 minutes). The tomatoes were ready, the chicken was still hot, the rice was done...it was perfect.

Thanks, Steph, for sharing your great recipe!

3.25.2009

Some Old...Some New


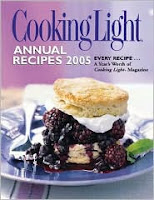
I'm mixing it up a bit this week. I'm making a few "usuals" and trying some new recipes from Cooking Light Magazine. Cooking Light combines all their recipes from each year and puts them into a giant cookbook. I checked out Cooking Light 2005 from the library last week. I love me some library cookbooks.

Cooking Light is a really neat magazine...lots of simple and healthy ideas. I like all the tips they include with their recipes, too. Good stuff.

Well, ground turkey was on sale at Giant this week...and you know how excited I get about ground turkey. I make all sorts of things with it. Like turkey bolognese sauce, and humble shepherd's pie, and of course turkey chili. So when I saw that it was on sale for 3 lbs for about $5.oo, I grabbed a 3 lb package to make meatloaf.

Monday: Turkey Meatloaf (click on the link, scroll down to find the recipe) So easy: So awesome.

Tuesday: Turkey Meatloaf sandwiches (because you can't make meatloaf and not make sandwiches with the leftovers) I heat up slices of leftover meatloaf with some provolone cheese on top. Then I put them onto ciabatta rolls from the freezer that I defrost in the toaster oven.

Wednesday: New Recipe!

Lemon Chicken and Rice with Artichokes
~This was very quick and easy~
  • 1 lb skinless boneless chicken breasts, cut into 1/2 inch strips
  • 2 1/4 cups chopped onions*
  • 1 cup chopped red bell pepper
  • 2 cups instant rice
  • 1/4 fresh lemon juice (about 2 lemons)
  • 1/4 tsp salt and 1/4 tsp pepper
  • 1 (14 oz.) can quartered artichoke hearts, drained
  • Parmesan or Romano cheese
  1. Heat a Dutch oven (I used a medium pot that has a tight fitting lid) with cooking spray or olive oil over medium-high heat.
  2. Add chicken, chopped onion, and red bell pepper. Saute for 5 minutes.
  3. Stir in rice, lemon juice, salt, pepper, and broth. Bring to a boil.
  4. Cover, reduce heat, and simmer for 15 minutes (or until rice is tender).
  5. Stir in artichokes and cook 1 minute until heated through. Sprinkle with cheese to serve.
*I chopped up the onions and pepper on Monday because I was already chopping onion and other things for the meatloaf. I do this a lot...prepping ahead means that you do less later in the week when you are more tired.

Recipe taken from Cooking Light Annual Recipes 2005

Thursday: Another New Recipe!

Shrimp in Green Sauce*
~I always keep a bag of frozen shrimp in the freezer~
  • 3 1/2 tbsp olive oil
  • 6 garlic cloves, peeled
  • 1 cup coarsely chopped green onions
  • 1 cup coarsely chopped fresh flat leaf parsley
  • 1/2 tsp salt
  • 1/2 tsp pepper
  • 1/4 tsp crushed red pepper
  • 2 1/4 lbs large shrimp, peeled and deveined (I'm only going to use a lb and a half)
  • 1/3 cup dry white wine
  • Sourdough or Fresh bread, torn into pieces
  1. Preheat oven to 400 degrees.
  2. Place olive oil and garlic in a food processor and process until garlic is finely chopped, scrapping the sides of the bowl occasionally.
  3. Add green onions and parsley in food processor; pulse until minced.
  4. Spoon garlic mixture into a large bowl. Add salt, pepper, red pepper, and shrimp to garlic mixture and toss well to coat.
  5. Spoon shrimp mixture into a shallow roasting pan, and add wine. Bake at 500 degrees for 7 minutes or until shrimp are done (stirring once).
  6. Serve with bread to soak up the rich sauce.
*I haven't made this yet (being that it's only Tuesday as I'm writing this) but I have high hopes for it. How bad can garlic, shrimp, and herbs be?? I will add a note about its success after I try it. Maybe I'll even add a picture...ohhh, ahhhh...

**Update: I made this recipe and it was very very good. I've added a picture above. I will make this again for sure**

Recipe taken from Cooking Light Annual Recipes 2005

Friday: Roast Chicken with Green Beans

Easy Green Beans
~The best of both worlds*~
  • Fresh Green Beans (ends snapped/trimmed off)
  • Olive Oil or a bit of butter
  • Salt
  1. Fill a large pot with water and let it come to a boil.
  2. Add the green beans to the boiling water and let it come back to a boil.
  3. Boil the beans for a few minutes (4-5). Dump them into a strainer/colander and then immediately rinse them under very cold water. This stops the cooking and lets them retain their bright green color.
  4. Heat up some olive oil in a skillet and saute the green beans with a sprinkle of salt. I even add some minced garlic in there sometimes.
*I like making green beans this way because boiling them is quick and easy...and then sauteing them adds so much flavor.
If you just want to boil them (which is called blanching) then increase the time they are boiling until they are crisp tender. If you just want to saute them, just increase that time as well. I personally like to do both to get the best of both worlds.

Saturday: We'll go out to eat and I will prepare Sunday's dinner during the afternoon

Sunday: We're having my family over for dinner and I'm doing a Mexican theme.
Fresh Guacamole and Chips
Chicken Enchiladas
Tortilla Pie
Rice
Cornbread
Flan (I've never made this...if it's a success, I'll post the recipe)

Finally, I also prepared a meal for someone at my church that just had twins. I sent a batch of turkey chili their way with some chopped up scallions, tortilla chips, and sour cream for toppings. I made up a batch of Cranberry Orange Scones for a sweet treat.


3.19.2009

How could I forget?

I was scanning through some of the recipes I've posted and was shocked to see that I haven't posted my favorite salmon recipe yet. I make this recipe regularly because it is very simple and I usually have the ingredients on hand once I pick up some fresh salmon (you could also freeze salmon and pull it out when you want it).

Salmon is not the cheapest thing you can buy, but it's cheaper than some other kinds of fish. It's also extremely good for you and worth the extra dollar or two. I try to make it at least every two weeks. During this time of year you can usually find it on sale because of Lent. A great thing to do is buy a nice big fillet, which is usually priced lower than buying little pieces, and make what you want and then freeze the rest.

If you are like me, I prefer salmon without the skin on the bottom. Why do they leave that on there? Is there some sort of specialness about it that I'm missing? Anyway, I learned how to remove it easily while I took classes at The Kitchen Workshop. Using a knife can be tricky and if you aren't careful you could waste some of the fish. Try it this way:
  • Using a knife, separate the fish from the skin at one end (for just an inch or so).
  • Then grab a clean kitchen towel and use it to secure the little bit of skin to the counter/cutting board.
  • Take your other hand and, palm facing downward, place it between the skin and the fish.
  • Hold the skin steady with the towel and push your hand toward the fish with a good deal of pressure. Your hand will separate the fish from the skin without wasting any of the fish.
Toss the skin in the trash and the towel in the wash and you're good to go. It's an easier technique to show rather than explain in words...but I did my best. Onto the good stuff...the recipe:

Sweet Mustard-Glazed Salmon Fillets
~This recipe can be used with any type of fish fillet~

  • 2 tbsp fresh lemon juice (1 lemon)
  • 2 tbsp Dijon mustard
  • 2 tbsp brown sugar
  • 1 tsp ground cumin
  • Four 6 oz. salmon fillets (just double it if you are making more)
  • Salt and pepper
  1. Preheat the oven to 400 degrees.
  2. In a shallow baking dish, whisk together the lemon juice, mustard, brown sugar, and cumin.
  3. Season both sides of the fillets with salt and pepper, place in the dish, and turn to coat the salmon with the mixture.
  4. Bake until the fish is fork-tender, 10-13 minutes.
Recipe taken directly from Robin Miller's Quick Fix Meals

3.15.2009

Speaking of Books...

In my first Read, Talk, Eat post I wrote about some good book club recipes. After I wrote that post, I came across the coolest books/cookbooks in my local library.

I've been frequenting the library lately because I love books and can't afford to buy a lot of them. I used to have an attitude about the library. Why would I want to read books that have been handled by strangers? Then I grew up and had to pay bills...needless to say, I dug out the old library card (which I got when I was in third grade...the signature is rather cute as I had just learned how to write in cursive).

Anyway.

I've been checking out a lot of cookbooks lately for inspiration. I found three this past week that related so well to using cooking/food to socialize and planning ahead when you cook.

So here's where I play the part of book critic:

The Book Club Cookbook: Recipes and Food for Thought from your Book Club's Favorite Books and Authors
By: Judy Gelman and Vicki Levy Krupp
You can buy it lots of places and on Amazon

Because I'm such a book lover, one look at the table of contents causes my heart to flutter. The authors have chosen 100 books and paired them with recipes that relate to each book in some way. The books range from classics to contemporary best sellers.

Sometimes the recipes match the books country of origin like the recipe for Scallion-Ginger Fried Rice given in the chapter on The Good Earth by Pearl Buck (set in China). Sometimes the recipes are for food mentioned in the book like the recipe for Roman Punch in the chapter on The Age of Innocence by Edith Wharton. Sometimes the recipes go with a book's theme like Hot Cocoa for Chocolat (by Joanne Harris) or Honey Cakes for The Secret Life of Bees (by Sue Monk Kidd).

Each chapter includes a brief synopsis of the book, an explanation of how different foods play a role in the book, and one or two recipes based on those foods. Then the authors profile a book club that has read that book. There's even a "More Food for Thought" section in each chapter that gives suggestions for ways to pair certain foods with the book.

This book is endlessly fascinating to me because it has recipes like a cookbook, but reads like a regular book. I have a feeling I'll be buying this book before too long.


The Cooking Club Cookbook: Six Friends Show you how to Bake, Broil, and Bond
By: Katherine Fausset, Cynthia Harris, Lucia Quartararo, Lisa Singer, Rebecca Sample Gerstung, and Sharon Cohen Fredman
Again, it's available lots of places and on Amazon

This cookbook chronicles the adventures of a group of young women living in New York City. In a city that's infamous for eating out, these gals decided that they were going to use their tiny kitchens to learn how to cook...and they were in it together. They started a cooking club and learned how to cook a variety of foods based on a variety of themes. Each chapter centers around a certain cuisine or topic. There's a chapter called "Chow Bella" (Italian), "Far East Feast" (Asian), and "Oil of Ole" (Spanish). There are also chapters based on comfort food, sexy food, and lighter fare. Some of the recipes are kind of out there, but they are interesting to read. Other recipes sound easy and delicious. I really enjoy the little excerpts from the girls' emails conversations that show how each menu originated. This book really shows how cooking and food can bring people together.


Cook for the Week: Leisurely Weekend Cooking for Easy Weekday Meals By: Diane Morgan, Dan Taggart, and Kathleen Taggart
Available on Amazon

This book completely goes with my philosophy of prep-ahead cooking. It's truly awesome. Each chapter is set up with a weekend menu and then weekday meals that can be made in a flash by using things from the weekend. The recipes are sophisticated and packed full of helpful tips for cooking, choosing ingredients, varying ingredients, and storing food. They have set it up in such an easy to read and understand format. For example, they give you a recipe for roast chicken with lemon, garlic and rosemary. Their philosophy is to roast two chickens instead of one. Serve one of the roast chickens on the weekend with herbed drop biscuits, steamed broccoli, and chocolate cheesecake (um...yum.). Then take the other roast chicken and leftover broccoli and use them to make biscuit-topped chicken pie, linguine and broccoli and blue cheese, and Asian chicken salad later in the week. I am definitly planning to try some of these weekly plans because they are practical and sound delicious. So cool.


So there you have it, folks. The library is a great place to find new recipes and inspiration for your kitchen adventures...and to rent seasons of Murder, She Wrote on DVD.


3.14.2009

Not just for St. Patrick's Day

My Dad's side of the family has some Irish in there. Sonny has Irish on both sides of his family. So I like to make Irish sorts of things around this time of year. Last year I made Humble Shepherd's Pie for dinner. I also made Irish Soda Bread. I loved the Irish Soda Bread so much that it made me think...

Could I perhaps make this at other times of the year? Can Irish Soda Bread be enjoyed not just for St. Patrick's Day, but all year round? Of course it can! I make this bread regularly.

This recipe is easy and so delicious. It makes 2 loaves, so you can freeze one...or give it away...or eat both like I do.

This bread is very versatile. I've served it as an appetizer at my book club. I've served it alongside dinner. I've eaten it for dessert or brought it to work for a snack. It has a unique flavor and a touch of sweetness without being too sweet. I just made two loaves today and am kicking myself because I forgot to take a picture!

Irish Soda Bread
~I learned this recipe at The Kitchen Workshop~
  • 4 cups bread flour (I keep bread flour on hand, but you can use regular flour, too)
  • 1 tbsp baking powder
  • 1 tsp salt
  • 3/4 tsp baking soda
  • 1/2 sugar
  • 1 cup raisins or currants, rinsed in hot water and patted dry
  • 1 tbsp caraway seeds
  • 2 cups buttermilk
  1. In a large bowl, sift together flour, baking powder, salt, sugar, and baking soda.
  2. Stir in raisins/currants and caraway seeds. Add the buttermilk and stir the mixture until it forms a dough (I do this in my Kitchen Aid mixer with the paddle attachment)
  3. Turn the dough out onto a well floured surface and knead for 1 minutes (I attach the dough hook to my mixer instead...much less mess).
  4. Halve the dough and with floured hands, shape each half into a round loaf. Transfer loaves to a lightly greased baking sheet (or one with a Silpat on it). Cut an X about 1/4 inch deep across the top of each loaf. Beat an egg with a splash of water or milk in a small bowl. Brush the top of each loaf lightly with the egg mixture (this will make it brown nicely)
  5. Bake in the middle of a preheated 350 degree oven for 45-55 minutes (or until tester comes out clean). Transfer loaves to a rack and let them cool.
  6. Serve warm or room temperature with butter. It can also be toasted...yum.
Happy St. Patrick's Day!

3.13.2009

Thankful

The first year we were married, I asked my husband what he wanted for his birthday. His reply was, "Thanksgiving".

So now I prepare a thanksgiving feast for him every March the 6th (this is only our second year, but I'm sure he will continue to request this for years to come).

Last year I prepared what, in my mind, was the perfect thanksgiving menu. It turned out very well and everyone enjoyed it...including Sonny. However, when I sat down to plan the menu this year I thought, "I should really ask Sonny what his idea of the perfect Thanksgiving menu would be, since it's his birthday after all". His menu was different from mine and I was happy to honor his requests. (I'll likely post my favorite Thanksgiving recipes in November)

Sonny's Thanksgiving Feast

Very large roasted Turkey and Gravy
Mashed Potatoes
Stuffing
Macaroni and Cheese
Broccoli Casserole (I added this because he did not mention a vegetable in his perfect menu...imagine that, haha)
Rolls
Cranberry Sauce (the jellied kind that comes out of a can)
Brownie Bottom Cheesecake (his cousin actually made a chocolate cake instead, which he loved just as well)
Apple Pie (I added this, too, because I can't make Thanksgiving without an Apple Pie)

Roast Turkey
~I hate to brag...but it was one fine lookin' turkey~
Don't be afraid of the massive amount of instructions...I just wanted to be really detailed because that's what I needed when I first started making roast turkey.
  • Fresh or thawed Turkey (I usually make 18-20 lb turkeys...but this would work for smaller ones)
  • Salt and Pepper
  • Head of garlic
  • Large onion
  • Lemon
  • Orange
  • Bunch of Fresh Thyme
  • Bunch of Fresh Rosemary
  • Bunch of Fresh Sage (sometimes I don't use this)
  • Butter (1 or 2 sticks)
  1. Preheat oven to 350 degrees. Remove all the bags of gross stuff from inside the turkey. You can use these to make gravy, but I don't really get how to do that yet...I'll have to ask my mother-in-law (she does it for me).
  2. Rinse turkey with water and pat dry. Place the turkey in a roasting pan and tuck it's little wings under the body (this feels kind of violent...but it keeps them from drying out). Generously salt and pepper the inside of the turkey.
  3. Cut the head of garlic in half. Cut the onion, lemon, and orange into quarters (or slices...whatever fits best). Grab several sprigs from each bunch of herbs and remove the leaves. Chop the herbs leaves and put aside.
  4. Stuff the inside of the turkey with both halves of garlic, slices of onion, lemon, and orange (if it doesn't all fit, that's OK...just shove as much up there as you can). Stuff the bunches of herbs in there as well (not the leaves you chopped up...you'll use them later).
  5. So here is where I have two suggestions. I've done the butter part in two different ways, and they've both been successful.
  6. One way is to use softened butter and mix the chopped herbs into it. Massage the butter into the skin of the turkey (even lifting up the skin a bit near the opening of the cavity and putting the herb butter in between the meat and the skin)
  7. Another way is to melt the butter completely and pour it over the turkey. Then sprinkle the turkey with the chopped herbs. Salt and pepper the turkey. Tie the legs together with butcher's string. Put in the oven, covered in tin foil. I let it roast for an hour and then baste it with some of the pan juices. Continue to do this every 45 minutes or so until about 3 1/2 or 4 hours. Then take the tinfoil off to let the skin get brown and wonderful.
  8. I'm being vague because the timing depends on the size of the turkey. This time, it was done in about 4 1/2 hours for a 17 lb turkey. The way to test for done-ness is to cut between the thigh and the breast to see if the juices run clear. You can also use an instant read thermometer inserted in the breast. It should read 165 degrees or higher (try not to overcook it...it's so awesome when it's moist). Sometimes I get scared of poisoning my guests and will actually cut into one side a bit to see if it's done)
Creamy Make Ahead Mashed Potatoes
~My neighbor gave me this tip on how to make these the night before~
  • Yukon Gold Potatoes (I used about 8 lbs for 13 people)
  • Whole Milk (you can use lowfat...but this makes it sooo creamy)
  • 2 sticks of butter
  • Buttermilk (not as fattening as you think)
  • Salt and Pepper
  • Low fat or regular Mayonnaise (I can explain...)
  1. Fill a large pot with water. Peel potatoes and cut into pieces (I usually quarter them).
  2. Put the potatoes into the water and allow it to come to a boil. Let it boil for 10 minutes or so and then check to see if the potatoes are fork tender.
  3. Drain the water and put potatoes into a large bowl.
  4. Melt the butter and add to the potatoes. Pour some milk into the potatoes (it's hard to say how much...maybe 3/4 cup). Use a hand mixer to begin whipping the potatoes. Add buttermilk until desired consistency. Add salt and pepper to taste.
  5. Spread potatoes into a casserole dish (I use a glass 9x13). They can sit overnight in the fridge. When your ready to serve them, preheat the oven to 375 degrees.
  6. Here's were the mayo comes in. Spread a thin layer of mayo over the potatoes. It makes them moist and allows them to brown a bit in the oven...which looks great.
  7. Bake for 20 minutes or so...until they are hot. You can sprinkle fresh chives over them, if you'd like. These taste just as good as if you just made them!
Broccoli Casserole
~My mom makes this every year at Thanksgiving...I just love it~
  • 2 packages chopped broccoli
  • 1 can cream of celery soup
  • 1/2 cup buttered Ritz crackers
  • 1/2 cup grated cheddar cheese
  1. Mix broccoli and cream of celery soup. Spread into oven safe dish.
  2. After buttering 10-12 Ritz crackers, smash them up. Sprinkle them onto the broccoli mixture. Then sprinkle chedder cheese.
  3. Bake at 350 degrees for 30 minutes or until heated through and cheese is melted.
  4. Yeah, it's really that simple. It can be made ahead and it tastes awesome.
I would love to share my Macaroni and Cheese, Brownie Bottom Cheesecake, and Apple Pie recipes...but I'm afraid that if I write any more you will tire of scrolling down. I'll share them another day.

So, in conclusion, Happy Thanksgiving Happy Birthday, Sonny!!

3.12.2009

Read, Talk, Eat

I love to read. I have loved to read long before I even thought to become a teacher. Now that I am a teacher, I'm passionate about kids learning to love literature. I'm actually working on my master's degree in Literacy right now. I'd like to be a "Reading Specialist", which is a teacher who works with struggling readers.

I started a book club for my 3rd grade Language Arts students. We meet once a month at lunchtime to discuss a book that we've all read. I also started a book club for adults at my school. We meet once a month to do the same. Book club gives me the opportunity to combine three things I love: Reading, Talking, and Eating!

Here are some of my favorite book club treats! The first recipe is one that I make for my "kid" book club. The other two are ones that are more suitable for a "grown up" book club. I've got lots more book club recipes to share in future posts!

Cranberry Oat Cereal Bars*
~This is a fresh take on the traditional "Rice Krispie Treat"~

  • Nonstick cooking spray
  • 4 tablespoons unsalted butter
  • 1 bag (10 ounces) marshmallows
  • 1/2 teaspoon salt
  • 6 cups toasted oat cereal
  • 1 cup dried cranberries, or raisins
  1. Spray a 10-by-15-inch rimmed baking sheet with cooking spray. Line with waxed paper; spray paper with cooking spray, and set aside.
  2. In a large saucepan, melt butter over medium heat. Add marshmallows and salt; cook, stirring occasionally, until marshmallows have melted, about 5 minutes. Remove from heat, and stir in cereal and dried cranberries.
  3. Immediately transfer mixture to prepared baking sheet. Using a spatula (or your fingers) coated with cooking spray, press in quickly and firmly. Let cool, about 1 hour; cut into 24 bars (3 rows lengthwise by 8 rows crosswise). Store in an airtight container up to 2 days.
*Let's be honest...I may add a smidge more butter and marshmallows so that they are extra gooey and delicious.

Recipe taken directly from Everyday Food Magazine

Brown Sugar-Dijon Brie*
~My sister-in-law brought this to a family gathering and it was so divine...I knew it would be a great book club recipe~

(Don't pay attention to the Pampered Chef 'tools' referred to in the recipe, if you don't have them. I wrote typical kitchen tools in the parenthesis)
  • 1/2 cup sliced almonds, divided
  • 1/2 cup packed brown sugar
  • 1 tbsp Dijon mustard
  • 1 4-in. round (8 oz) Brie cheese with rind, room temperature
  • 1 loaf (16 oz) French baguette
  • Vegetable oil
  1. Preheat oven to 425°F. Coarsely chop 1/4 cup of the almonds using Food Chopper (or a knife). In Small Batter Bowl (or bowl), combine chopped almonds, sugar and mustard; mix well using Skinny Scraper (rubber spatula).
  2. Cut Brie in half horizontally using Utility Knife (or just a knife). Place one half of Brie, cut side up, onto center of Large Round Stone with Handles (the stoneware would be best for this, but I can imagine you could use a cookie sheet). Spread half of the sugar mixture evenly over bottom half of Brie using Small Spreader (rubber spatula). Top with remaining half of Brie, cut side up. Spread remaining sugar mixture over Brie; sprinkle with remaining almonds.
  3. Using Bread Knife, cut baguette on a bias into twenty-four 1/4-inch-thick slices. Arrange baguette slices around Brie; spray with oil using Kitchen Spritzer (or cooking spray). Bake 8-10 minutes or until baguette slices are golden brown and Brie begins to soften. Remove from oven; let stand 5 minutes before serving.
*Variations: Tangy Pepper-Pecan Brie: Substitute 1/2 cup pecan halves, coarsely chopped, for the almonds, 1/4 cup apricot preserves for the sugar and 1 jalapeƱo pepper, stemmed, seeded and chopped for the mustard. Proceed as recipe directs.

This is a Pampered Chef recipe

Cheesy Salami Pinwheels*
~The possibilities are endless with this simple recipe~

  • 1 package of crescent rolls (the kind in the tube)
  • 1/4 lb Salami from the deli
  • A couple handfuls shredded cheese (I use the Mexican 4 cheese blend)**
  1. Preheat oven to 375 degrees.
  2. Carefully remove the crescent roll dough from the tube (try to keep it in one piece)
  3. Unroll it so that it makes a horizontal rectangle (long sides on top and bottom, shorter sides on left and right). Using the perforated line down the middle, separate the dough into two smaller rectangles.
  4. Using your fingers, push the perforated lines together so that the dough doesn't fall apart when you roll it later.
  5. Cover each rectangle with an even layer of Salami and then an even layer of shredded cheese.
  6. Roll the long side up to make a cylinder, then cut 1/2 (or 3/4) inch slices. Lay the slices flat on a cookie sheet. Bake for 12-15 minutes (or just keep an eye until they are golden and the cheese is melted). Serve them warm.
*You can prepare these ahead by assembling, cutting, and arranging them on the cookie sheet. Then pop the cookie sheet in the fridge until you are ready to bake them.

**There are numerous variations for this recipe. I've done dessert ones by sprinkling chocolate chips over the dough. I've even made a mushroom and cheese mixture before. If something sounds good to you..try it! Anything stuffed into a buttery crescent roll dough can't be that bad, right?

I got this recipe from a friend of mine...she made them for Bible study one night and we ate them all in 5 seconds. I have been making up variations ever since!


3.07.2009

Just One

This week was so very busy for me and I was not feeling well for most of it. I kept things quite simple for meals thanks to two things: Wegman's and my freezer. So I only have one true recipe to share in this post...the rest of the week, I just kind of put things together for us to eat.

I don't shop at Wegman's regularly because they don't have very many sales. I know many people argue that their prices are lower overall, and that may be true (depending on what products you are looking at)...but I have found that I save money by shopping the sales at other stores and going to Wegman's for certain things.

Do I make my own pizza dough? I sure do. Do I make it when I'm really busy? I sure don't.

I absolutely love using Wegman's pizza dough from their pizza shop. They sell their pizza dough (regular and whole wheat) in little plastic containers so that you can make pizza at home with ease. They even sell toppings and cheese (I think these are rather expensive and opt to assemble my own toppings). I head over to the produce department to pick what I'd like on top (usually mushrooms...we love mushrooms). Sometimes I buy the real mozzarella cheese (in ball form) when I want a treat...but I often just top it with shredded mozzarella. If I have another kind of cheese in the fridge, I throw a sprinkle of that on there too...just for kicks. I buy a $.99 jar of Ragu pizza sauce (over in the pasta aisle).

I take the dough ball and use my rolling pin to spread it this way and that way until it's the shape I want. I poke it with a fork all over so that it doesn't puff up when it bakes and then I rub a small bit of olive oil onto it. I bake it in a 375 degree oven for about 10 minutes. Then I take it out and spread pizza sauce on it, top it with cheese and various other nice things, and put it back in the oven for another 15 minutes or so. I always cut into the crust to see if it's baked inside...if it's doughy I give it a few more minutes. Sometimes I have to swab up a bit of moisture that comes from the melted cheese and toppings with a paper towel. Give it a minute or two to cool and then dive in.

So we had Wegman's pizza on Monday.

On Tuesday, I made pulled pork sandwiches. I like to buy pork tenderloins from Wegman's because they sell small ones (1 or 2 lbs). I much prefer the smaller ones to the gigantic ones they always sell at Giant. Not only are they easier to cook, but they are cheap too! The one I got for the pulled pork sandwich recipe below was only $3.95.

Lighter Pulled Pork Sandwiches
~This takes about an hour, but it's mostly "walk away" time~

1 can (15 oz) crushed tomatoes in puree
1 tbsp brown sugar
2 garlic cloves, finely chopped
1 tbsp spicy brown mustard
salt and pepper
1 pork tenderloin (about 1 lb), cut into 4 pieces
1/4 cut light mayonnaise
1 tbsp plus 1 tsp cider vinegar
1/4 tsp celery seed (I didn't use this because I didn't have it and didn't want to buy it)
1/4 head small green cabbage, shredded (I bought it already shredded in a bag)
Rolls (I used the ciabatta rolls I keep in the freezer)
  1. In a medium saucepan, stir together tomatoes, sugar, garlic, mustard, and 1/2 cup water. Season with salt and pepper. Bring to a boil and add pork.
  2. Simmer, covered, until pork is tender (18-20 minutes).
  3. Transfer pork to a plate to cool and simmer sauce over medium, uncovered, until reduced by half (about 20 minutes).
  4. Meanwhile, make slaw in a bowl by whisking mayonnaise, 1 tbsp vinegar, celery seed, and 1 tbsp water. Season with salt and pepper. Add cabbage and toss to coat.
  5. Shred pork with two forks, and return to sauce. Stir in 1 tsp vinegar. Serve pork on rolls and top with slaw.
Recipe taken from the March 2009 edition of Everyday Food Magazine

On Wednesday, we had our faithful freezer standby: Turkey Chili. We have it often, I know, but it's such a filling and satisfying meal. It freezes so well and can be thawed easily as a last minute meal.

On Thursday, we had....wait for it....cereal! I came home from work exhausted so Sonny ate a big bowl of cereal while I took a power nap before Bible study. I woke up, had a bowl of cereal myself and we headed out the door. Sometimes you just have to eat cereal for dinner...it's just part of life.

On Friday, we went out for Chinese food at Han Dynasty in Exton. It was Sonny's birthday and he loves Chinese food. We'd heard good things about this restaurant and we thought it was quite yummy. The service was interesting because it seemed as though there was one waitress for 50 million people...but we weren't in a hurry and it didn't bother us very much. If you split the name of the restaurant up differently, it looks like "Handy nasty". This makes me laugh.

On Saturday, I spent a good deal of time preparing for Thanksgiving dinner. Thanksgiving in March, you may wonder? I will leave you in wonderment until my next post.

3.01.2009

Snow. Snacks. Sweets.

I just got that glorious phone call...school is canceled tomorrow due to snow (which hasn't actually fallen yet). When I was growing up, I remember sitting in front of the TV and watching for my school's number to come up on the news to signal a cancellation. My heart would pound in utter anticipation. Now that I'm a teacher, I get that same feeling when the weather report calls for snow...that excited and hopeful feeling that maybe, just maybe, I will get an unexpected day off.

Within minutes of the call, I made a mental list of all the lovely things I will do with the hours of freedom that lay before me. I will stay up extra late, I will read a really good book, I will finish up an assignment for my grad class, and I will make yummy things to eat in celebration.

Here are three recipes that are mostly made with ingredients you could easily keep on hand in your fridge or pantry.

Hummus
~This incredibly healthy snack comes out perfectly every time~


4 garlic cloves
1 tsp salt
2 (1 pound 3 ounce) cans chick peas, drained and rinsed
2/3 cup well stirred Tahini (you will find jars of this in the aisle by the peanut butter or in the ethnic food aisle)
1/4 cup fresh lemon juice, or to taste (you can use the bottled kind, but it's not quite the same)
1/2 cup olive oil, divided
water
(sometimes I toss in a tsp of cumin and/or Jamaican allspice to add some zip)
1/4 cup fresh parsley leaves (optional)
2 tbsp pine nuts, toasted lightly (optional)
  1. On a cutting board, mince the garlic. Use the flat side of your knife to mash the garlic into the cutting board (creating a paste-like consistency).
  2. In the food processor, puree the chick peas with the garlic paste, tahini, lemon juice, 1/4 cup oil, and 1/2 cup water (add cumin and Jamaican allspice, if you want).
  3. Continue to process, adding water as needed, until you reach the desired consistency (I like mine nice and smooth).
  4. Transfer hummus to a bowl and clean out the food processor bowl.
  5. Puree the parsley and 1/4 cup oil until the oil is bright green and the parsley is minced. Fold the parsley oil into the hummus. In a dry pan, lightly toast the pine nuts over medium heat until golden and fragrant.
  6. Serve hummus with toasted pine nuts sprinkled on top and pita chips* or veggies for dipping. It can be covered and stored in the fridge for several days.
* You can buy pita chips...but making them yourself could not be more simple. Just buy a package of pita rounds (I prefer wheat) and cut them into wedges with a knife or a pizza wheel. Toss the wedges in a bowl with olive oil and seasoning (I use Mrs. Dash Italian Medley). Lay wedges in an single layer on a cookie sheet and toast in the oven on 400 degrees for 5 minutes (it may take longer...keep checking them until they are golden and crispy). Store in an airtight container for several days.

I adapted this recipe from one I learned at the Kitchen Workshop

Donut Spice Cakes
~These smell delicious and are ready in no time~


1 package (9 oz.) yellow cake mix
1/2 cup cold water
2 eggs
1/2 tsp ground cinnamon
1/4 tsp ground nutmeg
2 tsp powdered sugar
  1. Preheat oven to 350 degrees. Grease and flour 10 (1/2 cup) mini bundt pans (you can totally use a muffin tin for this...I just happen to have a mini bundt cake pan that I picked up at TJ Maxx years ago. They obviously will look more like muffins and less like donuts, but they will taste the same and you will probably yield more than 10).
  2. Combine cake mix, water, eggs, cinnamon, and nutmeg in a bowl. Beat with an electric mixer on high speed for a few minutes or until well blended.
  3. Spoon mixture into muffin tin or mini bundt pan. Bake 13 minutes or until toothpick comes out clean and cake springs back when lightly touched.
  4. Cool in pan on wire rack for 5 minutes and then remove from pan. Serve cakes warm or at room temperature, sprinkling powdered sugar on them just before serving (store extras in an airtight container or bag).
Recipe taken from Favorite Brand Name: Easy Entertaining

I got the recipe below from my friend, who got it from the recipes that came with her Kitchen Aid Stand Mixer. The recipe references using your Kitchen Aid mixer, but you certainly don't need one to make the recipe. An electric mixer would work just fine, too.

Awesome Chocolate Chip Cookies
~An irresistible and classic treat~

1 cup sugar
1 cup brown sugar
1 cup (2 sticks) butter at room temperature
2 eggs
1 1/2 tsp vanilla
1 tsp baking soda
1 tsp salt
3 cups all purpose flour
12 oz. semi-sweet chocolate chips
  1. Place sugars, butter, eggs, and vanilla in bowl of mixer, fitted with the flat beater.
  2. Turn to speed 2 and mix about 30 seconds. Stop and scrape the bowl.
  3. Turn to speed 4 and beat about 30 seconds. Stop and scrape the bowl.
  4. Turn to stir speed and gradually add baking soda, salt, and flour to sugar mixture (mix about 2 minutes). Turn to speed 2 and mix about 30 second. Stop and scrape the bowl (I think it's funny that the recipe keeps telling you to do this).
  5. Add chocolate chips and turn to stir speed for 15 seconds.
  6. Drop rounded teaspoons of dough onto greased or parchment paper lined baking sheets, about 2 inches apart (you could also use a SILPAT, if you have one).
  7. Bake at 375 degrees for 10-12 minutes (sometimes it takes a little longer). Remove from baking sheets immediately and cool on wire racks.